Overview

From the sales description found on websites:
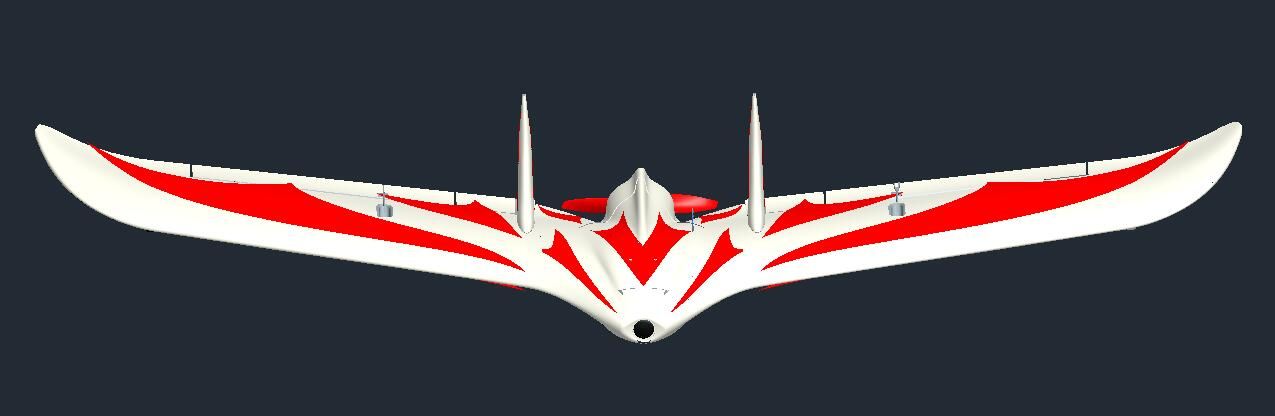
"This 1213mm wingspan HD flying wing is designed for stable flight and multitask FPV flying, the specially designed high-efficiency airfoil and envelope offers great elevating force during flying, it’s spacious rooms inside fuselage are perfect for more FPV gear and large battery to ensure long flying time, we offer foam nose and plastic dome(interchangeable) for multiple FPV camera mount, the separate hatches in two wings are for Vtx and GPS mounting with great cooling effect, the landing sled in bottom of fuselage and wings will protect your airframe from scratches."
Let's look at the claims:
1213mm wingspan - Strange size, 1219 is 4 feet. Usually, metric planes are just 1200mm. Oh well, bigger is better.
Designed for stable flight- Surprisingly stable, the extra nose weight gives this plane flying authority. It holds a position very well, the only tweaking needed was to get the trim right so as to not pitch nearly as much.
Great elevating force during flying- There were a few times during 'line of sight' flight I had to bring the plane back down closer to earth, because, yes, it does like to climb. The worst part is that it's so smooth that you hardly notice it climbing.
Large fuselage "perfect for more FPV gear and large battery to ensure long flying time"- Perhaps one of it's greatest selling points, this is a nice platform for medium range FPV. The plane is designed to haul around some weight. I am checking it out now with different batteries. But yes, it's ideal for adding cameras, perhaps many cameras.
" {F}oam nose and plastic dome(interchangeable)"- The plane comes with two foam noses and one clear plastic dome. And yet, there aren't enough magnets for all of it. Thus, if you order the plane you should order s"ome extra rare earth magnets. You need magnets because many kits come with poor magnets or none at all. Even kits like the HD Wing feature magnets that you can loose over time, so having extras on hand is ncesssary.
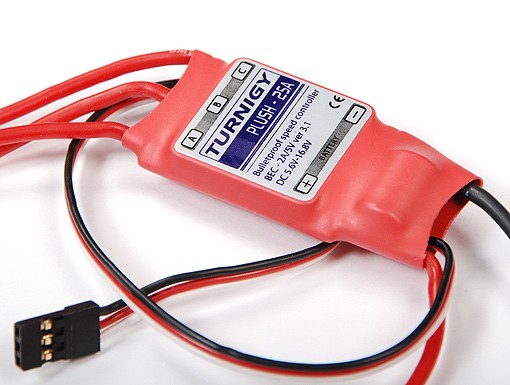
The separate hatches in two wings are for VTX and GPS mounting with "great cooling effect",- This is important if you're running those really hot VTXs. You can mount it out on the wing to help prevent it from overheating. If you're flying with a flight controller you can further mount a XM+ are similar full range receiver on the wing They are small, weigh next to nothing, help improve range while freeing up space in the fuselage Its strange that such a large fuselage would be nearly empty. We are benefiting from our friends who fly micro quads. The gear these days has been miniaturized.
The build
Thankfully there is a good build manual that comes with the plane, and plenty of good build videos, like those from Andrew Newton and 7Demo7. You can piece it together on a dry build and get the gist of how to finish assembling it. it's not a complicated build. The one thing I wished I knew before I built it was that it can take some fairly large propellers. Other than the cheap 600mm "Spirit Wing" this is the only plane I've built that has the propeller sit fully behind the wing. This means that there is no size limit to whatever propeller you want to use. I like larger propellers. They tend to be quiet and efficient and can be good for slow flying The limiting factor will be weight. A little more weight in back means that it needs a lot more weight up front. But still, this is fantastic for long range FPV with the right motor combination.
The suggested motor is a 2212 2200KV. With this motor, the pull of 700g it seems like it may struggle if you weight it down with heavy FPV gear or extra batteries. The smaller propeller is better suited for fast flight. On my initial build, I used a 2830 1300KV motor swinging a 9x7 propeller. Performance wasn't lacking and speed was decent. Best of all, it was quiet and helped the plane sustain a half an hour flight on a 3S 4000mAh battery

The build process is a bit longer than most, because it has a lot pretty cool options. I must say that I fell in love with the plane during the build process. I love how the plane goes together, the attention to detail and the quality of the parts made me excited to get it in the air.
I did paint the plane. The one thing I can't get excited about is white EPO foam. It has a certain unfinished look about it that I don't care for. It's a bit stark and dull and can get hopelessly dirty after a few too many wet grass landings. If you have mroe than a few planes they all start to look the same when stored together. With that being said I I will say that the decal set that came with this plane look decent. I have no idea how long they will stay on once applied. At least they don't look like they were designed with 14-year-old teenage boys in mind.

I use Krylon Foam Primer first. Only a couple of coats are required Let it dry and then start putting on the final colors. I went for a two-tone paint job. Black fuselage with yellow wings. I like strong contrast in my planes because I find that they are easier to spot in the sky. Since the body comes in two pieces I used a red bottom with a black top on the fuselage. Visually, it was easy to see. I wasn't the largest fan of the yellow in retrospect. It had more of mustard yellow for my tastes. I decided to call it "Honey Badger" because, in the end, the plane just don't give S*&T. It's gonna fly and fly. I even got it a honey badger decal.
The plane was finished off with a very durable 5mm lamination. It helps keep the plane clean, prevents the paint from peeling off, provides extra rigidity, and I've found helps lower drag. The bad news is that the plane looks like it's being stored inside a sandwich bag! I've gotten used to the look of lamination on my planes. I will say that I had to wrestle with the lamination on this build for a couple of evenings before it was done.

Areas of concern
Center of Gravity- People seem to struggle with finding the right CG for this plane. It's going to take a couple of flights to really nail it down. There are a couple of dots on the bottom of the wing which many find to be the correct CG, and not the CG marks that come with the plane.
Exposed nose- The other huge issue with the plane is that there is a huge nose that sits well in front of the delta wing. During a crash, this will take the brunt of the damage. True there are interchangeable noses, but there is also a wood plank that protrudes out with the nose. If this breaks it's going to be fun trying to repair or replace it. My best advice, don't crash!

Plastic dome- There is an FPV plastic dome options for the front. The problem is that these clear domes give strange reflections that show up in thef light footage. It gives the look of flying inside a plastic bubble. This may be fine for an FPV camera, but for HD recording, stick the HD camera up on the top of the plane.
The maiden
After the first few attempts, the plane would fly for around five feet on full power and land on the grass. I gave it some serious thought and felt that perhaps the motor wasn't strong enough to make it fly. I decided to try replacing the propeller with a larger one, when I noticed that for whatever reason the prop was on backward. Once it was on the right way, it was one happy camper. The next issue was that it didn't have enough weight on the nose. I got to test the foam nose in a real-world crash situation. after it went up and came right back down. Everything was fine. Then I added considerably more weight to the nose and off she went!
My first flight was really an interim test flight. This plane is going to be set up for FPV, but first I need to know how she flies. So, I put in a very lackluster speed controller that I literally had laying around. It doesn't like full throttle. So, I had to test it with at most 70% throttle, which was fine. But, I still didn't get to see the entire story. And that is the issue for now. After one successful maiden flight, I felt she was ready for an FPV upgrade. So, she's been sitting around for weeks waiting for the upgrade. Currently, I have other planes that are seeing their FPV upgrades first. The HD Wing will get better quality gear and when she's full FPV I will add on to this article.
But, how does she fly?
 |
| C1 Chaser, notice how close the winglets are to the center of the plane |
I can compare this plane to a C1 Chaser, which is essentially an oversized Wing-Wing. The C1 is a plane that can fly slow and likes to glide. And yet it tends to do a bit more wandering in the sky. It may be because of the arc of the wing that makes it a bit more forgiving. and perhaps more ideal for newer pilots. Thus if I were to suggest at 1200mm ideal for newer pilots it would be the C1 Chaser. The HD Wing has a flatter wing, and thus likes a bit more speed and can be a bit less forgiving. The HD Wing is all business. It may be because I had the heavy 4 amp 3S battery up front but it was straight as an arrow. So straight that it may be considered a tad bit boring. It doesn't participate in the winds and changing air flow as much as the C1 Chaser seems to do. It just holds its position very well. Then again, that may be the huge amount of mass up front that I flew with doing the talking. Regardless, this would be an excellent platform for FPV. The plane literally demands FPV. Without FPV, it may be just an 'Okay" line of sight plane. I do like the C1 Chaser better as a line-of-sight plane.
Great elevating force?
The sales literature mentioned "Great Elevating Force." Again this has to do with its wing design. But yes, it catches lift in a bit of an unusual way. It's subtle, over time it seems to go higher and higher. So, when flying her, be certain keep an eye on her altitude. She does like to climb.
Why I really like this plane
First, this plane is a rock solid platform. You put it in the air and it flies straight and true. It doesn't roll from side to side nor gain or lose altitude. It just flies straight. This is just a very predictable flyer. You can look down for a moment and the plane won't be on the ground. This may be a good plane for a video platform because it flies so straight. I do really enjoy her even though I haven't put a camera on her yet.
 |
| Andrew Newton wins the award for best paint job. |
FPV Potential
ZOHD is a division of Sonicmodell. Not all their planes are winners, but more often than not they have exceptional planes. I like what they are doing with the hobby. Their planes are innovative. The HD Wing is really setup to be an FPV plane. The nose has a few different options. One is all foam and thus no FPV camera mounted onto the wood. There is an FPV camera cutout for foam option and the third option is the clear dome. You can also mount a camera on the top of the plane. Of all these options, I think the clear dome is fine for an FPV camera, but not a Runcam.
There are spots off to the side of the fuselage where you can mount your GPS, VTX and receiver. I am switching over to XM+ and thus will mount them onto the wing The other thing I love about the plane is that the winglets have no risk of getting hit by the prop. My next build of this plane will have an 11" prop. I am hoping for longer flight times and quieter flights.
Long Range FPV?
 |
| The full-sized SkyHunter is a better long-range FPV plane. |
Long-Range FPV is a term that gets thrown around very loosely. The people who do it well have worked their way up the technology food-chain. Long-range FPV is a discipline and a huge commitment of time, effort, resources and money. What most folks are probably thinking of is mid-range FPV. The technology to fly a plane 3-5 kilometers away and bring it back is readily available and fairly inexpensive. With each time that you fly a plane beyond line-of-sight there is a realistic possibility that it won't come back. Thus, you don't really want a huge financial investment flying away from you. The HD Wing is a good idea for mid-range FPV because the plane is inexpensive. It can also carry a lot of weight. My little test with a 4amp 3S batery had the plane flying around for over half an hour. I can easily see this plane flying for an hour, covering 20 to 30 kim in that period of time.
If you're going to test out FPV beyond line-of-sight, the further away you go the more you really need to be away from where people live and work. We have a number of people doing stupid things with the technology we are given and sooner or later if this keeps up we'll all suffer from newer, more stringent laws and regulations. Some people aren't fortunate enough to live where there is a lot of open land. If you do, mid-range may be fun to try out.
Overall
 |
| The HD Wing gets a huge thumbs-up! |
The HD Wing isn't a first or second build plane. Perhaps it's not even a park flyer. There are some wonderful EPP foam wings you can cut your teeth on before taking on this plane. I have a lot of gripes about the Wing Wing style of plane. The winglets near the prop make them louder than they should be. The motor mounts are often horrific. And yet they fly so very nicely. I have LOVED my C1-Chaser. The HD Wing is a more fragile step up from the C1 Chaser. it's just better thought out. The attention to detail is superb. It demands a flight controller running INAV. My next build of this plane will have digital servos and it will fly like silk. About my only gripe is that the plane comes with extra noses, but why no option for an extra battery tray? You know that people have been breaking it along the way. I can make something work with hobby wood, but why not at least sell its replacement on eBay?
Overall, this is a nice plane to own. It's not a "must have" plane. IF you do buy it, you'll appreciate it. It's a wonderful plane! 1200mm or something around there is a nice sized plane to fly. It does fly differently than an AR Wing. This plane is very nice, and is certainly a keeper. Build it right, treat it well and you'll love it for a long time. This is probably one of the most under-rated planes in the market. There's a lot to love about it.
I will update this article once I have the FPV gear added to the plane.