Thursday, December 6, 2018

FlyingFoam.com is gone


Flying foam was a Midwest outfit that had a CNC machine that would make custom cores on a CNC machine   A lot of their business came from aerospace students working on projects.  They would take designs and turn them into EPP foam wings.  You could order the wings in a variety of different types of foams and colors.  You could also buy blocks of foam for your own project.

Part of their offering were designs they had programmed  sold under their "Quick Core" section of their website.  One of the better offerings was a 4' delta wing known as "Cheap Shot"  that sold for less than $60. They also offered other delta wings in 5 and 6 foot wingspans.  Along with this they had plans for various other planes such as Andrew Newton's favorite,  the 'Le Fish' glider.

The owner,  Coby Leuschke  saw a lot of work, and not a lot of money. He looked to get out of the industry and sold the CNC machine to an aerospace company.  The machine will now be in the hands of people who will use it exclusively for commercial drones.   As for Coby, he was working on an open source robotics platform on Kickstarter around 2014 and 2015. 


I wish to thank Coby for all he's done for the hobby over the years and wish him success in the future.


Here's a few videos of the various offerings from  Flying Foam.


Le Fish (Andrew Newton)


The Illusion 5' Delta Wing


The Mother Ship  6'


My favorite, the Cheap Shot


The Wide Glide


Wednesday, December 5, 2018

ZOHD Orbit Review

Overview


(Specs at end of review). You would think that cheap kit planes coming from China would be poorly executed knock-offs of more compelling planes from established manufacturers. And yet, in the past year Sonicmodels and it’s offshoot ZOHD have come up with some of the most compelling new planes in the industry. Earlier this year, Sonicmodels AR was one of the first “must have” smooth EPP foam blunt-nosed planed from China. It outclassed the very sophisticated Reptile S800 (also from China). The AR is a new generation RC plane, an FPV with the mindset of those who design miniquads. Every inch was well thought out with places for your Runcam/Go Pro and FPV camera as well as your flight controller. ZOHD has had some success with the Nano Talen and some failure with the original Dart only to come back strong with the Dart XL.


One of my friends has been raving about his ZOHD Orbit to the point that I bought one. I was in between the Black Friday deals and the potential new tariffs from Chinese products (United States). So, when the 20% off sale came along I bought some planes to carry me through 2019 to build.

First Impressions


The good


Box Storage -I am running out of room to hang planes in my garage and keeping planes in boxes to me sounds like a great idea, especially if they are small boxes.


No servo wire fishing - Spending a few minutes before every flight fishing servo wires through the body isn’t that much fun. And that’s where the Orbit shines. There are no wires to fish because the servos and all electronics are kept in the center portion of the plane. It offers a new and very clever way to work the elevons from inside the center of the wing. What it means is that you just push it together, and it’s ready to go flying. I am excited to try this out.

Extra Light Weight -It has a flying weight of 1 lb (455g) which is not only outstanding but puts it in the league of a light-build Teksumo. This means it should stay up in the air longer than my AR wing. This is achieved by having s somewhat hallow wing core.


Flight Stabilizer - The plane comes with a flight stabilizer installed and configured. This makes the plane one that would be fine for line-of -ight (LOS) flying or FPV without a flight controller. This plane doesn’t scream out that it needs a flight controller As I understand it, the stabilizer work well enough.

EPP (Not EPO) Foam - The plane is EPP foam which is nice because I seem to be building mostly EPO foam planes lately. I really do like a good EPP delta wing, though I am not a fan of pure white EPP foam. It tends to look a bit static. I may have to finish off at least part of the wings with a colored lamination. I would not use paint on this plane because it would just add weight.

Prebuilt- Usually, I like to build my planes from the ground up. But, more and more compelling planes are coming out as prebuilts. As long as they are built right, I won’t complain.

The bad 

The Motor -The motor is a bit unusual. It’s a 2204 which in motor terms isn’t the most current. It weighs around 50g which is heavy for a 2204. It also takes a proprietary propeller. I have to examine it to see if it eventually get swapped out for a lighter 2205 or 2206 2200 KV motor. There isn’t a lot of specs about the motor so I guess we’ll just have to see how it works.


The build process 


It takes about 3 minutes to figure out how the plane assembles. The square rod didn't go in as smoothly for me as I would expect so most of that time was spent getting the rod in the right way. The wing clips in fairly easily. I do like this design because it detaches easily during a crash. This is a good thing because crashes aren't uncommon in our hobby. The detaching process during a crash hopefully is enough to absorb energy without causing damage.


Binding-


I did seem to have an issue getting the ZOHD to work with a Spektrum AR7000 receiver. I put in a Redcon receiver with satellite and there was no problems. Others have expressed similar issues with the Spektrum brand receiver. Interestingly enough there is a small port for a Spektrum satellite receiver to hook in and give you all the channels you'll need to fly this plane.   I've tried it, it works fine.  You need to do a range check if you plan to use a Spektrum satellite receiver only.  The usual range is 300m to 1000m  (1000 feet to .6 of a mile).  The Redcon and LemonRX have rave reviews.
At the risk of changing topics the little satellite receivers have similar range than their counterparts with servo connectors.   If you're only flying line-of-sight (LOS) with this plane you can get away with a 'good' satellite receiver.    If you like flying about as far as you can see you may want to go the full servo-pinned receiver with satellite route  (Which is what I did).

The choice of a receiver is something you may want to really think twice about. The reason is that the flight times on this plane are insane. Without a flight controller, there is no return to home function with this plane. If you install a camera and VTX on this plane you don't want your receiver to lose range before the VTX you will need a longer range receiver.  If you plan to take this plane beyond line-of-sight there are other brands of transmitters to investigate that have longer range capabilities.

PWM Receiver Setup


The only other part of the build process which was kinda frustrating was the very basic documentation could have labeled the colors of the wires. It just uses terms like "Elevator, throttle, mode" Here they are:

3 wire (black, red, white)-Aleron

Blue-Elevator

Yellow Throttl

Green-Mode


Just double check, you never know when they change coding schemes. .


The maiden


There's a reason I don't video my maidens. The first ones don't go as well as plan quite often. Despite my CG being correct per the CG marks on the bottom of the plane it took off tail heavy. The stabilizers did their job, sorta. I brought it back down and put  a couple ounces more weight in the nose and it flew for 45 minutes before I got tired and landed it.  I checked the 3S 2200mAh Lipo to find that I had close to a storage charge worth of power left! Now I can see why people love this plane so much.


The flying characteristics of this plane were very nice.  There was no glaring negative experiences that I've noticed about this plane. when flying her.    The stabilizer worked well and though it was a bit underpowered it was a fine flying experience.

So, why aren't I raving about this plane?  I  know people love this plane and some may get a bit angry that I'm not singing its praises.   But I have to tell it like it is.

The flying experience is about as sterile as the big white hunk of foam you're looking at in the sky.  It's safe and predictable.   I am really going to have to do something to jazz up the looks.  Aside from its appearance, the flight characteristics are a bit too smoothed out.  To be fair, I haven't taken it off of the flight stabilizer.

The one huge omission with this plane is no spot to mount an antenna for your VTX.     Some people have worked around it, but it leads me to believe that this is a plane you throw your Runcam into the front of and fly Line-Of-Sight while on vacation.  And yet, even with stabilizers the plane has waggle.  This may be because the plane is light.  Even though it has digital servos the stabilizers won't give you the silky smooth video that you would get with a gimbal.

The YouTube Vlogger Painless 360 has come up with a VTX antenna mount for the Orbit which can be found on Thingiverse.


Of course, this begs the question "Why is such a superbly designed plane missing an antenna mount if it's marketed as an FPV plane?" 


As predicted, the motor was underwhelming. I guess if you want performance you should stick with the AR 900. This plane is about efficiency, and thus it's a bit of a vanilla flying experience. That's not bad, some days you just want to loiter around in the sky for about an hour.   This plane will do that.


Would I recommend this plane?


Nope.


It's not a bad flying experience, and it's not a mind-blowing great flying experience.  It's just okay. It's been so refined that it managed to suck some of the soul out of flying.   It's the Michael Bolton of RC planes. 


I'm not saying that this is a bad plane and you shouldn't buy it.  What I am suggesting is that this is version 1 and it hasn't really evolved enough.  This is more of a proof of concept plane.  They have proved you can make a compelling 900mm plane out of EPP foam that can fly for an hour and can be broken down and stored in a small box.   It can easily be setup again and ready to fly in a couple of minutes.  That's remarkable.

I can throw different motors on the plane and put in flight controllers and antennas, and GPS.  But sooner or later that effort is better spent on another plane  I'll just accept this plane at face value for what it is, a nice plane to take with me on vacation or when I leave town.    Just take along a few batteries and you've got good flying for days.


I know this plane will appeal to some people.  If you've outgrown your trainer and need a good first delta wing, this isn't a bad choice.  If you're not into building planes but would like a plane that you can easily get flying with as little fuss as possible, this is a good plane.   But, if you're into building kits and worry about all the little details, this plane may not excite you enough.   Despite all the innovative cool features, in the end, it's just a light, stabilized 900mm delta wing.


NOTE:  Our Facebook page has a name change, find us at "RC Planes-Talk, Tips & Reviews"

Specs- ZOHD Orbit 900mm EPP AIO HD FPV Flying Wing PNP


Key Features:


Built-in gyro makes flight super stable and easy to control.

Autonomous flight directly after hand-launching - never crash when taking-off.

Multiple bonus camera mount, compatible for Gopro H3/H4, Runcam2 HD, Foxeer HS1177 FPV camera in the market.

EPP molded wing, pre-built-in Carbon Fiber spar for enhancement, light and flexible plus crash-resistance.

Detachable mainwing for easy transport - easy to change the wing via a simple plug.

Mainwing connected to fuselage by buckle - this will disconnect and release in the event of a crash.

Room inside fuselage for FPV gear  (Debatable)

''NACA” air-intake in nose and air-outlet in tail for better cooling on FPV gear.

Self-tightening prop nuts for secure prop mounting


Specifications:


Brand Name: ZOHD

Item Name: Orbit Wing

Wingspan: 900mm/35.43in

Length: 422mm/16.61in

Flying Weight: 455g (w/o FPV gear)

Material: Crash ResistableEPP

CG: 11.50cm from the wing leading edge(a bump CG mark under the wing)

Color: White + Black

Motor: ZOHD 22041870KV BL

Motor Shaft Diameter: 5mm

ESC: 30A W/1A BEC

Servos: 2pcs 8g digital servo

Propeller: 6x3

Recommended Battery: 3S 1300-2200mAh 25C

Flying speed: 10 to 85km/h

PNP Package Includes:

Airframe

ZOHD 22041870KV BL motor

30A W/1A BEC ESC

2pcs 8g digital servo

Gyro

Hardware

Wednesday, November 28, 2018

Navigating Black Friday, hunting for planes


Do I really want a Ranger 1600? As I was looking into reviews it sold out,  first in the United States, then in Hong Kong. This was within 10 minutes!  It was like nothing I've ever seen before. The plane was in my cart, and then it was "sold out."   It's a well-respected plane, but not the plane of the year.  There are a lot of mid-fuselage pusher planes on the market, such as the line of Bixlers and Sky Surfers.   So, why suddenly was this the hot ticket?  I believe it was meant to be the kit, and not the PNF version for the price listed.  Perhaps this was the deal of the season.  And there were deals, some better than others.


The hierarchy of the RC plane hobby.


To some, gas and balsa are the only real planes.  What can I say?  Some of these planes are worth more than my car!   Large gas planes are still around, and still in demand.  But, not as strong as it used to be.  The hobby has shifted to smaller, lighter foam planes that are battery powered.  The problem is that for many years foam planes were about as wonky as its name implies.

At the flying field, you just don't show up and start flying your large gas plane.  There's work to be done.  There is prep work for a gas plane, fueling it, making last minute adjustments and firing up the engine.   You get one of your buddies at the park to hold the plane down as you fire it up.  The guy says "She's running a bit rich today, Dave."   And, that's part of the enjoyment Guys socialize through their planes.    They like going to the flight line, setting up their plane taking it up for a flight, and BSing with the other guys as they clean it and put it away.    If you're into large scale planes, to this day, they are wood.   The smaller ones in size ranges between one and two meters used to be exclusively wood as well.  But now foam is creeping in.  Imagine, showing up to a club field with a foam plane?  Unheard of years ago.


Foam evolution


The evolution of foam has been mind-boggling.  The first generation of foam planes was derived from packaging materials. Interestingly enough, it was the folks at the glider slopes who first embraced the foam planes.  The DIY nature of the first foam planes are being revisited in Dollar Tree Foam Board planes like those found at Flite Test.

Foam planes are now beautifully made, nothing like the first gen foam planes. The EPO and EPP offerings are good and getting better all the time.   Different grades of foam make for planes that are firm, rigid, and a lot more repairable than wood.

Foam is now creeping into the wood plane market, and the ramifications can be felt across the industry.

Horizon Hobby


As for Horizon Hobby, if you can find your way to a hobby store that sells RC planes in the States these seem to be what's on the shelves.   Horizon Hobby tends to be run the full spectrum of planes.  They offer the cheap foam planes all the way up to the very best large scale wood planes on the market. Thus, any hobby store that sells Horizon Hobby can sell you anything from a Micro Radian for $80 to a multi-thousand dollar large scale plane.  Somehow, Horizon Hobby has figured out how to make this all work, so they have my admiration.  They seem to fetch premium prices for most of their offerings.  Thus, any sale is a welcome thing if you're into their planes.

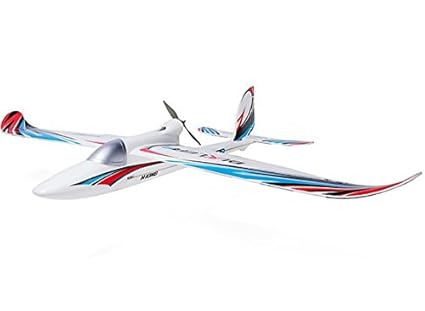
Horizon Hobby did have quite a few planes on sale over the Black Friday/ Cyber Monday week.  The one plane that I was interested in for a short time was the Timber.  It's a 1.5 meter bush plane.  One option is to get it as a Bind N Fly with the proprietary Spektrum receiver and built-in flight stabilization.    And yet I got the similar plane on sale at Hobby King for $100 less.  No receiver and no flight stabilization.   But, for $100 that can buy another plane!


Hobby King


Hobby King had one of the more interesting set of sales going on this season.  They had some remarkable flash sales that made me look up their offerings and debate if I should buy certain planes that weren't even on the radar.  All I can say is that I've been to their website more in one week than I've gone the rest of the year.  During this week I understood what Hobby King is trying to do a bit more.

The one thing I've really figured out about Hobby King is that they've perfected the foam plane to the extent that they can make just about any plane out of EPO foam and make it look lovely.   Some of them  are so good  that they are very difficult to figure out if they are made of foam or wood just by first glance   Instead of fighting in the swamp with Banggood for every last kit sale they seem to be looking at Horizon Hobby's market.   What I am seeing more and more of is compelling $200-$500 planes made of foam offered by Hobby King.

What I am expecting from Hobby King is lots and lots of scale replica planes.  I'm sure you'll see a "Spirit of St. Louis" plane and  EDF versions of the G5.  Some people get off on this, I kinda like planes that fly well with as little hassle as possible. So, for the most part these planes aren't on my radar, with the exception of the Tundra.


Banggood


What started out as a retail portal in China for the rest of the world is evolving.  Every day they have many planes on sale.  Some are perpetual sales which means they really aren't on sale.  The Black Friday /Cyber Monday sales were ho-hum this year.  Most of the sale items were listed weeks earlier.  Banggood had a generous 20% off sale.  And yet, 20% off was after other sale prices.  For example, the ZOHD Dart was 70% off before the 20% off.  The one place that had the best deals this season was definitely Banggood.   Which is fine because the prices over the busy flying months seem to be high and the sales weren't that good.  It's a good time to stock up on sale items.  It's also a good time to stock up if you're like me and believe that Banggood will eventually have to start making a profit on selling planes.

Banggood has a good selection of planes from low end to the medium range of the market  And quietly they are filling the over $300 range of the market with FMS planes and other offerings.  What I am not seeing is a rush of scale planes.  They seem to be the ideal choice for guys like me who like to build planes that fly well, if they are pretty it's an afterthought.   Most important, the prices are as low as you'll find them.   Though some planes are Chinese knock-offs of established planes, Banggood has a nice offering of planes from Volantex, Sonicmodels and ZOHD.    These three manufactures had their planes on sale over the month of November.

Example sale items


Horizon Hobby


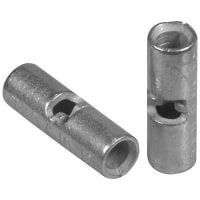
This was an online only cyber week sale.  For under $200 including tax they can have a very good trainer that has everything from the radio to the battery and charger.  The good news about this plane is that parts are readily available.    Downsides, well there are a few. The battery is a "Star Connector" which to me looks like a Deans connector.   The first thing you may want to do for someone who buys this plane is put on XT60 connectors on the plane and battery charger.  Then they can load up on those $11 3S 2200mAh batteries from Hobby King.    The Tactic receiver only works on one plane.  Chances are if someone is hooked on this plane you can start talking to them about better gear for their next plane.

But, what's not to like about this plane?  It has everything you need to fly.  Most importantly it has a built-in flight stabilizer.  With this plane you'll need a large, empty park  to teach someone to fly.  The receiver has a buddy cord port if you also have a Tactic transmitter.   Best of all, all the parts are readily available.  This is an attractive price for this kit and if it was up to me this should be the price it stays at.  It would help more people get into the hobby.


Hobby King

Hobby King had some remarkable planes for sale.  This was the one plane that got a lot of people measuring space in their garage or closets.   The Avios Grand Tundra. The plane was on sale for  around a week  at $250.  Not a cheap plane by any stretch of the imagination.  It is a HUGE plane and though it is a STOL plane (short take-off and landings) it's a bit too large to fly at your local park. And yet, it will take off and land just fine at your local park.   It comes equipped with many lights so twilight flights are something in your realm with this plane. It's a Bush plane which means that it can land on a variety of surfaces such as grass or some dirt paths.  This is the direction I am seeing Hobby King going.  Scale planes that are well done sold pre-assembled.  The one thing they thankfully haven't done (yet?)  is come up with their own proprietary battery connector.


I toyed with buying this plane for a few days (it was on sale for well over a week).  It was way too large for my needs, I didn't have the batteries it required and I felt the flight times were a bit short.  I opted for its little sister when she came up on sale.


Banggood


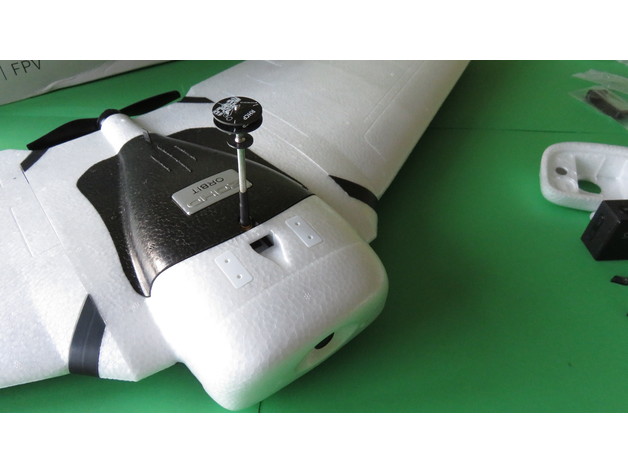
Sonicmodels AR- (Banggood)  In many flying circles, the AR seems to be the plane of the year.  It's what a lot of people have been looking for, a rugged EPP foam plane that is blunt nose which means it can take a 2200mAh 3S battery and your FPV gear.  It flies great and many people have raved about this plane.  It's a great plane if you're coming to wings from quads.  it's fairly easy to fly. 900-1000mm seems to be the sweet spot for my taste in planes.  You can throw it in the car, take it to the park and enjoy a relaxing flight.  Or you can watch the hair on your arms go up as you take this plane through various stunts that it can easily handle. Thanks to it's smooth EPP foam, it can handle just about  any speed you throw at it.

Normally a plane like this doesn't go on sale, why should it?  It seems to be a plane that is always in demand. And yet it went on sale in two different ways.  First, it was $5 off its normal price.  I know, yes a whole $5!  So, it was $65 on sale. But then Banggood had yet another sale on top of that, a 20% off promotion which dropped the price to $52.    This sale price lasted less than a day, however.  That's over a 25% discount on a plane that they didn't need to discount.   The 20% off promotion was also on the ZOHD products which included the Dart (standard not XL) the mini Talen, and the Orbit.


There's always the end of the year.


The RC planes fall into the "toy" category for many retailers.  In a perfect world, Christmas would be a week after New Years.  This would end the previous year with a good financial push for most retailers and then also start the year with a good financial push. The left-over toy inventory could be marked down gradually.  As it stands right now, retailers have one week to move the excess toy inventory off their books before year-end. So, what you can often expect to see is heavy discounts starting around the week before Christmas and continuing into New Years.  Thus, more bargains are out there, waiting to be had.


Things to keep an eye on in the new year.


Banggood/Gearbest- Aside from a looming trade war the thing I see happening is the strengthening world economy and increased demand for RC products.  I think you will see less significant sales, especially around the summer months as the flying season is hot.  Chinese New Year is on February 5, 2019 and will last around a month.   Production will fall off and perhaps inventory that is out may not get restocked in the United States until the third week of March.   Around this time you may start seeing new planes hitting the market as some plants take the downtime to retool.  I think the demand is there so perhaps next year will offer some interesting new planes from these retailers.


Hobby King-  This retailer worries me the most.  They seem to be moving away from the hobbyist builder who likes to build their own planes and is moving toward the hobbyist who wants to buy a plane, throw in their own receiver and batteries and go flying.

When I did research into offerings of the Bush planes recently one plane that stuck out was the FMS Kingfisher.  Its motor seemed out of line for the rest of the offerings  It turns out that the same motor was used in a few FMS planes. I can see Hobby King doing the same thing, streamlining the motor and battery offerings to the point where the selection will be slashed.  Hobby King will continue to make some of the best planes in the industry, and some duds.   Though they sell the Wing Wing, and the Reptile S800 I doubt they perceive these planes as their future.   What I can see is that every few months a new scale plane will come out with all the hoopla that surrounded the C-130 transport painted in the Blue Angels colors. I can see how Hobby King would like to be more like Horizon Hobby and less like Banggood.

Horizon Hobby-   I just don't see Horizon Hobby discounting many planes in the summer months.  So, the time to stock up like other retailers is in the winter.  Of course, the million dollar question is what happens with brands like Great Planes which was squired during the Hobbico purchase.    There are many Great Planes enthusiasts out there who have a lot of money tied up in these planes who want to know that they can still get parts and planes in the future.   Tower Hobbies/OmniModels is going through a sort of restructuring.  One brand that I liked that has gone away but seems to be coming back is Hacker.  I am hoping for their triumphant return in 2019.


Fast Food Analogy


Why the sudden push of pre-built planes from Hobby King?  I can explain it with food!

The one sure sign we're in a recession is the 99 cent hamburger advertised at the front of McDonald's or Burger King.  Times are good now so you won't see those signs.  But, when times get tough and they need traffic those signs go up.  And yet, that 99 cent hamburger is perhaps costing them $1.40 to hand over.   So, how does this work?  Simple.

Hamburger:  $1.40
Soda:   $.30
Fries     $.40

If you buy this for $3 they'll make a buck.  But, at $5, they'll make $3. A burger, fries and a drink for $5 is easy to be found.   And, that's the thing. People are fine with $5 because sit down meals are 2 to 3 times more expensive.   But, when times get tough they don't eat out as often.

One other thing that was common  a decade ago was to supersize the drink and fries for $1. The extra soda, larger packaging and extra fries were probably less than 40 cents.  So, one more shot at extra value, and the customer felt that they were getting more value though the burger didn't get larger.

And there are always jerks like me.  When I was a kid I would come in and order two burgers and that's it!   They probably lost 80 cents to $1 each time I walked in for lunch.  I'm surprised they didn't hand me $.50 and ask me to eat elsewhere.

So, comparing this to the hobby store.  When you buy a kit plane because you have all the other parts at home, it's like just buying a burger.  Maybe they make money, maybe they don't. But they are hoping you buy other things that are more profitable.   An example? t the Hobby King Tundra.

Kit:                               100
4 Servos                         10
Motor                             20
Prop                                  5
Speed Controller           15


I'm into this plane at $150 and I have to set it up myself.  But, Hobbyking gets their parts for less  With the Chinese labor they are paying to assemble it the plane is perhaps $160.   It retails for $210, thus there is $50 profit for each sale, if not more.   When I bought it on sale it was $165.    Thus I doubt the true costs are higher than $165, and perhaps a bit more like $140  But, when you supersize it to the next size up, the Avios Grand Tundra, the build costs are probably not much more than $40 more though it sells for $350 ( $250 on sale).  If the plane costs $200 to make, the profit is $150 at full price if not more.

You can see why Hobby King wants to sell kits at full retail prices, the margins are great!   And pretty much, this is what you'll be seeing in the future.  The only problem I see was that this racket was figured out by Tower Hobbies.   You would think an online dynamo would never face hard times, and yet they did.  Tower Hobbies was  the it place to go, and then competition like Hobby King came along.    Perhaps the profit dollars are lower for guys like me who live kit planes.  But, we do show up and buy. Hopefully HobbyKing will round out this portion of their line with new offerings in 2019.


Sunday, November 18, 2018

Cloud Raptor- Read before you click the buy button

It looks enticing

Image result for cloud raptor

The Cloud Raptor is one of those planes that goes on sale a number of times each year with Banggood.   During a 20% off sale over the holidays, I picked up one up and finally got around to building it in late summer.   I won't bury the lead. This isn't a plane that's for everyone.  It has a lot of really good things to like about it, and a fair number of things that are huge concerns. You can watch a video where Matt Osborne reluctantly gives it a good review based only on flight characteristics on one good day of slope soaring   I'll tell it like it is,  most people really shouldn't buy this plane.  For the same money, you can get much better planes.


Here's the characteristics I think people will like about the Cloud Raptor

1. Blunt Nose
2. Huge Cargo Bay
3. Extremely Light
4. Nice Graphics
5. Works with a wide array of motors
6. Can take large props
7  Flies great
8. Long flight times
10. 1 meter in size
11. Relatively inexpensive

Getting a 1-meter plane for under $50 US  when on sale (often under $40) makes this a compelling plane.   With the right prop and motor for the job ( I went with a 2208 1450KV motor with 7x5 APC prop) this plane can stay up in the skies nearly forever.  The plane does have a lot of likable features that it's hard to resist when it goes on sale.  So, I will put it through my standard grading system, and we'll see how it does.

Documentation: 0  points out of 5 points possible.


There was no documentation in my box.  I sometimes think that Banggood does this to cut down on postage costs.  Anway, it would have been useful but not necessary.

Quality of Materials 12 points out of 20

This isn't a top-shelf plane. I found the foam to be of low quality, but it was still EPP.   There is a covering over the top of it which I believe is a Poly Propolyne film.   It's thick and durable.  It's the first time I've seen this come with a kit plane which makes it unique. I really like this idea and hope to see it on many more planes.  The elevons and thin, flimsy and best replaced with $2 worth of Balsawood.   They were by far the worst elevons I've seen on any kit.   Worse than the Dancing Wings Rainbow elevons. 


The control horns were decent and the kit did include some extra wire for running the motor to the speed controller.  The kit also includes some adhesive that I didn't bother to use.  I could have done without the glue and better elevons. The motor mount is a thin plywood mount.  I've gotten used to them over the years. Just paint them and put epoxy over them to provide strength.  Still, it kinda feels like you're making a Dollar Tree Foam plane more than a kit.
The portion in the middle of the plane, the actual "blunt nose" has a cargo bay that is only the thin layer of foam and then polypropylene.  That's it!


Build process  20 out of  20 points.


Despite the lack of instructions, the plane went together without a single problem. It has minimal steps to get this thing together.  The one big turn off was that the single spar for this plane was at the bottom of the foam next to the film.  I would have liked it deeper in the plane's cores.  Also, the film over the top doesn't give a lot of options for cutting in more spars.   There were plenty of nice wiring cutouts for the plane which made routing the wires easy.   Still, there were two holes that weren't accounted for near the top of the bay.  Two holes on each side in the wood.  I used these to run a couple of drywall screws.  I did this just after I glued the plane and it helped secure the foam to the wood, a little bit more.  Other than making custom elevons out of balsa wood, and using lamination this was my only modification.

Graphics  (FYI)

There is no points for graphics but I have to say that the Inkjet graphics on this plane we actually very nice. I liked the American flag, then again I am American.    I did find that the color scheme was a bit busy.  When I replaced the elevons I got rid of the yellow on top for an orange that matched with the graphics.


Flight Characteristics 30 out of 30 points

I have to say this plane really flies like a beauty!  I put a 1600mAh 3S battery in and flew it up to the sky.   With barely any throttle the plane handles very nicely. It floats around and explores the sky, free to float on mild breezes. And yet, it still has authority.  My maiden flight lasted 31 minutes.
I wouldn't go as far as stating that its the same as, but it is very similar to the Popwing or Tek Sumo.  It has that same "Glides or rails" feel to it.   This plane is a little lighter than the Pop Wing so it tends to float a tad bit better.

It's excellent flight characteristics is what makes this plane so nice.  If you're willing to overlook the wonky build quality of the plane then yes, it's a great plane.  It rolls and loops and does some rather nice stunts.   It's not a stunt plane but I do very much enjoy planes of 1 meter   It's the right size.  Very controllable and yet a blast to fly.


Value  8 out of 15 points

Keeping in mind that planes with worse designs that were made out of styrofoam were selling for $130 20 years ago this is a good value for around $40-$50.   And yet, we live in today's world.    There are some very compelling planes for around $40-$70.  A Reptile S800 is a much better and so is the Sonicmodels AR.  Of course, if you can get your hands on a Popwing or TekSumo in the $30 price range that's an even sweeter deal.  The Teksumo/Popwing provides similar glide characteristics and a similar flying experience to the Cloud Raptor.   But it boasts a much more robust build with thicker cores that can be crashed and fixed many, many times.  Even if the going price was $30 for this plane I would still say that for  $20 more you could get a better plane.


Final score 70 out of 100

Yes, this pretty much sums up the plane, it's a C- overall. I say, fly it, enjoy it, crash it, and have fun with it.  But when you can't repair it anymore, pull the parts off the plane and put it on a better plane.  There are some planes that I would replace that day if I ever lost it, this isn't one of them.

One Saving Grace

The one thing that makes this plane interesting is the large cargo bay.  The Reptile S800 and Sonicmodels AR have limited space for storage.  The Reptile has interesting placement strategies for things like video transmitters and speed controllers.  With these planes, space is always an issue.  There is a lot more free space with the Cloud Raptor.  And you can offset the front weight issues with larger motors in the back.   One issue is that there is no space up front for a runcame or GoPro, thus you would have to attach a low profile one to the wing.  Otherwise, there is space for your FPV camera built in up front.

This is a plane that take a 9" prop and a BR2212 in back with a 2200mAh 3S up front.   You can throw on a flight controller, cameras, GPS in a fairly sloppy manner. Once it gets over 800 grams it may be hard to handle, may start dropping wings on tight turns and won't survive crashes that well.   But it can most likely cover upwards of ten miles which isn't bad for a small plane.   Thought that's not long range FPV it's someting that is a bit compelling none-the-less.   Perhaps a good way to get your feet wet with mission based flights without having to go the Skyhunter route right out of the gate.   Here's something small, manageable and if it crashes in someone's yard it looks more like a toy than something that broke free from a military base.   You'd have an easier time getting it back.


Update: Since writing this review I have put in a cheap FPV camera and cheap VTX.   It still gets mind blowing long flights with the additional weight.  Maybe a flight controller down the road?  I'm not certain. The plane is so stable that it doesn't need gyros.  I have to say I fly it a lot more than I let on.  Now, if I lost it, I would most likely replace it. The only other thing I didn't mention was the wonky motor mount. It does work. It fell off once and I just had to glue it back on. It works fine now.

The only other thing I've discovered is that the bay, though very big, could be a bit taller.  It never closes well for me.  Perhaps they can make this into a 1.2 meter plane and make the bay deeper?


Saturday, November 17, 2018

Setting you GPS up with your Flight Controller

Of course, you want GPS


One of the richest features of a flight controller is its ability to take over flying for you.  If you fly out of radio range on your transmitter or you lose video signal you'll want to activate the "Return to Home."  When the flight controller first fires up it will try to lock in on some satellites. It then records the location of where the flight controller is armed.  It is possible flying FPV that you may lose orientation to where you are located and thus this feature comes in handy. You can also use it to measure flight distance, ground speed and give you a direction back both with an arrow and a distance scale should you get disoriented.   The GPS units are generally fairly inexpensive.

If you're into simple.

There are various bundled flight controller packages.  The upper echelon seems to be the PixHawk.   I looked at the HolyBro version of the PixHawk 4.  At $170 it pricy, though it does sport a high end flight controller board.  The only problem is that they didn't solder on the pin headers on the power distribution board.  So, you're going to have to solder anyway.   The good news is that most of it's figured out for you in advance.    Thus, it will get you flying with fewer headaches.  But seriously, $170 and you still have to solder?  This is also a fairly large unit which means it won't fit in your Wing Wing.


The Pixhawk uses connectors and thus many of the GPS unit's you'll find will say that they are made for the Pixhawk. I would love to think that every flight controller board would take every GPS module as a plug-in, but this isn't the case.

It's only four wires if you're flying a plane, six if you're flying a quad.

Parrot Bluegrass Multipurpose Quadcopter for Agriculture


Some GPS units have four wire and some have six.  There are 4 used for the GPS and 2 used for the compass.  If you're flying a plane the assumption is that you're always flying forward. So, you really don't need a compass. Drones can hover and spin so they need a compass.  My suggestion is to cut the two wires for compass if you're flying a plane, but not too short.   You'll never know if a cool feature shows up in iNav or BetaFlight that uses a compass for some reason.  You can also wire it back up and solder it back in.  But, if not, it's one less headache to deal with.

Four wire, 2 +2

Two wires are for 5 Volt.  One's positive and one's negative.  That's simple.  You can wire that to your PDB on 5V.  That leaves us with two wires. One wire says TX and one says RX.  This is the only confusing part. The TX on the GPS goes into the RX on your  FC board and the RX on your GPS goes into the TX on your FC board. Some flight controller boards have a GPS connector on the side.  If you do, there is either a 4 or 6 pin connector that you probably don't own.  Ive been facing some difficulty finding GPS connectors for flight contoller.

And, this is when things get a bit more difficult

So far I haven't played with any flight controllers that use a "connector only" solution.  If you do have this, then you'll need to find the connectors to get your GPS to work.    When you go this route follow the diagram, not the color code of the wires.   This is a super important point.

Don't trust anybody's color coding system.

Some people make a list of color coding online to make it easier for their readers and viewers. The problem is that the GPS modules do change over time and thus the wiring guide may be inaccurate, and worse may burn out your GPS.  Pay attention to their logic, but TRUST NOBODY'S wiring diagram based on color.


Example of two GPS units I acquired.


This one is simple


The GPS module can be found HERE.   It's the newer style of GPS, really built for the microsized quadcopters but we're using them on planes as well. It's very small and very light.  One piece of advice.  You should have the GPS unit away from the electronics of your plane.  Thus, if you're wiring this up, perhaps give yourself some extra wire to help place this unit on the wing.  If you can see the label it's upside down.   The label goes onto the top of the wing, and the side you don't see points up to the sky.  These things are so small that you can route an exact sized hole in your wing and mount it flush.

Anyway, what we can tell about this unit is that it's 4 wires and thus doesn't have a compass.  From left to right  Pin 1 goes to 5V -.   Pin 4 goes to 5V +. You can wire it to your power distribution board or extra pins on your flight controller.  Pin 2 goes into your RX on your flight controller and pin 3 goes into your TX on your flight controller.  Assign the right UART channels on your flight controller, turn on GPS and you're done!


I would use additional wire to wire to your flight controller. The small stranded wires tend to not solder well to your board and could come loose.   Also, there is a crystal in the GPS unit that can break in a crash.  When this happens, throw the entire thing away and install a new one.


I bought a few hockey puck GPS modules

You won't have a problem finding these online. The module itself is much smaller than the big plastic casing.   I have a feeling that the original modules were the size casing.  Anyway, it provides plenty of protection and the wires seem secure.  I am not going to route the module out on my wing for these modules. Why?  Because I have a feeling that this design will be gone in a few years.   Just use the provided double stick tape.  When that fails, glue it down with something like UHU POR so that it can be removed should you ever want to get rid of it.

The original Hockey Puck modules were grey.  These black ones are newer.  Here's a photo of the chipset used.


You can look up the number and find out all sorts of interesting details about the GPS.  It seems to find satellites faster and works a bit better.  Anyway, I got three from the same vendor, but I won't assume all three are identical.   I will open each one up and look inside.

The vendor was gracious enough to not give any wiring instructions on their sell page.  And to make things even more complicated,  the wiring position changes from one side of the cable (as intalled in the connector) to the other side's connector.


Starting from the bottom, the red and black are actually correctly color coded. Red to 5V+ and Black to 5V-.  The yellow RX wire goes into the TX on the flgiht controller.  The forth wire is green, it says "TXO (Transmit). It goes to the RX on the flight controller.  The last two wires are for the compass.


When you assign your GPS to a UART, be certain it's one you haven't used before.  Thus, setting up your GPS may be one of the last things you'll want to do, after you have your transmitter and video working.


Take it outside

When you fire up the unit with GPS you'll need to have it outside to find enough satellites.  GPS works off of triangulation, thus you'll need at least two satellites to discover your location.  I believe the INAV doesn't turn on until it's seen something like 5 or 6 satellites.

Now your motor won't spin?

You take out your plane or quad and arm it, and the motor won't spin?   The flight controller is looking for satellites.   When it's found enough it will arm your flight controller.   It will also log in the exact location where you armed your plane or quad so, keep that in mind.


Return to home/ failsafe

It's a blast to flip the switch of the first time and watch the return to home bring back your plane or quad.   If you're flying a plane, this is where things get not so fun.  Flight controllers are designed for quad pilots in mind.   If you're flying planes,. here's some advice.

INAV over Betaflight- I've seen guys flying wings with Betaflight.  I bet they started off as quad pilots and really know and love the Betafight.  But, looking on Betaflight's wiki they suggest that fixed wing folks head over to INAV.  If you want to stick with Betaflight, the servo tabs are hidden until you go to advanced mode.

There is a lot of good info and good settings in INAV's wiki.   The one thing I will tell you right off the bat is that  the default return to home is something like 30 feet.  This means that your plane will fly around 30 feet in the air when it finds it's way back home, which means you'll probably run into trees.  They have fixes for that in INAV and options to have failsafe to return you to where you first armed your wing.

Patience my padawan

Image result for yoda's jedi training

Your first plane took weeks to assemble?  Now you can build the same thing in less than an evening?  Flight controllers are the same thing. Actually, worse.   You have to get the micro-soldering down.  Then you get to figure out the wiring, often with little to no information.   And when that's all complete you have to work with software and millions of options.   To top it off, now and then you'll have to copy and paste some lines of code.

And yet, it's one of the most rewarding experiences you can have as an RC pilot.  Thirty years ago, if you even suggested at the RC park that a plane could fly itself places via a computer and fly back to where you are with a flip of a switch they would suggest psychiatric help for you.


Friday, November 9, 2018

ESC-Secure electrical connections

There is nothing more wonderful than watching your plane lose its electrical connection and then fall from the sky.   Once you've seen it, you never want to see it again.   This is something that is completely avoidable.   If you're going to spend upwards of hundreds of dollars on a plane, and countless hours getting it ready, the last thing you want to see is deadstick that turns into a crash.

I will go over the pieces of what I feel does and doesn't work.  I'll explain each component.


The ESC


Very often, this is what you get.

Image result for esc brushless motor

Notice there are no connectors on either end?    Here's what it's supposed to look like when it's done.

Image result for rc plane esc and motor
Other than the red Deans connector this is a typical setup for smaller planes.  The bullet connectors plug into the motor.  If the motor spins the wrong way, just swap two of the bullet connectors around and the problem is fixed.

So, let's set it up.

Connectors


Battery:

Image result for xt 60 cable
I buy these out of China via eBay, they usually sell for around $1 each set.  It's 12 gauge wire.  You can buy the connectors and solder them on directly to the wire from your ESC. The problem with that is that the leads melt the plastic and they can start going in the wrong direction.  I find that wire with leads I buy from China tend to be perfect.  Large, lovely 12 gauge silicone covered wire with the polarity right.

Bullet connectors
The most common size I've found is 2/5mm.  If you're flying any motor with a 22mm, 28mm, 35mm diameter motor these are what are most common. I buy these in sets of 50


Image result for 2.5mm bullet connectors rc

Yes, you could solder the connection, but unless you're using a flight controller where you can easily reverse the direction of your motor you'll want to stick to a solution where you can remove the motor from the speed controller easily.  You may want to swap motor directions or audition a new motor.  You will need to solder these onto the wires. It's not that difficult.  A cheap $10 soldering iron will do the trick.

Connecting all ends


So, now that we have the parts to connect the ESC to the battery to the motor you'll need some parts.

Soldering the connectors.

There are a few parts you'll need. This video explains what they are and how to solder the connectors.


Here's my source list for all the soldering stuff you should get. I don't get any money from these suggestions. And you're free to get what you want.

Soldering Iron   Solder      Solder Stand   Wire Stripper (Good ones)  Bullet connector/XT60 solder stand   Heat Shrink 

This is a list that will get you started.  You may want to add from here as you get more into the hobby.
All these supplies should be around $50 US if not less. When you get going you can get a good set of helping hands and a good heatgun.  My Porter Cable heat gun was just a few dollars more than the cheap Chinese ones.  It's worth the money.

Connecting wires


What doesn't work

Image result for 12 gauge butt connectors


Insulated crimps are horrible.  If you use them you're not supposed to use heat shrink. If you do the heat from the heatgun will losen the crimps.  On an RC plane, you want the most secure connection possible because the wires get pulled on often as batteries fall out of your plane on landings. I found a 'do it once and forget about it' solution.

Non-insulated crimps
Thomas & Betts 2C-10

Here's the good news, they are freaking expensive.  They range in price from 7 to 25 cents each. And if you don't cover them they will make contact with each other.  So you'll need some heat shrink that covers them.  While you're ordering these you'll want the very much more expensive 12AWG to 16AWG step down non-insulated butt connectors. The reason why is because the wire for the speed controller is often thinner than the wire from the XT60 connector.  It's expensive but worth it.

Crimp tool

Crimping and Cutting Tool, Tapered Nose for 10 to 22 AWG Solderless Terminals and Connectors Klein Tools J1005

The Klein Tool J1005 is around $33.  It's expensive I know. But, it's solid. When you use the step down butt connector crimps you're going to  squeeze very hard (or step on it with your foot) This tool works like gold.  The crimps are perfect.  Cheaper crimp tools just tend to crush the connector.

A word about speed controllers


Image result for esc brushless motor

If you're flying a foam plane and not too worried about weight and space, these speed controllers work great!  When you get into lighter weight planes where weight and space are a factor you'll want to move into one of these types of speed controllers

DYS 20Amp Micro Opto BLHeli brushless speed controller
These things are around 2/3rds smaller and lighter. They are designed for drones.  They are missing the BEC (Battery Eliminator Circuit) and thus if you want to use one, you'll have to add it.


So, this is my setup with a BEC and the bullet connectors attaching the XT60 wires that are 12AWG to this 18awg set of wires that I soldered together.


The little servo connector that comes off those smaller speed controllers made for drones still plugs into your motor port on your receiver.  But, you'll need to to plug the little servo connector as shown above in an available port to give your receiver 5 volts.  Otherwise, you're not going anywhere!


Summing it all up

I know this looks like and sounds like a lot of work.  To wire up a plane's motor with bullet connectors and then do the rest of the speed controller build is less than 30 minutes.

I am a stickler for technique because I didn't use to be.  What I found was that sometimes the connection worked, and sometimes they didn't.  Now, if I do it right, I usually never have to worry about it, ever again.

I am not as bold as to say "This is the right way" or "This is the best way."  This is a way that works for me.


Monday, November 5, 2018

Bixler 1.1 V2 Kit-Build and mod ideas


Build or buy?


Having just finished the kit  I can say with all certainty that if you haven't built many planes as of yet you should probably buy the PNF (Plug and Fly) version that comes with all the major electrical components installed.  You just need to plug in a radio and you're set.  The  Kit/ ARF (Almost Ready to Fly) version comes without good instructions on how to build it.   The ones you can download online from HobbyKing 's website are for the PNF and not for the kit (ARF).  Which is a fancy way of saying, if you take on the kit, you're kinda on your own.

The PNF comes with a 1900KV motor which is plenty strong enough for flight. It balances right with a 2200mAh 3S battery.  The plane will fly well and you'll enjoy it.   And yet, this doesn't appeal to me.

Why build the kit?


Your first mid-fuselage pusher is your throw-away plane.   I still have my original SkySurfer V8 but it's been so mistreated that if it could it would be writing country music songs about me how I've abused her.   If it wasn't for this plane I wouldn't have fallen in love with the mid-fuselage pusher concept.  But, I also learned how to build them.

Metal gear servos-  There are four servos on this plane, two are difficult to get to in the body of the plane and the two on the wings see more than their fair share of abuse.   The  PNF comes with PLASTIC servos (yuck).  If you have plastic servos they are fine until they break and then you get to pull them out if you can and put in metal gear servos.  That's why I avoid the PNF

Motor options- There are some compelling motor options for this plane, even if you don't go the route of installing the optional upgraded motor mount.  At the time I bought this Bixler, Hobby King only stocked the upgraded motor mounts in Hong Kong.  The kit showed up right away, and it sat there until the motor mount showed up a couple of weeks later.   For the money, it's worth the wait.  If you can't wait there are aftermarket ones sold on eBay here in the states which I've used and they do work well.


When you go this route you are building a plane that is at least 700g in weight. The flying weight on my plane is 908g.   So, let's review for a moment, weight on a plane, good or bad thing?  I say it has to do with the type of plane you've got.  If you overload a flying wing, it still flies but it can do strange pitches and rolls and that usually isn't easy to correct.   You may find that the plane will fly a bit better in a good breeze than on breezeless days but it may never be just right.  The Bixler style planes have a lot of wingspan and they can take on the extra weight a bit better.   And yes they do fly better with a bit of wind.   Since the shape is like a glider you can refer to Alan Moore's video on how to add ballast for gliders.  You'll be surprised how much weight you'll need for a rip-roaring  windy day on the slopes.  The point is, the Bixler can withstand a bit of weight and you may find it actually flies better.

The downside of weight is that you'll need thrust to get the plane off the ground. This means having a motor that is within the thrust-envelope of the weight of the plane. If you're motor can only put out 600g of thrust and your Bixler weighs 900g then even if you could get the plane flying it will struggle the entire time.


What to look out for in the kit build


Servo placement

In the fuselage

There are two things you have to look out for.  The first is that the TowerPro MG90 9g metal gear servo didn't fit into the holes cut out for servos.  It required an Xacto knife to gouge the hole a bit deeper.  If you don't don this, the servo arms may rub against the top of the fuselage.  This could restrict the movement of the servos.  Since this is your elevator and rudder we're talking about, you don't want this to happen.


The other issue which to me is a major design flaw of the plane is the potential for the arms of these two servos to touch.  I had this happen with a Radian.  There's nothing like watching a Radian nosediving to the ground.  How I resolved this issue was to cut the servo arms even shorter so that they could never touch.  Did I lose a bit of control?  Maybe.  Have I noticed it at all?  Nope.

On the wing
The servos that go into wing for ailerons have restricted travel on the side closes to the leading edge. This was one again fixed with a little gouging with an Xacto knife.  It's a minor mod but worth mentioning.


Before you glue the fuselage together


There is a large wooden piece that has a fairly good sized hole in it and places for two screws.  This holds you wing together in case you want to screw them in.   I don't know what it is about the Bixler line but they seem to have the worst ideas for attaching the wings.  The problem with screwing in metal screws is that if you have a bad crash the screw cut through the foam.  Surprisingly enough, the pieces fit together nicely with the rods and the simple compression fitting.  If worse comes to worse and I have to look for a more permanent solution I would rather glue the wings on.  If you go this route look into plastic screws to replace the metal ones.  They break during a crash.


Motor lead extension

If you have extra wire, bullet connectors , heat shrink you're better off making this piece yourself.  In retrospect I made mine a little short. It worked, but barely.  If you're going to use the upgraded motor mount you'll need even more wire.  I suggest making it 12" (30cm) long.  After you hit the "Buy" button on Hobby King's website is a good time to make these three wires.  It's probably a good time to get all the electronics in order.


Extra Homework while you're waiting for your plane to arrive.


In that downtime between ordering your plane and figuring out what you're going to tell your wife there are a few settings you should learn on your radio.

Rudder-Aileron Mixing

There isn't a great video that explains this, and I guess for each transmitter it's different.  If you're a fantastic pilot you know how to bank with your rudder and ailerons.    But, there are ways to have your radio do this for you.  Since each radio is different you're going to have to research how to do this.  The end result is very worth it.  You want your rudder to point to move to the side where the aileron is up.  For extra credit, I changed the differential on the ailerons. The side that goes up goes up 100% of the way. The side that goes down only goes down 70% of the way.  The helps in fighting off adverse yaw.  It sounds nice, right?  The turns on the plane are so much smoother and doing this has added to my enjoyment of the Bixler.

Camber

This function droops the ailerons down and acts like flaps when you're launching. Make sure both go down significantly.  Put this function on a switch and once the plane is flying, turn off the camber.

The motor/prop combination I selected

The Bixler had dihedral on the wings.  The means the go up on the ends. What this does is to help level the plane.  It's about as effective as a good set of gyros.  The downside is that it effects performance.  Everybody has their own style, I like slow and quiet.  I also like  using motors that I have laying around.  I had a BR2212 1000KV motor laying around and thought it would be a nice touch to this plane.   The motor matched with the thrust needed to power this plane.  I put on a whopping 9070  triple bladed propeller.  My flights are lasting over 25 minutes and this platform is perfect for adding cameras.

Right out of the gate the plane flew great.  I need to fine tune the CG. It could probably stand another 14g in the nose.

Fine tuning the launch sequence

Put the plane on between 40 to 50 percent power.  If you can launch from a small hill all the better. The plane enjoys a bit of wind to launch.  My perfect launch combination is a well-balanced plane,  starting on a hill that is up about 3 feet high, and holding the plane close to the nose with my left hand and doing a five-step jog and toss.  Mid-fuselage pushers aren't easy to launch and thus would be horrible planes to suggest for beginners.

The landing


I have some planes that are so nose heavy that they have to be landed with power  If there's no power I have to point the nose down toward the ground so that it picks up enough speed to not stall  and then pull out of the dive about 20 feet from the ground and hope for the best.   Not my idea of fun.

The Bixlers land without power like they have the best gyro stabilizers you can ever imagine landing them.  It just puts a smile on your face when it lands.


Bixler 1.1 V2 or the Bixler 2?


They are very similar planes and chances are you don't need both.  They are so similar, I suggest buy what appeals to you.  There is only 10cm difference beween the planes. I will say that I find the build quality and engineering on the Bixler 1.1 V2 to be a tad bit better.  But, the extra 10cm makes for a smoother flying plane on the Bixler 2.  So, it's really a tossup.

Image result for bixler 2


Andrew Newton explains the PNF very nicely. If you're building the kit get ready to hit freeze frame a few tims to help you figure out what to do with all those extra parts.


Forget what you think you know about gliders.  Allen Moore talks about ballast and wind. This reinforces my point that a little extra weight won't hurt a Bixler.


Andrew Newton takes on rudder mixing with aileron.  He explains how to add it on a knob on a Taranis.  This is well worth learning and can really add to the enjoyement of your Bixler.  Mine is on all the time. I don't find that I ever need to turn it off.


Small Parts CNC makes a motor mount for the Bixler which is around $15 US. This guy takes about 10 minutes to explain 2 minutes worth of information.  I have this mount on my Bixler 2 and it works well.  I like the products from Small Parts CNC.


The fun of buying used planes

  If you like to buy and sell used planes.  Occasionally you can find really good deals. I mean, mind blowing deals.  Most of the time you d...