Tuesday, May 30, 2017

How to get your Drone / RC plane out of a tree

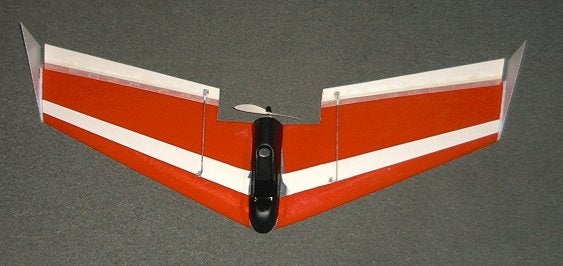
A bad end to a good day.

Time to stress


A plane/drone  in a tree is a stressful situation. It happens to the best of pilots and nearly everybody has at least one plane in tree story to tell.  If you aren't fortunate enough to live close to where the plane is stuck you may end up losing the plane forever.   So, drastic action is required if you want to save it. The battery will wear down and the plane/drone will suffer the effects of weather.


Height is an issue


Planes 30 feet and under are much easier to recover than when they are up over 40 feet and up.  Even with good tools you'll need leverage.    You will also have to be careful how you get the plane/drone  out of the tree so that you do as little damage as possible.   When it comes to getting planes/drones out of trees there are good ideas and bad ideas.  I'll start with the bad ones.


Climb up the tree and get it yourself.


When I was growing up, a family a couple of blocks over lost their father one afternoon.  He was trimming the trees himself and hit a power line by mistake.  They aren't certain if the shock killed him or the 40-foot drop.  I can't tell you how sad the kids were and how the loss really hurt the entire family.    If you are an experienced tree climber and the plane/drone is well within your wheelhouse then don't let me talk you out of it.   If not the medical bills you're risking will outpace the cost of your entire RC plane/drone collection.   Broken arms and legs are one thing, a broken back can never really be repaired.   You'll never be the same.   So please, safety first.

Throw rocks at your plane/drone


It's going to come apart in pieces which is fine if you just want the motor and speed controller and other goodies. Perhaps you won't have to resort to this.

Better ideas


Get some leverage on it from the ground.


If you can get a stick under it and push it out the way it came in  that will be helpful.   When I landed my plane in a tree 60 feet up, this is what I did.  I'll tell you the story.

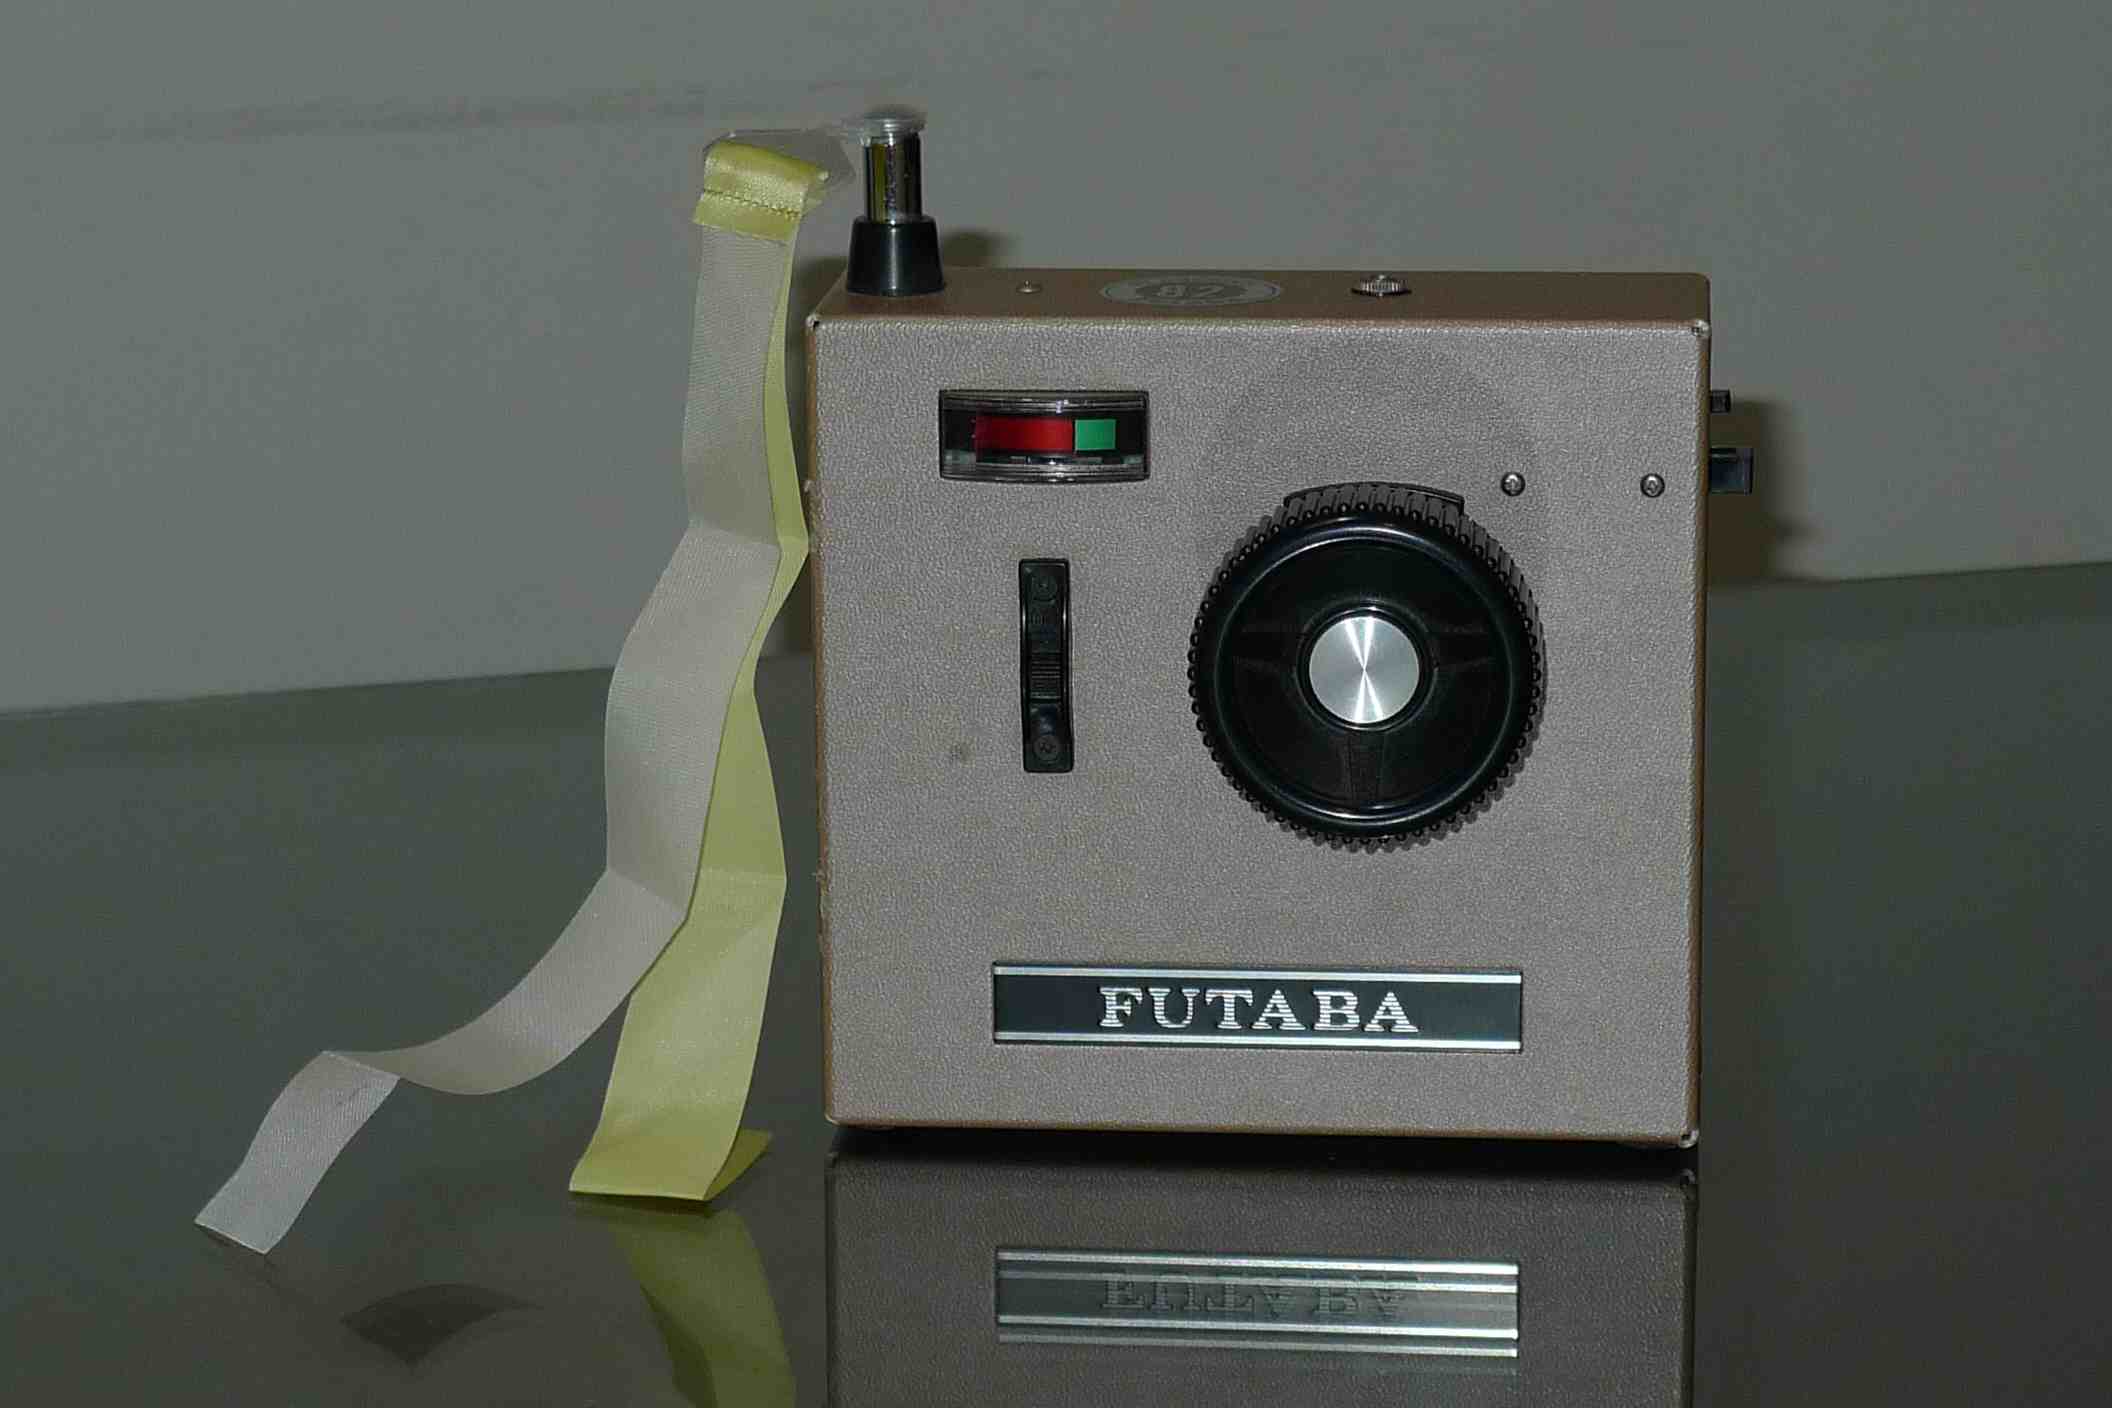
My plane was acting funny, pulling to the right so I tried to compensate with trim.  This caused me to put the plane in a spiral about 100 feet up. It landed perfectly in a tree, 60 feet up.  The plane was perfectly wedged in between branches.   Since it was FM the radio would keep the plane calm. When it was off the servos started twitching nervously.   Since the tree was near my house I put the radio under a bush and started to look for solutions.

Solution #1  Pull rods


I used these to pull electrical in my attic.  I've had a few too many desserts in my life and the thought of my fat ass squeezing between narrow beams while stepping on studs didn't work for me.   These rods worked great.  I got the electrical wires pulled without a problem.   However, that was a horizontal pull and the plane is up vertically.  By the time I screwed five rods together it wouldn't stand up straight, it just bent.  For the record that was 15'.

Home Depot PVC Pipe


Someone posted on a forum that they used 3/4" PVC pipe and that they could get it to up o 60' in the air.  I tried this, after a few pieces, it also bent.  However, discussing the issue with a buddy he said he had success by putting a piece within a piece.  He had 1" tubing and put in half inch PVC tubing on the used a half inch tube inside of an inch tubing inside, when they overlapped he would tape it with duct tape. My buddy said he could get up to 60 feet this way.   I haven't tried it, but if you're desperate then this doesn't sound like a bad solution   The inner tube braces the outer tubing.  Buy the longest lengths you can get such as 16'.  You can easily find ten feet.  Push the smaller pipe at least a few inches in the bigger one, put tape on the areas they overlap. This is going to get heavy once you get four lengths in so you may need someone to help you get it up.   My buddy said he did this and it worked fine up to 60'

What worked for me.


 The single PVC pipe idea didn't work.  What did work was tying the extension pole from Home Depot as seen above taped with duct tape  to another extension pole.  The second one was lighter.  I stood on a ladder and barely touched it nearly 60 feet up.  It took about 10 minutes to position the pole within the right area.  I was able to give it a light push.  It moved.  The with the breeze I was able to give it a second push.  The question I had was how it would fall out of the tree?  The answer was straight down, right in the middle of my forehead.   Good thing it hit something soft! The plane was fine, except the battery was dead and not recoverable.  I kept the new pole because I know I will doing this again.


Other options


Tree trimming


Perhaps you can reach a branch 20 feet up on the tree or lower with a pole saw and cut the branch down?  It's probably going to be fairly thick so plan on having this take a while.  The branches may help protect the plane/drone as it falls to the ground.   If this is on private property you, of course, want to get the permission from the property owner before you do this.  If it's in a park or land where the property owner can't be identified easily then it's up to you.  My thinking is that branches grow back.  Just be certain to clean up the tree branches when you're done.


Baseball and rope


"Take me out to the ball game. . ."  Remember those years playing high school baseball?  No?  Well it's time to live your glory days as you throw a baseball that is taped to a nylon rope up a tree.    It sounds easier than it is I'm sure.  The secret they say is to lay the rope out in a zig-zag pattern on the ground.  You take the rope to the ball with duct-tape and stand there throwing the ball up the tree.  Heck, have fun with it, offer $10 for the first person to make it over the branch.  When it comes down the other side you're supposed to grab both ends  of the rope and aggressively shake the branch so the  plane /drone falls out of the tree.


Wait for it to fall out of the tree.


If this is stuck in someone's backyard this may be  your only option. Sooner or later it may fall from the tree with a good stiff wind and if you leave them your phone number they'll call you.  It may take hours, days or months.


Call a tree trimmer


If you have a balsa wood plane or one that is delicate or perhaps loaded down with a lot of FPV gear the notion of it falling 60 feet to the ground can mean the plane/drone will get damaged beyond repair or the equipment onboard will suffer too much damage. This is when you get your smartphone out and start calling all the local tree trimmers in the area.  Most likely you'll hear "I can get to you sometime next week, or the week after, I don't know, let me look at my schedule."   Since batteries will die and never will be able to be charged again someone who can get to it today is more desirable.   This is a 15-minute job for them in most cases, and an extra $50 will be plenty persuasive.

Flying Clubs


Many flying clubs know of guys who have skills climbing trees to get planes/drone out.  Some people have little side businesses doing this.   You may want to call your local club and ask a question or two. They may take a few days getting back to you however.

The last resort


It may be too late for this for this plane/drone but in all of your builds put your name and phone number on your plane/drone.   I've found 3 RC planes on my morning walks over the years.  None have had phone numbers. The last one belonged to a friend of mine, months later I told him I had it in my garage.  He was happy to get it back.    Chances are very good that someone will find it and return it to you if they know how to contact you.  If it never comes back to you, well, write it off and move on. I'm sorry to say sometimes that's all you can do.   You can attach a note to the tree stating your name and phone number and the plane/drone  in the tree above belongs to you.  If an honest person finds it they will be in contact with you.


Monday, May 29, 2017

Hacker Hot-Wing Evo 1000


Hacker Hot-Wing Evo 1000


When I first saw the Hacker Hotwing online I liked it.  It certainly was a good value.  It was the first plane I built from the ground up., and it was the first plane that I bought the wrong parts for.      It mentioned desired KV but no real mention of  motor size. I ended up with  d3536, a motor that was for a plane that weighed four times more than the Evo 1000.  As my buddy Charlie says "You're only new once."   When the box for the Evo 1000 arrived it was much lighter than I imagined.  I threw it on a shelf and promised to get back to it.  About a month ago I did get back to it.  The instructions weren't very clear, so I ended up sending emails to the owner of the company.  He was the one who told me about UHU Por and did answer my questions about the build.   There were some steps to this day I still don't understand and  a few changes I made before the first flight.  But overall, I am beyond thrilled with  this  plane!

A smooth Delta Wing


I have a Radian, it has controls on the rudder and elevators.  In other words it goes up and down, left and right.  An aileron plane is a different flying experience.   It's capable of axis rolls, flying inverted, and more of what my friend Charlie calls a real flying experience.   Delta Wings don't have a tail, so the rudder and elevators are out of the equation.  It only has two ailerons.  Thus, when you push left on the stick the left aileron (looking at the plane from behind) goes up, the right one goes down. The opposite happens when you push right,  Pull back on the stick both ailerons go up, push forward they go down.   It sounds so simple, but getting your radio to cooperate is like solving the Rubik Cube.
This is by far one of the smoothest, most forgiving delta wings around.   Delta wings can be very temperamental, especially around 600mm.


How it flies


I know you will want to go big with this plane opting for big motors, large speed controller and heavy servos.  Seriously, keep it light.  If you do, you literally toss this thing with your left hand.     Simply power up to around 50% and toss.  Hold the controller with your right hand start flying.  The first 20 feet it's somewhat close to the ground and soon it's climbing.   Right away you'll feel like you're in control.

Instead of BSing you about some mystical religious experience of flying the plane I thought I'd tell you exactly how it handles in realistic terms.    Once you're in control the plane climbs nicely.    I find that close to half throttle takes her up and away at a decent climb.  It's not 3D climbing rates but it's stable. At my local park I have a pattern I fly which is to get up to around 120 feet then bank left and come back around.   I have a TekSumo which is 10% smaller at 900mm with a stronger motor.  At this point is where I see a huge difference between the planes.  The TekSumo has a stronger motor and if I don't change my angle of attack while making the turn the TekSumo can fall out of the turn into a spin.  The Evo-1000 hangs in there making a smooth first turn.

The plane is very maneuverable, much better than you would think a 1-meter plane would be. If the plane starts to sink quickly you have it a bit too nose heavy.  CG isn't touchy on this plane, but it does make a difference.  If  you find that you're having to manage the controls too much on the first flight, inch back your battery to the CG.  With my 1500mAh 3S   I actually place it perpendicular to the CG and its best about an inch above the CG line.  The plane is very predictable, it can handle a bit of wind with grace, but it's not really meant for gusts over 10MPH.  If the wind gets to be a bit too much it will remind you of a guppy swimming aginst a strong current. When you cut the power it should gilde.  That makes this plane very predictable and easily controllable.  The smooth , predictable drop from 100 feet means that you can precisely set this plane down.  Thus, if you're flying on a good sized front yard or a small park you can set this plane down in something as small as 100 feet as long as you have good clearance.    The TekSumo needs to burn off speed before it lands.  The Evo-1000 just seems to drop at a reliable pace.  So, when it's a couple of hundred feet out you have a good idea where it will land.

The plane does loops and axis rolls. So, it's appealing to someone who has more advanced skills.  It handles well even at very low altitudes. I like flying it close to the ground, turning close to the ground and then kicking up the power so that it climbs out of the park well before the parameter trees get in the way.

On calm mornings I put this plane up around 300 feet and let it troll around the heavens at 20% power.   I a getting around 30-minute flights on 3S 1500mAh batteries.    Part of the problem with being a stable plane is that it's not a stunt plane.   I have planes you need to be on top of every second or they will find the nearest tree to land in.  They are great stunt planes, but nerve racking to fly.   Part of what makes The Evo 1000 an enjoyable plane is that you don't have to micromanage it.
My skill level is very mixed.  I have many, many simulator hours.  They have been useful for me.  But, when it's reality with real trees the plane can get stuck in I am a lot more conservative.  This plane is perfect for me.  I would rate my skill level as an advanced-beginner.  One other thing I enjoy about this plane is that it doesn't have a cutout for a battery by the nose, though the instructions call for it. I find that the lack of foam makes the nose cave-in or tear easily during crashes.

Suggested pilot skill level.


The Evo-1000 is a very forgiving trainer.   If I were going to let someone fly on a buddy-cord with me, this is the plane I would grab.   It's small enough to throw into the back of the car without much fuss.  I can see myself taking it out visit friends and letting them fly it at their local park. People with more advanced skills may enjoy it for its easy flying characteristic

Charlie give it 5 stars!


My morning flying plans with Charlie  (a very skilled RC pilot)  got cut short when we discovered a stripped servo in the Radian. Charlie lives about 45 minutes away so I decided to take along planes that I had recently built.  Of all of them the one I felt the most confident about was the Evo-1000.  Charlie said "Get it ready!"  Almost like a military inspection I had the plane ready, he looked it over, didn't bitch a whole lot.  The CG was right, the plane was ready.  He threw it, fired it up and within a minute there was a smile on his face.  "This is a five-star plane!"   It wasn't a perfect plane, the motor was 1000 KV wasn't a screamer.  Charlie found it to be very predictable and handled very well.  Though he's an actual pilot and has built untold hundreds of planes he enjoys planes the best that don't need to be micromanaged.


The Build

The building process on my messy workbench. 

When the kit showed up in the mail it was about 1/10th of the weight that I thought it was going to be.  The box weighed nothing, it almost felt like was empty.   The instructions left something to be desired, but most do.   The instructions were better than most though a few steps still have me scratching my head.    Once you've built a few foamies you almost don't even need instructions.  The instructions were in many different languages and at least one step was repeated twice.  For the most part you're just gluing the cores together, burying a spar, putting the winglets on, the servo horns, and strapping on electronics.  There are "vortex generators" on the plane.  They look like fins.  They improve the aerodynamics of the wing.   The control surfaces are a very nice size as well.  I do like how the plane is made.    Just be certain to get your own control horns and some Dubro EZ connects.  I am also going to redo the plane in the near future and get rid of the carbon rods used as control arms.  I am not pleased about how much the rods flex when moving the servos.   I also like the graphics on the plane.   Using UHU Por it took me a few days to put this plane together spending a little time here and there.    As for storage, it is said that the plane should be hung by its prop.

One meter Delta Wing
The original 4 foot Zagi 400X from the mid-1990s. 

This is a good size.  Way back in the day the original Zagis were shown at the cliffs above the beach near Santa Monica.   You have to keep in mind that this was in the era of balsa wood gliders.  So, a foam plane was unique and different.  The Zagi  was 4 feet (48 inches).   That's a robust size for a glider.  In metric the that works out to 1219mm.   Keeping in mind that most of these planes are made in countries that are on the metric system the planes are now sold as 1200mm (1.2 meters) and more common is 1 meter.    One meter is a tad under 39.5 inches.  As the planes get smaller they get a tad bit more sporty.  They can also be flown in smaller parks.    The problem is, the smaller the plane the harder they are to see when they are higher in the air.  I find the Evo to be a great size, I can see it 400 feet up.

The build Quality


I think it repeats mentioning again this plane is very light. Though it's a light grade of EPP foam it's thick.  The plane feels like a Nerf football and Morey Boogie Board got together and decided to make a plane. This plane is more like the old school Zagi in shape than the 1-meter planes coming out of China.   It has a nice, fat leading edge.  It's much thicker than the cheap 1-meter planes from China.  It's a more robust build which can take a decent motor.  I haven't put something insanely sick on the back such as a 3536 with a 5A Lipo battery in the front.  From what I've read, once you start loading the wings down with heavy gear it loses part of its charm.  Also the wing load won't support the weight with the thin spars that come with the plane.  You can also break the plane. I do like that the plane isn't pre-cut with a battery compartment for a battery that doesn't fit.  I simply don't like the idea of cutting foam near the nose of a plane.  When you crash, this is the first area to tear.    I simply strap my battery to my plane and use Velcro to hold it in.

My parts:


Motor:  BR2212-  This is the second motor I ordered for the plane.  The specs were rather vague and I had no clue what to order.  So, I ordered a D3536 with 60A speed controller.  That's four times the weight of the BR2212.  The motor I put in the plane was a BR2212-1000KV.  There are many different BR2212s, this is the one I bought.
This little motor is actually really great, though it was designed for a 10" prop in mind it works perfectly fine for the Evo-1000. The plane specs out at least a 1000KV motor.   You can go with a smaller prop and a higher KV motor if you want to push a bit more speed.  I like the slow flyer big prop however.

Speed controller-  I used a Plush 30 for the speed controller.   I've recently switched over to Skywalker speed controllers, however.  Why 30A?  It's what I had laying around.  The motor can get away with a 20A ESC.  If this is going to be a special plane for you and you're going to keep it around for a while then, by all means,  spend the extra $ 7and get the Hitec ESC from Omni Models.

Servos- I threw in the generic Towerpro 9G servos.  They work great.  And if one breaks I'm only out a couple of bucks.  I have recently switched over to the metal gear servos.  They are a bit nicer but a lot more expensive.

The prop is a 9" APC. I believe it's the 9060 EP  E is for "electric" and P is for "Pusher."  Here's the link from Omni Model.  I would suggest an 8x4 with a 1400kv motor however.

The radio- Select your favorite.  I use both FM and 2.Ghz.  By now you probably already have a radio system.

Battery- LiPo 1.5A 3S 11.1V.   With this battery, I am getting around 30-minute flights.   The plane isn't tail heavy with the light motor so I find that I am pushing this battery closer to the CG than the nose.

The plane-  I bought the plane from OmniModels with my own money-  Here's the link to what I bought-

Control Horns-I know my experience with RC planes is limited. If I can teach you anything it would be to get yourself a whole lot of good control horns.  Throw away the ones that come with the plane. I'm sorry, I have to bitch here for a moment.  Across the board the control arms, control horns and ways of linking the arms to the servo arms are bad from most models I've seen  The only thing that is about as bad are the ways that the motor mounts to the plane.  I really think that Omin Models should have a set of parts that they sell on the side of this plane as an upgrade.   The motor mount on the plane isn't bad but the rest needs an upgrade for sure.

Buy UHU Por- Dealing with the owner of Hacker he told me to not mess around with anything else.  This is German glue, and I have to say it's simply amazing.  I bought mine from Amazon.  If you read the UHU Por Review I wrote I mentioned it's not shipped from the USA.  At least not at the time of writing this.   Amazon took about a week to get it to me.

My overall evaluation


I give the flying characteristics 5-stars.  But the build quality gets knocked down a star with the cheap parts.  The EPP foam cores are great.    I highly suggest this plane for any beginner, intermediate pilot.   Just do yourself a favor and get some bettter parts.

Suggested upgrades


Aside from the control arms and control horns I am going to make a suggestion for reinforcing the plane.  The plane could benefit from a real 2mm or 3mm carbon rods running horizontally from wing to wing near dead center.   If you order the spars from China they come in 500mm lengths.  If you order them in the states you can get them in 1000mm lengths.   You may need one in a 1000mm length to go from one wing to another.  The plane isn't floppy when you hold it, but this reinforcement is something I plan to do after a year or two as the stress of flying takes its toll.    If you're prone to crashing a lot you may want to run 2mm carbon spars buried in the leading edge to help keep together.   As the instructions suggest I keep my plane  hanging when not in use


One last thought

Foamies are resilient planes.  You can be somewhat abusive to them and they will bounce back.  But I don't see them as forever planes. The hinges will come apart over time and it will start to sag even with the best care.  Thus, when you find a plane you really like, it may be worthwhile to buy the model again and put your parts on the newer plane.   I can see myself ordering another Evo-1000 in a couple of years.   This isn't a TekSumo.  It's not begging for hot rodding.  I really don't see myself outgrowing this plane.  I very much enjoy flying it.

OminModels

I've had the best shopping experience with OminModels.  They are now my "Go-To" supplier for RC planes and parts.


Saturday, May 13, 2017

The slow death of FM transmitters and receivers


FM transmitters and receivers, the good ol days.


Image result for old rc radio
Today we think in terms of binding our radios to our receivers and never think twice about flipping on our radios when we're at the flying field.   Our radios won't interfere with our friend's radios.     It's never a consideration.   That's the beauty of flying on narrowband at 2.4GHz.  Simple, inexpensive worry free flying.

And yet there was a time not too long ago, in the dark ages, back before lovingly supplied us with our electronics when Radio Control meant dealing with the FM frequency.   We mostly flew in the 72MHz range with 49 channels at our disposal and up to 90 channels if we had radios that could handle the extended range.  For the Ham Radio operators, they had their own special channels.  Instead of discussing  the merits of AFHDS and Tactic SLT we were debating the merits of single conversion versus dual conversion crystals.  Yes, crystals.   Your radio transmitter and receiver had to have have matching crystals.  And this is where things got even more specific.  Certain radios took certain crystals and  what worked and what didn't was hard to keep track of.  If you followed the instruction laid out by the radio manufacturer or the guy behind the counter at the hobby store you were fine.   But, once you got to the field you had to check to make certain that nobody was on the same channel you planned to be on, or you could accidentally crash a plane.

No such thing as a dead technology, it just goes out of fashion.

I'm of the opinion that technology never really dies, it just has phases.  Right now the idea is that when you put a plane or drone in the air you want exclusive flying privileges.  you don't want anybody else having control of your plane, even for a moment.  But, I see that changing in the not too distant future.

FPV, the next generation


What's all the rage right now is flying first person view (FPV).   Instead of watching a plane fly around in circles above you the thrill is attaching a camera to the plane from the view of the camera.  This is a new level of trust in technology.  Though they are still controlling the plane via radio they don't have to maintain a view of it from the ground.  This allows people to fly the plane miles away.  And this is a lot of fun, for now.  But like anything where people look to push the boundaries, this won't be enough.   And besides there is a limit the cameras can broadcast and the radios can work.  If the radio connection ever fails there is a "Return to home feature" which will send the plane back to where it started from.  

Beyond FPV


The next thing past FPV is the realization that you don't need to control a plane.  As long as you can assist with launching it and be around when it lands a computer can do the rest.  Intel Corporation is already ahead of the curve in respects to computer controlled flight.   A very practical application is surveying land.  A small plane with a camera and a computerized course can do an amazingly precise job, cost effectively  One 45 minute flight over an area can render photorealistic 3D modeling. 

Intel already has something called the Aero Compute Board which is a computerized flight controller. The good news is that it's open source the bad news is that the board isn't for sale by itself, yet.   But, mark my words, this is the next wave in radio controlled flight.

Here Intel demostrates it with a drone.  Intel is selling it as part of a kit with fairly cheap and readily available accessories.  No idea how much it will cost.

https://software.intel.com/en-us/videos/preview-of-the-intel-aero-ready-to-fly-drone

One other thing Intel is also working on which is kinda a big deal if they can get it to work a bit faster is "Real Sense."


What does this all mean?


The first question is why is Intel working on such a project?  Intel is a multi-billion dollar a year corporation that has real things it works on.  However, when Intel missed it's shot at the smartphone revolution it didn't want to be left behind.  There are a few concepts that are hard for people to agree to such as driverless cars and drones flying around us all the time.  However, this reality is coming.   Amazon has already said it plans on having drones deliver packages. You can rest assured that people won't be flying them.

In the short term, the next phase of RC flying will be going beyond where FPV can go.  Where I live there are mountains very close to my home that prohibits me from getting line-of-sight any further west than a  mile.   What is absolutely cool would be to layout a path on Google maps of where I want it to fly and have the plane fly it's mission like we've seen in the Intel video above.   When it's done it would head back to where I am and I would take over control once the plane is range.  I would want to do this to capture video of places I can't get to.

The next logical step
If I start a plane off in flight and the computer takes over the flight why not fly it to someone else who has a remote? I can literally see flying clubs where one person starts a flight and it flies to another person who takes over the flight with their radio and lands the plane, charges or swaps  the battery and sends it on to the next person in the club.   The only problem is that you can't do this if a plane is bound to one remote  This is where FM comes back to life.


Thursday, May 11, 2017

UHU Por-Review

What is UHU Por?


Image result for uhu por glue
From the UHU.com website:

UHU por is a quick-setting special adhesive for bonding expanded polysterene, e.g. Styropor® also in combination with other materials. It forms an elastic adhesive film which is highly resistant to age, colorless and waterproof.

UHU is a German company.  As best as I can tell, at least some of the UHU Por is made in China.  The Bolton Group who owns UHU also owns Bostik USA which is well known for their construction and industrial adhesives.  There must be a good reason why UHU Por isn't sold in US Retailers. I am free to speculate.  My best guess is that when you're dealing with  large, multinational corporations, ones that are conglomerates that acquire other corporations people get very defensive.    These corporations are usually run as independent companies.  They have their own product lines in their established markets and don't want to be told what to sell by the bean counters who put these large conglomerate deals together.  They also object if  a corporation under the same conglomerate umbrella turns into competitors in their established markets.  It's more likely a turf war more than any harmful chemicals in the glue that keeps it from being stocked in distribution in the United States.    If you buy it, it will ship from out of the country.  My last purchase was from Amazon, it arrived in a week.


Look out for a good deal.

When I had foreign exchange students from Germany, I tried to take them to American places.  Toward the end of the trip I decided to show them WalMart.    Most of the Chinese made items were available in Germany.   These were teenage girls however, and they wanted to go to the Heath & Beauty section.  When they found the Revlon makeup they were grabbing it off the shelf, calculating exchange rates on their phones, buying more.  When they got back home they started calling their parents to send more money.   Word of this wonderful place known as Walmart spread among the group and soon they were asking to go back!
So, when my trip to Germany happens I already know what I am going to do.  I am going to wear my not best clothes.  At the end of the trip I will throw them away.  Half my luggage will be German chocolate bars, the other half will be  UHU POR.   I am not kidding.

Because it's sourced elsewhere it can sell for a bit more than adhesives of similar sizes in the United States.   I recently bought three tubes of it and paid around $5 a tube including shipping for a 40ml tube, so it wasn't bad.   You just have to be careful when looking around online, some people want way too much money for it.

A contact adhesive

The idea behind a contact adhesive is that  if you're joining two pieces of foam together you need to put a bead of glue on each side, give it ten minutes until the adhesive gets a film on it, then join the pieces together.    You can use an accelerator with it, I find it doesn't help all that much.   Don't bother spreading it with knife to thin it out.  I find that the pores in the foam seem to allow plenty of surface area for the glue to hide.  In my experience, thick beads work the best.

A flexible bond

Glue is often thought of in very simple terms.  All it's really about is attaching two or more things together.  But, the adhesives and the bonds need to be considered.  Let's compare a few.

Elmer's Glue-All  - This Columbus, OH glue is world famous and a staple in many American homes. It's abundant, dirt cheap and highly effective.  It applies quickly with no mixing and  does provide a very strong bond with excellent tensile strength.  Many foamy enthusiasts swear by it because it bonds strong, covers well, and dries clear.  The downside is that it dries slowly.  It can take days before it's fully dried.  You can't use it for quick fixes on the field. If you goop it on too thickly it can form a layer of what looks like a think piece of plastic that can easily shatter.  If you push it together too firmly you can create what is called a "starved joint."  The bond will easily break.

Epoxy- Similar to fiberglass resin epoxy creates a plastic like bond that is also very strong. There is a lot of confusion as two what the different numbers mean.  5 minute epoxy means that once you mix it you have essentially five minutes to apply it before it starts to cure.  30 minutes means you have a longer period of time before it starts to cure. The end results can be quite different  between the five minute, 15 and 30-minute epoxies.  I prefer the 30 minute epoxy.  Relatively speaking, it's fairly cheap and easy to aquire.

Epoxy does offer a very strong bond as well.  Depending on where and how it's applied it can give extra support and rigidity to a foamy plane. It can also shatter with impact, and like Elmer's glue, it offers no flexibility in the joint.

UHU POR-Flexible bond


When modern cars are designed they are done so with the idea that they may very will be crashed.  A crash will transfer a lot of energy in a short period of time. Absorbing energy and transferring it is part of the design. If a car had a solid wall of 3-inch thick steel at the front of the car it wouldn't be safer.  That solid wall would soon be what stops people in the cabin from going further during a front end collision.   Ironically many bumpers on modern cars have styrofoam inside because foam helps absorb energy in low-speed crashes.    What is important in a crash isn't rigidity as much a flexibility so that energy can transfer and get used up as metal, plastics and foam  warps, bends and crushes during impact. The idea is to use up energy before it gets to the occupants in the cabin.

If you think of planes in similar fashion then you'll know that a hard bond isn't always the best idea when it comes to crashing a plane.  A flexible bond on a flexible EPP foam wing means that the energy is transferred through the bond to other parts of the foam.  What this means is that your plane may not split in half at the joints  when it hits the ground.

UHU Por features a flexible bond.  For certain applications this is what is preferred, such as flexible EPP foam.    Though it's a contact cement I find that it takes a few days for it to fully dry.  One of the main ingredients is natural rubber adhesive along with other things that allow for a good bond.   Rubber cement is fairly inexpensive and provides results that are too aren't good enough to hold together foam  RC airplanes.   UHU Por smells like it has a CA adhesive in it as well.   It's impossible to tell exactly what's inside and to what ratio.  All I can say is that UHU Por simply works.  It doesn't foam up like Gorilla Glue.

My rating

If money is no object and you want a very good adhesive, UHU is the best I've found for EPP foam planes.  The cost and lack of easy availability drags it down a few notches in my book.  I give it an overall rating of  80%.  I will continue to use it though I will seek out other options.

Update-  I had to remove some POR from a plane today.  It didn't come off, but tore the EPP foam below it.    I am so very impressed!


Hacker calls for UHU POR specifically for the Evo 1000 build. 


Sunday, May 7, 2017

Connecting different gauge wires

Image result for connected wires
Soldering is prefered by many

My goal with a wire connection is one that it is not only connected 100% of the time but one that is strong and protected from the elements.  The issue of having a strong connection comes with the fact that the battery may pull on the connection in cases of crashes. A very fast, and simple connection would be to simply use wire nuts.  If I were to use batteries with different connectors, one with an XT60 connector and another with a JT connector I would be tempted to use wire nuts because I could change out the connectors before the speed controller.   But, that's a bit more work than it's worth.  I would also worry about the connection over time as the wires would be bent onto each other over and over again.    I also do want some protection from the elements and most importantly to ensure that there is no way the positive and negative wires would ever touch.


Talk to any old-time electrician and they will swear about soldering.  Soldering a 10 gauge wire to a 16 gauge wire is something that they have no issue with.  I do because that 10 gauge wire takes a lot of heat to heat up and at the ranges hot enough to melt solder it also melts the insulation around the wires.  A good crimp is a close second.  If you gauge effort, time and the final results there are many who swear by crimping.  

100% of the time connection

My Radian had a slight electrical connection issue.  There was a connection between the battery and speed controller that would fail if the wire was twisted in a certain way.  It was super easy to fix and worked most of the time.   Perhaps this little issue wasn't worth worrying about?  Of course, you never can really tell when a connection would fail. Maybe it would be just momentary and the servos would bounce back on once power was restored?  The motor wouldn't be ready for at least 10 seconds as the speed controller goes through its fire-up song.    The good news is that no matter what the plane would soon be back on the ground, most likely in a debris field.  I know that "Build, fly, crash, repeat" is our motto.  Yet, a little extra caution will decrease the down time.

The problem-Different wire gauges


My preferred crimping method

The cheap plastic crimps mainly from China are fine for some applications. If I were wiring two pieces of speaker wire together inside a house it would be fine. I would simply make certain to keep the insulation inside the crimp to prevent shorting.   When you put a heat shrink around it the heat causes the plastic to bend back to its normal round shape.  And then there's the issue of wire gauges which are different gauges.  The connection of the thinnest gauge will always be suspect.
For connections, if different gauges, ones that will be exposed to the elements I use non-insulated step-down crimps.
Non-insulated Step-down Butt Connector  The step-down crimps can be found in many different flavors, insulated, non-insulated, and ones that are heat shrink crimps.  Sure they are more expensive than the bag of 100 crimps for $5 but they work all of the time.  Putting heat shrink around them doesn't affect the crimp.   For what I have found it's the best solution for getting it right the first time.


The fun of buying used planes

  If you like to buy and sell used planes.  Occasionally you can find really good deals. I mean, mind blowing deals.  Most of the time you d...