Wednesday, September 19, 2018

Is our RC flying hobby going away?


Image result for FAA laws meme


This is the fourth time I’ve written this blog article, and to be honest I have never struggled so much with a subject that I have with this one. I have completely changed my mind about what is going on and what the future has in store for us. Trust me, I know and understand your concerns. I know we are afraid of a day where our civil liberties will be reduced to the point where government regulations will require us to go far away from the cities to fly in some government approved RC flying areas that are desolate and unpopulated. But, I don’t see that day happening. I do see us losing more and more ground over time, which is concerning.

Rule 336 and US Laws


There’s been some interesting commentary about American drone laws from people from other countries. American laws have international ramifications as other countries look to the United States for policy. The current negotiations with Congress and the FAA (Federal Aviation Administration) to regulate drones has been described in soap opera terms. So, what I’ll tell you isn’t gospel, I’m just an American who has experience with our laws, our legal system, and our various forms of government. The main thing I want to say is that this will play out for the next decade.


Section 336 concerns our rights to fly our drones and RC Planes ( known as Unmanned Aircraft Systems UAS). The FAA tried to step in and regulate the zero to 400-foot airspace. For a while, we had to register with the FAA and get a special license number that we had to put on all our aircraft that weighed more than 8 ounces. Then a hobbyist sued the FAA stating that they didn’t have the right to regulate that airspace. The FAA lost and the licensing went away. One of the main issues was that anything over 8 ounces needed to have the FAA number on the plane or drone. That’s just a little intense. A lot of us were hoping for something under 2 pounds and 4 feet shouldn’t need regulation. And the lobbyists for the Aeronautical Modeling Association (AMA) have been pushing for more lenient rules, or none at all from the FAA.


Nothing is written in stone


Whatever the FAA agrees to do today may change dramatically in a few years. The FAA has been known to be a fairly flaky government entity, and not always well run. Thus, whatever deal we strike with them won’t be written in stone. What I’ve read into the FAA’s statements thus far aimed toward us is “Don’t be stupid, and stay out of our airspace.” The FAA will want to do something to regulate us, but you can count on it to be as little as possible because they don’t have the resources or interest in micromanaging hobbyists’ UAS. To the FAA, we’re just an annoyance.
This next part is what I think a lot of people are missing. The FAA can help craft some Federal laws for UAS. The ones I can tell you right off the bat they will institute are to not fly over 400 feet, to have radio beacons that display our FAA numbers, and not to fly over highways, crowds of people or power lines. On a local level (state, county, city) we cannot override the Federal laws, BUT THEY CAN ADD TO THEM. Any state, county or city agency can say for example that we cannot fly at night. They can write city ordinance restricting UAS flights over parks and government buildings. I live in Southern California and I’ve seen some beach cities starting to spell out more regulations on UAS. Over time the list of dos and don’ts gets longer.


And now, we've got big business in the act.


There is a new organization known as the Commercial Drone Alliance (CDA) that has popped up on the radar. The head of the organization, Lisa Ellman has been described as a supervillain by some. Some worry is that the CDA will regulate our hobby literally off into the cornfield somewhere far from the city. There are things I like about her others I don’t like. She seems to project a sincere desire to help the hobbyist with the UAS regulation. It doesn’t seem like she outwardly hates us. But her credentials include a stint in the Obama administration in drafting policy. Thus, she’s a policy wonk, she is now working in the private sector for a law firm and you can expect she of course wants policy, lots and lots of it. Obama was big on big government with lots of regulations. Thus she feels that more regulations are beneficial to us.


She heads up an organization called the Commercial Drone Alliance (CDA). Some companies that want to cash in on commercial drones have the law firm she works for (Hogan Lovells LLP) represent them. She is more or less a lobbyist for commercial drone applications. One member they don’t have is Amazon.


The major concern is that the CDA will push for regulations on us to push us out of the cities, or make use use such expensive hardware that that it will drive RC pilots from the cities. I’m a bit optimistic about the stance of the CDA. I think that Lisa gets that the teenagers who stay up late nights playing with their drone’s firmware, and soldering their flight controllers are the same people who will be working for CDA partner companies in the future. I really don’t see that drones will only be for commercial applications in the future. They just want to have jurisdiction in zones that they will fly in.


Commercial drone applications are more than Amazon’s Prime Air.


Somehow this is the only thing that comes to mind when we think of commercial drones. Whenever we see a movie, a TV show or the news you’re likely to see drone footage now and then. This is a commercial application. Real Estate agents love drone footage. So do brides who want really cool drone footage of their weddings. The list goes on and on. Thus, when we think of commercial drones we need to think beyond just Amazon.



What is wanted from us.


Sooner or later we’ll be going back to UAS registration with the FAA. Along with that will be a requirement to have a radio beacon to alert commercial drones which are flying in the area. I don’t know if this will ever see the light of day, if so, just go along with it. Most of the planes I fly are smaller than Canadian Geese which makes me wonder? If you’re afraid of running into my UAS, how are you going to avoid the geese and other larger birds?


Commercial drones will help our hobby.


The downside to the CDA and Amazon pushing for more regulations is that we may potentially have to jump through more hoops. Obama, he once said “If you own a business, you didn’t build that, someone had to help you along the way.” So, who helped the Commercial Drone Association? Another way of asking is who put billions of dollars into drones that helped pay for R&D thus far? Oh yeah, that’s us! You, me and millions of other folks. So yes, we deserve respect. Equating us to idiots solely because of a few bad actors is like equating baseball players to villains because a few people use baseball bats to do assaults.


Somehow, everything I’ve seen or read about the Section 336 and future laws is spelled out in terms of doom. Yes, there can be more restrictions in our future. But, is the hobby really going away? I doubt it. Let's look on the upside. With commercial applications comes one thing we can appreciate, more money floating around for R&D! Though we may not get our hands on proprietary drone made by large corporations we will benefit from more money flowing around.
I am hoping for rapid advancements in electronics and motors. And who know, maybe better lightweight materials that inexpensively go beyond foam?


Be an advocate in your city


I do most of my flying in empty parks. It’s amazing how often the parks are empty because kids just don’t play in them like they used to. Instead of worrying about the FAA I worry more about my local city coming up with ordinances. A poorly written ordinance can lose in court. Thus when cities have a problem they really care to get rid of, they tend to spend a lot of money on a well-worded ordinance. There is something in our state called the “League of Cities” which is an annual meeting where cities sometimes share these well-worded ordinances with each other. So, if UASs become a problem in one city it won’t be long before many cities have the same ordinances. This is why I feel that worrying only about what the FAA may do is a waste of time. What may help is if you’re up on the laws you may want to go to your local city manager, code enforcement officers and members of your city council and let them know that you’re into model aviation and leave them your phone number, What I have found is that when a city has a problem they look to mitigate the problem. Once an ordinance is written cities are reluctant to change them, and you may end up needing to go to court. The threat of legal action may get them to budge, but that’s an extreme which is expensive, time-consuming and doesn’t win you friends in city hall. Sometimes just getting known is all you need to do. There will be many changes when it comes to drones over the next ten years, both in laws and technology. It’s good if you’re a resource and an asset to your city.


Final Thoughts


The partisan bickering in Washington has slowed down progress on just about everything. Heavy-handed regulations in conjunction with the repeal of Section 336 has been discussed, and so has pushed the whole matter ofe responsible UAS pilots.

Wednesday, August 22, 2018

Franken-Hacker

The donor Hotwing 1200


Breathing new life into a dying plane. . .


If my original Hacker 1200 could talk, it would be reading me the riot act on Jerry Springer!   The maiden flight didn't go so well.  The plane split in half about 80 feet up and hit the lights at a Jr. High playing field   Then about a week later, with some glue and a little bit of carbon fiber rods added to the mix it split apart again, at 600 feet.  This time I had a camera on it, and made some neat video of it spiraling to earth   But the fun doesn't stop there.  I went back home and gave it an insane amount of  Gorilla Glue, carbon fiber of foam with Gorilla Glue sticking it down, filament tape, and lamination.   Not my finest work. But, surprisingly, it flew.   And I flew it many, many times.   Then I ordered the plane once again and this time I really built it right. Oh, how I love the new Hacker 1200!   But the older one just kinda got left behind.   When I came upon deal on  to buy even more kits from OmniModels I picked up a couple said to myself  "It's about time to call it a night on the original  Hacker 1200."    But to quote the immortal words of John Belushi


Me with my new Hotwing 1200.  It gives me hope for the Franken-Hacker
We've all been there

One morning I woke up and took the newer Hacker 1200 for a flight.  The winds were non-existent. The plane just flew (when the trim was set) like it was on glass.  It was a memorable experience.  It was an experience unlike what I've had with the original, beaten up Hacker.  Although the orginal Hacker flew okay there wasn't a "Wow, this thing is amazing, let's take it up again" type of vibe to it.  And that, in a nutshell, is the problem.  If it doesn't get flown, it just collects dust.  So, the challenge is to turn this into a plane that is compelling and that I look forward to flying.


One last look, of horror!


Rats nest wiring meets Gorilla Glue
I took it up for a couple more last flights.  It was "okay."    So, I started taking it apart.  I felt a sense of shame that one only gets when the media shows up behind the animal control officers to remove your 350 rabbits from your home.    Okay, it was beyond wonky.  But to be fair I did crash it a bunch of times, I've lost it twice and yet it's still around.  The original split wasn't really ever fixed and now there was another split at the end of the wing. In other words, filament tape and lamination held the plane together.   I guess I am like the guy who holds up the muffler on his car with wire coat hangers.  Hey, it was my learning plane.

The vision


Despite the many issues I felt I could bring this plane up to a standard it had never achieved.  Even though the plastic gear servos had never failed, it was time for some metal ones.   The foam elevons which had fallen off and had been glued back on many times would now be replaced with balsa wood elevons and plastic hinges  There were still two rather large issues. The first was what to do about the winglets and the second was fixing dead foam spots that were filled in with Gorilla Glue.


Large Winglets on  LE. The first thing to go.


The rounded edges shaved off for a triangular, flat winglet
I cut out the dead spots of foam, filled with extra foam, then shaved down to flush.
What I concluded was that the last inch and a half on the wings were rounded.  If I could shave down the ends so that I could get a flat winglet on the edges, I would be better off. When I did this I had a couple of nice chunks of foam.  I cut out the dead foam spots and used the newly found foam to fill in the gaps.


 Franken Hacker-The Plan


And that's how it all started  Filling in gaps with foam from other parts of the plane.  Yes, the wingspan is a bit shorter by a little over 2".   I don't care, I wanted smaller winglets on the end.  The parts of foam on the leading edge that was open to accepting the factory original winglets led to breaks in the foam. I wanted the LE secured.     Then I used an aggressive amount of carbon fiber, using I-beams whenever possible This stiffened the plane up like it never had seen before.  Next, it was time to fill in the gaps it up with light duty spackling.  Finally, it would be sanded then painted.  Then more 5 mil lamination to provide even more rigidity.
The new plan is starting to take shape

Lots of lightweight spackling to fill in holes. First coat.


My expectations


I fully expect that the plane will have a different feel to it. Right away I can tell its stiffer.  The shorter wingspan with extra firmness should give it a bit more of a sporty feel. The size will still make it glide nicely.   The jury is out on the winglets.  My theory is the oversized, rounded winglets on the leading edge was more for show. Having a flat flying surface should help give it more of a smoother flight.  Though I will sand the plane down before painting, the areas where light-weight spackle occurred will be smooth, whereas the foam will be textured.  So, it will be evident when looking at the final build where the spackling was applied.    The best I can hope for with this plane is that it looks nice though it may never look pretty.  What I consider success is a plane that I look forward to flying.

Hacker appears to be losing its distribution in the United States so this plane will be hard to replace.  There aren't many 1200mm planes you can find in the market for under $50.

The Current Status Of The Project.


I am currently painting the wood elevons and winglets.  The light duty spackling is drying and needs to be fully dry before sanding and painting.  More to follow in the next few days.


Plane crash video from 2017


The crash occurs at 3:00 minutes.


Tuesday, July 17, 2018

HobbyKing Bonsai II-#Fail


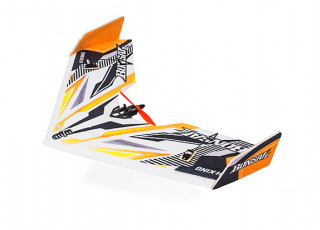
The original Bonsai


Image result for hobbyking bonsai

The original Bonsai was beloved.  600mm and smaller planes are difficult to set up right because they are so very dependent on getting CG spot-on.   They tend to tip stall easier and can be more difficult to handle in the air.  The original Bonsai seemed to be the exception.  It was possible to dial this plane in, and with a 3S 1amp battery half an hour or longer flights were easily achievable. Best of all, the plane was something you could land just about anywhere including a front yard with a little bit of grass because it was so very predictable.

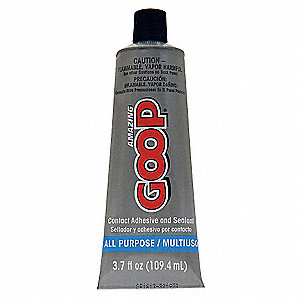
For years people have dreamed about something they could throw in a trunk and take out and fly on a whim. This plane was it!  Its durability was off the charts.  People discovered that simply using a thin layer of Goop on the leading edge made this plane bounce on impact.


All Purpose Adhesive,Squeeze Tube,Clear


One of my Bonsai's got challenged when someone ran into it with a heavy 4' Delta Wing going at full speed. The motor mount ripped from the back of the plane.  I was staying at a rather boring resort in Mexico with a friend when this happened and it seemed half the people at the resort watched this happen because I got questions about the next day.   Anyway, contact cleaner in the motor and a little CA adhesive and the plane was back at it.   Though it's not "perfect" it's 96% as good as new.  Which is great because HobbyKing has now made this plane a collector's item.

Bonsai II- Ruining a legacy


Image result for hobbyking bonsai 2

For the record, I don't own the Bonsai II.  It's a plane I wouldn't recommend.  Let's just say that promo videos showed people nearly crashing on each takeoff.  That was concerning.  So, let's call it for what it is, the Bonsai II is a small, unstable plane.  Even Matt Osborne called it out


What went wrong?


The design of the Bonsai was changed to mount FPV gear to it.  To balance out the addition of weight in the front the motor and servos were pushed further back.   What you end up with is either a tail heavy plane needed a bunch of weight on the nose or a properly balanced plane that's prone to tip stall and dropping wings.

Matt has figured out that the plane can be improved by moving the servos closer to the nose of the plane.


Why you should skip this plane


I am all for modding planes. Most foam planes can benefit from the addition of carbon fiber rods.  But when you have to make up for poor design before you even maiden a plane, that's nothing but a problem.   A lot of people want to get into RC planes and would be attracted to this plane because it's so small, light, and affordable.  Best of all, they can fly it FPV making the hobby more within reach of many of the drone pilots.  I am afraid that if this is your first RC plane, it may be your last.  it may seem counterintuitive but you're better off with the larger Teksumo.


Suggestions for FPV pilots


If you're hellbent on getting a 600mm wing that does FPV get the Blackwing  For the same amount of money you are into a plane that thrives on FPV.   It's slightly larger at 680mm and has a lot more foam.   It's a fast and compelling plane.


Thursday, June 21, 2018

Chinese made RC supplies- Price Hikes on the way?!?!


Face it, we're reliant on China.


Image result for made in china

As anybody who's been into the RC Hobby for least the past decade or two knows, we're in the golden years of the hobby when it comes to price and quality.   We're getting some unbelievable quality products at insane prices.  It doesn't matter if you buy it directly from China on websites like Banggood or if you go through your local hobby store a lot of what is being offered is being manufactured in China.  True there are other Asian countries like Taiwan, Hong Kong, Singapore, Malaysia, South Korea as well as perhaps a bit from Japan.  But the one that stands out the most is China.  A lot of the world's newest manufacturing equipment for everything from RC parts, electronics, and even the clamshell packaging it comes in is manufactured in China. We've come to depend on China.


Image result for large plastics plant in china


Simple law of supply and demand


The new manufacturing equipment is capable of turning out merchandise so efficiently, at low costs and beyond acceptable quality that the law of supply and demand kicks in.   There is far more supply than demand. If a small 9g metal gear servo costs $15 each you'll most likely buy a set for your next plane build.   If it's $150 each you'll most likely find a new hobby.  But when they are under $3 each you'll likely stock up in case you want to build a new plane sometime later this year.   It's because of this ability to supply far more than there is demand that the prices have stayed very low.

The two vendors I've been watching the most is Banggood and HobbyKing.   What I've noticed was that the lowest prices I've seen were around the holiday season.   In places like Australia it may be summertime, but for a good portion of the world people aren't out flying as bitter cold winters keep people indoors.

 When it comes to these seasonal lower prices I believe that a few factors are at work.  Retailers stock up on inventory for the holiday season, but realize that by mid-November that if Americans haven't ordered they most likely won't get the shipments before Christmas.  I also believe retailers like Banggood may slash prices because of low seasonal demand, and the need to reduce inventory before the end of the year.

C1 Chaser 1200mm Wingspan EPO Flying Wing FPV Racer Aircraft RC Airplane KIT

A case in point, the C1 Chaser is a very nice plane. Around the holiday it was selling for under $40 including shipping, now in the summertime, the price has gone up to over $60 including shipping here in the United States. That's a 50% price increase!

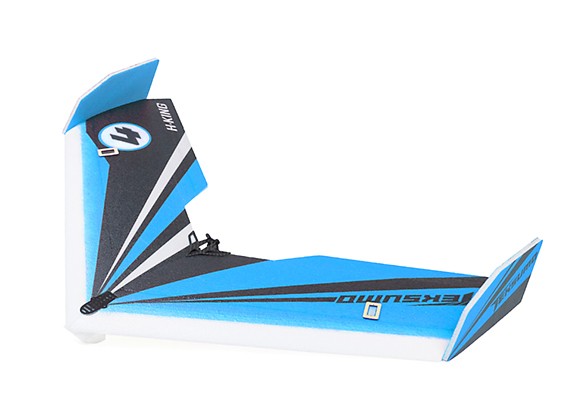
Another example, HobbyKing's Teksumo.
H-King Teksumo EPP Wing 900mm (35") (Cerulean Blue) (Kit)
This plane has traditionally been in the high 30's and low 40s.  It's now $50  sold and shipped in the United States. During the last holiday season, it was listed in the low 30s and was closed out in the old Orange color at $28.

The price has been in the $50 range for the majority of the year which means one of two things.  First, people are paying that price.  Or second, they have a fairly good inventory building up and will cut prices after summer and especially toward the end of the year.


The increasing prices may be a sign of an improving world economy and an increase in demand for RC products.  The US dollar to Chinese yuan has been changing.  The yuan has been gaining in value which means that it takes more US Dollars to buy the same Chinese made product as it did just a little while ago. 

As consumers, you're frustrated with the higher prices. But the retailer may not be keeping more money on there end either.   The differences are quite literally lost in financial transactions of changing dollars to yuan.

I don't believe China has a supply issue with many aspects of our hobby.    Most of the products made in China such as brushless motors and servos are to the point where they are commodities.   I've seen them sell out from time to time only to be restocked again within a week or two. If the world demand for 9g metal gear servos doubled overnight I have no doubt that China could figure out how to meet the demand. There are many factories in China all hungry for orders. EPP/EPO foam planes may be a different story because they are CNC machine cut.  These are usually made in batches and I've seen where a sale item puts the major online retailers out of stock for weeks if not longer as more production is scheduled.   I have noticed a definite price creep in EPP and EPO foam planes since the start of the year.  The good news is that our hobby is growing worldwide. The bad news is that increased demand is hitting us in the pocketbook.

Image result for trade war


The possibility of a US/China trade war.


China and the United States are the top two world economies.  China has more citizens than the United States but sells far more than it buys from the United States.  This is a huge issue for the current US administration.  They started to focus on Solar Panels made in China, and Chinese steel sold in the United States to put additional tariffs on.  China said they would retaliate by doing the same on US products.   Also at issue as well are violations by Chinese companies of international patents and allegations of currency manipulation.   Ultimately, what this all means is anything from a war of words that ends with a new trade deal in a few weeks between the US and China all the way to starting a worldwide recession.   Anything is possible, nothing can be accurately predicted.


Are prices about to skyrocket?


Are the prices of RC products going to skyrocket if you're an American?  Doubtful.  But the combination of a strengthening yuan combined with potential new tariffs along with higher demand for everything RC could spell out higher prices for RC products in the next couple of months. 

Suggestions


We're in peak season for demand.  Even the sales prices aren't all that special. The US midterm elections are in November and a heated trade war with China wouldn't play out well on election day.   My feeling is that unless you can find a sweet deal on a Chinese made plane this may not be the time to buy.   Perhaps it's time to check out reviews and consider what models you would like to add to your collection toward the end of the years.  I believe that RC planes are price sensitive and the higher prices on our end will be met with less orders. 

You may live in a country where the value of your currency is gaining over the yuan.  In that case things may look wondeful for you for the rest of the year.  Still, I expect that the best deals will be during the holiday season.

This is a good time to check your supply of consumables such as props, speed controllers, receivers, batteries. and servos.  You may want to keep enough on hand to keep you going for the next six months.  The prices on these things don't seem to have fluctuate as much as they have on foam planes.   Just keep a healthy inventory should supply issues arise.


There are other countries than China


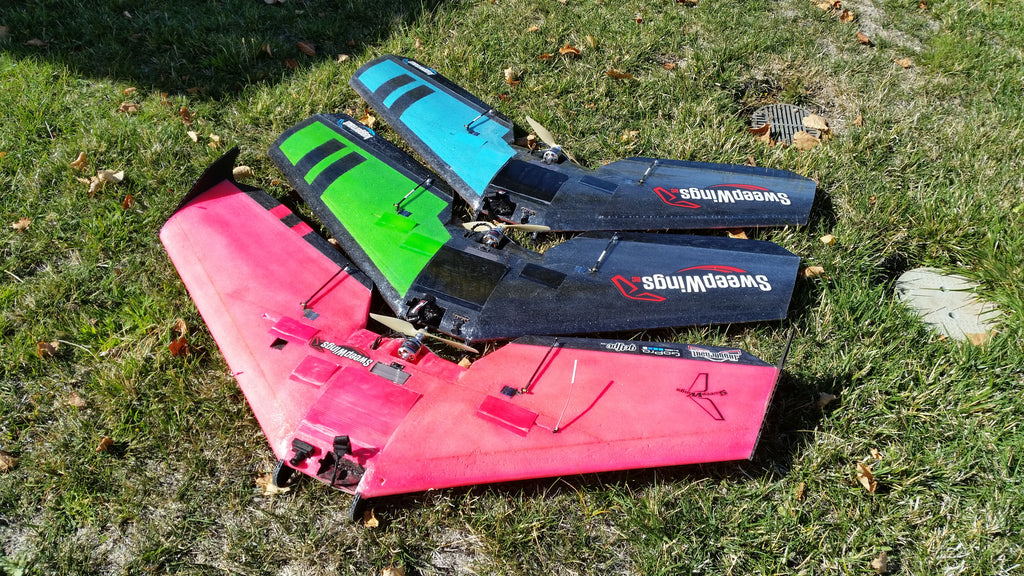
Things like motors, props and batteries come out of China.  But, there are foam planes that come from all over the world.  Hacker makes planes in Czech Republic (I love their products!). I've seen planes made in Malaysia and Vietnam.  There are also regional plane makers. In the United States there are custom planes by Sweep Wings, Crash Test Hobbies and one of my favorites, Flying Foam.  There are also DIY plane instructions for planes made out of Dollar Tree Foam.  And let's not forget 3D printed planes. This may be a good time to find alternates for just the foam of the plane as the other components of the plane seem to be readily available from China at prices in-line with what they normally are.
I have also noticed that companies like Horizon Hobbies have put certain models on sale.  You can always check around for a good deal. 
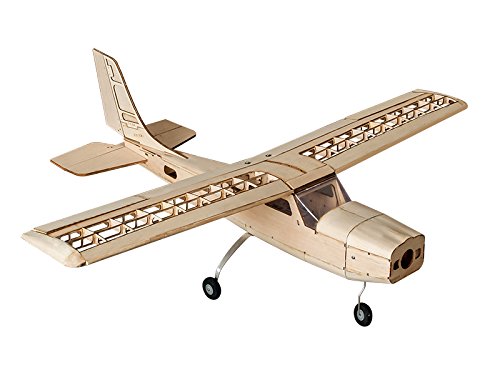
Image result for balsa wood plane kits

If you're so inclined there are many balsa wood kits (and pre-made planes) sitting on shelves gathering dust that can be purchased fairly inexpensively by private parties looking to clean out a garage. 

One other thing.

Don't be surprised if the yuan takes a sudden nosedive.  Let's just say that China knows how to keep the value of its currency low.   But I would expect this to be more reactionary the preemptive. 

There are way too many moving pieces. I don't expect that a trade war would go on for a long period of time, but it could be something in the news for the rest of the year. Just get ready to ride this one out.  This may be a good time to get around to building those kits sitting around in your garage or selling off the ones you don't want.   This is perhaps a better time to fix or update planes that need attention.

Just keep a few props from each size you frequently fly and on hand and a spare battery in your favorite size on hand.   You never know if a labor strike or issues in transportation could conflate the already sensitive forces in play.  This is not a time to hoard Chinese merchandise but it is time to keep enough supplies around ( a six month supply) in case the supply chain gets interrupted. 

Monday, June 4, 2018

Sweepwings Juggernaut Build Videos


Related image

Going off script

The following is information about a series of videos I have recently posted on Youtube.  This covers the Sweepwings Juggernaut but it is applicable to other wings.  There are foam kits from companies like Flyingfoam.com that come as foam cores and it's up to you to make them into a plane you desire.  The key to success is making sure that the plane balances on the CG.  If you start throwing heavy motors in the back you'll need to put disproportionally more weight on the nose.  So, it's best to start with the lightest motor that can offer the grams of thrust the plane needs. This is the route I went with the Juggernaut.  I went for a very light and floaty build with a large propeller.


At a recent visit to a world-class hobby store, I became fascinated with a blunt nose plane.  The guy who built it said that he couldn't get it to fly.  He put 2  6S batteries up front and still couldn't get the CG right.  The plane was old inventory and they cut me a deal to pick up a model that they felt was missing parts. It was the same kit as the plane hanging, and it was up to me to make it fly.

What I didn't know at the time was that I actually got my hands on a great plane that is very much sought after.  It was the Sweepwings Juggernaut.  The problem with that plane is that at face value I have no interest in it  It's too heavy and too loud for the way I like to fly.  But, the one thing I believe in is that when you buy  a plane it's yours to build off script.  There in the hobby store I started to figure out how I would build this plane to suit the way I like to fly. I like slow flights that catch thermals.

This is hopefully an interesting series of videos.  I wasn't certain by the time I was done how it would fly or if I was wasting my time and money.   I did state up front what I planned to use it for, which was a video platform.  On the maiden flight I had taped on elevons and a 3oz fishing weight tied onto the nose. Okay, so it wasn't exactly top shelf, but boy did it ever fly nicely!

In the first video I go over the idea of the plane and discuss how I plan to cut the foam.  I show the markups.  You can tell the hesitation in my voice, I didn't know if this was too much.  At first I planned to cut 2" of foam off the back, I ended up cutting off 2.5 inches.   There is a battery bay that sits towards the front of the plane. To use it you would need to cut out a good portion of the foam from that part of the plane, leaving a huge hole.  I figured that I would rather have less foam in the back, and get the motor closer to the CG mark.  I am not a fan of cutting foam for battery bays.


In the second video  I do the cuts and go over spar placement. I used a Dremel Tool with router attachment (it wasn't shown in the video).  There were only a couple of minor nicks but the spars were covered by duct tape along the leading edge.

Since I didn't cover this in the video I will here.  I used duct tape all along the edges.  I used no strapping tape, nor did I use paint.  When I watched the build video on the Sweepwings website they painted their wing.  It looks lovely.  I used to spray paint EPP foam planes.  Now I avoid it because the foam collects pools of paint in the valleys of the foam.   You often need multiple coats to make it look even and what you end up with is something heavier than you may have imagined. So, that was a no go.  Also the fiberglass spars are a no-go.  I am sure they are fine but I have a lifetime supply of carbon fiber rods so I used those instead.   Aside from the duct tape on the edges I used no strapping tape.

The kit came with 5 mil lamination.  I have a good supply of this as well, but I used what the kit came with.  Some people don't care for lamination.  I can't live without it. It reinforces your plane and cuts down on drag. I also used a little bit of black Ekonokote to make a simple black and white plane.

In the third video I go over the parts of the plane.  The plane came with a nice 2" elevon, but I went with a three inch one I found at the hobby store.  It makes the plane appear larger in the sky, and perhaps helps give it smoother turns.


Here's a list of the parts I used.

Motor:  BR2212 1400KV ( I keep calling it 1450kv in the videos, sorry).  So, right off the bat you're probably wondering  why I am putting on a $5 motor onto this plane?   The motor runs 2-4S and has more than 900g of thrust.  To get to the next level of performance I would need to move into a D3536 1250KV.   That would allow for another 200 or more grams of weight in the nose.  This may be a possibility in the future for aerial photography. The problem with adding weight is that the dynamics of the plane changes considerably.  It will need more airspeed to not stall. Realistically, I would move to a 3 bladed propeller before changing out motors.
For a cheap motor I have never burned out.  They are actually rugged and well made. There is the DYS version of it for a few dollars more.  That with a 40A ESC and a 9070 propeller would probably give around 1100 grams of thrust for a short period of time.  The DYS offers thicker wires and probably can withstand a bit more abuse.

EMAX ES08MA II 12g Mini Metal Gear Analog Servo- A plane this size is better off with metal gear servos. The one thing I will say about these servos was that one control arm didn't fit on the servo, and it really had me worried for a while.  The other two did work fine.   These servos may get replaced before the motor does  Since this is a plane for video I will put on a gyro/stablizer on this plane.  I plan to use a good one.  They tend to work fairly fast and digital servos would most likely help to keep the plane floating smoother.  The digital servos are around 20% faster. I don't know how much of a difference it would make. So, that's wait and see.

30A ESC- I used the Skywalker 30A ESC.  I seem to have good luck with them

On this plane I am using a Hitec Optic 6 FM transmitter with dual conversion receiver.  This is old technology.  But, let me tell you, it received the signal without dropping once from half a mile away.  So, yes, it's good.


The final video was the maiden flight. I was flying close to the ground for a few minutes trying to get the video while flying the plane.  Then I shot it up and found a thermal.  This was a somewhat weak thermal, it did have lift though not as good as what I see in the summertime.  Regardless I think it got to around 700-800 feet for a short time. Usually, at these altitudes, a plane gets bounced around quite a bit. The Juggernaut held together nicely offering a smooth flight in usually harsh conditions.

Blunt nose wings are all the rage these days with a lot of emphases on them for FPV flying.  The one thing I have noticed is that it seems to offer a smoother, more stable flight than a standard Delta Wing of the same size.   If you're a fan of the Reptile S800 and the Sonicmodels AR blunt nose planes and wanted to venture into a four foot plane, this is an excellent choice.  Yes, they are fairly expensive but each wing is cut by hand.  This is something you'll probably have for years and the extra money is well spent.


Monday, May 7, 2018

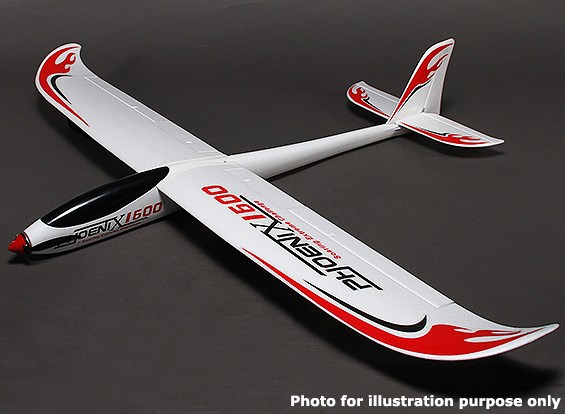
Phoenix 1600 Review (Hobbyking/Lanyu/Volantex)

The Quintessential RC Plane

Phoenix 1600 EPO Composite R/C Glider (Kit)

The Phoenix 1600 is an anomaly.   It's dirt cheap, built extremely well, and suffers from poor marketing and a couple of minor engineering missteps.   So, let's unpack what it really is.   It's a great plane for someone with intermediate building and flying skills.   This is not a trainer and not a good choice for a newbie.   There are so many planes on the market today that would be a better fit for a new pilot.   And yet, half the manual is devoted to teaching how to fly the plane.

The other issue is that there are a couple of design flaws that aren't fatal but are workarounds.  They have to do with the placement of the servos for rudder and elevator.   What I found works best was to take a file and file down part of the plastic on the fuselage to allow for the servos to turn freely in the proper position.

The largest single issue this plane has is the lack of good instructions.  In order to build this plane, you will need to hunt around on Youtube to find build videos.  I did write a post about mounting a motor to this plane and offered a couple of motors that will work with this plane.

What sets this plane apart is that you can fly it six channels.  One of the alternate builds is to make it a glider and skip the  motor all together.   It's far from a top-shelf gilder, but plenty of people use it for slope soaring. The other thing that sets it apart is build quality.  It's actually a very good build quality.  Again, it's not the best but its far superior to most of the planes I've seen in this price range.  The fuselage is a similar plastic that baby toys are made out of, so it's durable and not cheap to make.

If this plane cost three times as much I would say that it's not worth the price.  But, at this price, it's a FANTASTIC buy.


1. Documentation: 1  points out of 5 points possible.


The documentation is for the PNP and not the kit version.  There's a little bit there that is useful.  We live in an internet world these days and fairly good information to build this plane can be found online.  Thus, the poor documentation isn't a deal breaker.

2. Quality of Materials 20 points out of 20

Image result for phoenix 1600
It's a perfect score not because it's the best materials I've ever seen in a kit, but because it's the best materials I've seen in a kit of this price range. The foam is robust and the fuselage is spectacular.   The control horns get screwed in on both sides and they include things like the extensions for the servos.


3.  Build process  17 out of  20 points.


Other than the servos in the wings there isn't a lot of need for gluing.   If I were to build one for a friend I could have it together in an evening if I had the electronics ready to go before the plane arrived. Realistically,  it would be a fantastic rainy-day build because it would take most of a day to build from scratch.  I tend to like to build a few hours here and there so this plane would be something I would take about a week to build.    There are quirks to building this plane so it's best not to rush through it.

The two things that weren't obvious was the motor mount which I outlined in an article. The other thing was the servo placement.  It was odd, to say the least.  You'll find a pair of cut outs on the fuselage for the servos.  But they don't go there.  They go further back into a spot that doesn't look like it was designed for servos.  This spot works well, except. . .    One of the servo arms will hit the  side of the plane.  And, the standard servo sits up too high.   What it looks like building this plane is that it takes a 17g and 9g servo.  The interesting thing about the design of the plane is that you can assign a control rod to either the rudder or the elevators on the tail.  So, I thought about it logically.  If you have total control of ailerons the rudder is kinda an afterthought anyway.  Thus, the 9g servo got demoted to a rudder.  The larger 17g servo was for the elevators.  What I discovered was that if I trimmed off the end of the control arm it would just clear the side of the plane.  And then, with a little creative filing of the top of the edge of the plane (there is a lip) I could allow the rudder to turn freely.  At first I was fine without full control of the rudder, but in the end, I got full control of the rudder.

And that's really the extent of it, a lack of good instructions (which sadly is common) and a somewhat minor workaround with the servos inside the plane.  I did follow my own advice (which I am not always prone to do) and ran the ESC under the battery tray.  This left the battery tray free to mount batteries without wire getting in the way.


4. Flight Characteristics  30 out of 30


I can abbreviate my maiden flight in 3 letters. M, M, M.  Maiden Motor Meltdown.  This has nothing to do with the plane and has more to do with my speed controller or most likely culprit, the motor.  About a  year ago I bought this motor for the Phoenix 2000 and decided to go another direction.  In that time the motor has been discontinued at HobbyKing (hmmm).   I got somewhere between one half and 3/4s of a flight with the motor before it overheated and stopped working.  But, it was enough for me to form my own decisions and yes,  I will update this review with more experience. 

The basic design of this plane is something I've noticed about Volantex planes in general, they are heavy.  There isn't a lot of nuance with this plane, you build it, throw a 3S 2200mAh battery and take off.   But, because it's heavy I noticed at 1000KV with a 9x6 propeller  was a bit anemic.   I want a bit more power to get up to the sky.   Even if the motor is still working I want it out of this plane in favor of something with a bit more thrust.  I have a C-311 Leopard 2835/6T 1350KV on order.  The speed controller will be swapped out as well. 

The flight platform for this plane is good.  It's not a floater but may glide well with a bit more fine-tuning.  It is easy to fly and is very responsive.  Right out of the gate this was a plane that required hardly any trim.   I put a small amount of up trim in during the flight and the plane did very well.  It feels like it may be able to handle a bit of wind and still maintain control.    I don't have any planes that can reliably fly in my late afternoon Southern California wind.  Thus, this plane, though not one of my beloved floaters is still something that I can appreciate.

I was able to make the plane roll, loop and invert on the maiden flight.  There is a fair deal of excitement about this plane.  Of course, the million dollar question is about installing flaps.  And, that's where I start to object.  Flaps aren't a bad idea, if you really need them.  If you're flying in windy and turbulent areas then yes, by all means, you'll want something to slow down your plane.  But, if you are flying in the mild wind then it's just adding extra weight for something you don't really need.

I am glad to say that I really took my time to build this plane and the plane was perfect from the start.  I wished that the motor didn't quit because I need a few more flights to really get a good feel for the plane.   But, from the expereince I had, I really, really liked it.

The plane as a glider would be interesting.  It would make a good slope soaring plane.   But, that's a different type of flying and the gliders tend to get thrashed on the slopes.  Thus, this being robust and cheap is a good thing.   With a glider, I can see wanting to have flaps from day one. Gliding is its own sport and I think this would make a great first glider if I were to go that route.


5. Value 15 out of 15 points


For what you get for very little money this plane is an exceptional value.   You can work around the issues it has in the build process and add an excellent plane to your collection.


6. Ability to modify  8  out of 10 points.


You can put a variety of motors on the plane.  One guy wanted to put on a camera rig onto his Phoenix so he went with a lighter motor due to the extra weight on the nose.   Of course the ability to add flaps makes this plane more customizable.  My big mod was to paint the foam and laminate it.   I  went for a bright pink so that I could see it way up in the sky.   I really do like the paint scheme.

Though it's not tops on the ability to be modified it is still one of the more versitile planes on the market. 


Final Score 91 out of 100


With a score of 91 this is a good all around plane to kick around when you're ready for a 5 or 6 channel plane.  The 1600 is the same fuselage as the 2000 but has 400mm  (15.5 inches) less  wing length.    Having watched good videos from Allen Moore and Andrew Newton I am moving on to build another Phoenix 2000 as a glider.  It's not an immediate need as I've got my hands full of other build projects and HobbyKing  is out of stock on the 2000. 

I have opted for the Leopard 2835/6T 1350KV motor to power both of my Phoenixes. I will update this review as I get more experience with these planes.  But, overall I am beyond impressed at the value.  HobbyKing does stock replacement parts, but mostly in Hong  Kong which is far too expensive to ship to the United States.   It may be cheaper to buy another kit and salvage parts as you need them. 

The one good sign about the Phoenix is that Andrew Newton seems to have planes given to him left and right   He can't keep most of them.   So, what sticks around is what I pay attention to.  Andrew has the Phoenix in a regular plane and a slope soarer.  Allen Moore flew his Phoenix so much that he wore it out and built another one.    He has a slope soarer as well.  This is a guy who has a Bird of Time glider (huge an beautiful) but likes his Phoenix. These aren't endorsement deals, these are guys who fly what they like.

To me, the Phoenix glider would mean that I could get started in gliding with a plane that I can bash, crash, repair over and over again.  Slope soarers tend to take a lot of abuse.

Friday, May 4, 2018

Phoenix 1600 & 2000 Motor Mount Instructions & Motor Selection tips


The missing instructions


Image result for phoenix 1600

If you buy the Phoenix 1600 & Phoenix 2000 kit you'll find that the instructions are a bit light.  When it comes to mounting the motor there are two ways, the hard way and the easy way.  Since I own both planes I am proud to say I've done both.

The hard way


The holes on the standard crossbar that comes with most motors that fits this plane line up perfectly to the holes on the front of the white plastic cowl.   You can simply use a tape and die set to put in machine screw grooves into the metal then use the appropriately sized machine screw to secure the motor to the plane.  It's a bit of extra work but it works like a charm.

So, why am I even bringing this up?  If you bought the Phoenix 1600 in particular as  plug and fly  Andrew Newton has mentioned that the 750KV motor is a bit too underwhelming and switched it out for a similar motor that was 1000KV.  But, you may have a spare motor or two sitting around that would do the job with some slight modification. Find a cross bracket, tap it and use it.   You can't really get to it with nuts and bolts because the bottom of the motor will be difficult if not impossible to get to.

The Easy Way


In the kit there is a black plastic disc, a flat metal disc, and 9 screws.  4 are machine screws and 4 are similar to wood screws.  The black plastic is your motor mount.  There is a spot to run your motor wires through so that they don't rub against the motor.  The four machine screws are used to mount the motor.  Use Loctite to secure the screws in place  The vibration over time can loosen the screws.


Black plastic motor mount, notice cable run through the plastic?  Notice the metal disc in the background.?


On the outer parameter of the plastic disc are four screw holes that match up to the screw holes one the cowl.   Your job is to line them up for installation. This is the hardest part of the motor install.  When it's completed it looks like this.
Motor properly mounted.  The black plastic mount is inside the plane.


While you're at it.


The speed controller can stay above and sit next to your battery.  But you'll constantly be working around it.  Take a few extra minutes and get it out of your way once and for all.  Remove the batter tray and mount it under the battery tray.  I am going to include a video of some guy removing the tray.  Please note that there are four screws that hold the tray to wood glued to the side of the fuselage.  The guy in this video just rips it all out by the battery strap.  I found that if you remove the four screws and give a little firm pressure the top of the tray separates from the side mounts.  You can take his advice and remove the 41g ballast from under the tray.   My advice is to not to this before you have checked  the CG and flown the plane.   You don't want to risk making this plane tail heavy.  But yes, anything to make the plane lighter is a good thing. 


A tip about motors


There are a lot of motors that can work with this plane.  Whatever you use has to have a front facing shaft.  That means the shaft comes out the side where the wire are.  You can either buy motor that is front facing such as the Turnigy 2217 16turn 1050kv 23A Outrunner, or the  EMAX GT2215-09 1180KV 
  

Or, you can do a manual shaft reversal.


This guy is using an arbor press.   It works well for the task but most of us don't own one.  We should own a vice.  Simply do the same thing with a vice, but on the side you want the shaft to come out use a socket such as a 12mm socket to allow the shaft to come out the other side without letting the shaft get squeezed by the vice. (Visualize it, the shaft is getting pushed out one direction and it will show up on the other side.  You need the socket to allow space for it to pop through without touching the vice).  It takes a lot of force to move it from one side to the other.  You will doubt yourself the entire time you do it.  But it will work. 
Shaft reversal in vice, socket on left.


Warning-I've done this one 3 motors and on two of them the motor bearing came lose during flight  I use a collet that was made for wheels on landing gear to keep it in place once and for all.


Having done  the shaft reversal many times, and being comfortable with the process my feeling is it's worth going out of your way to find a motor where the shaft is reversed.


Motor considerations- 


Weight:


The optimum motor for this plane weighs around 80 grams.   You can get by with something that is 70g (EMAX GT2215-09 1180KV )  or 90 grams  The  Turnigy and DYS D3530 weigh 74 grams, but need a shaft reversal.  The good news is that you can buy this motor in a lot of different KVs.

If you make the nose too light then the tail will be too heavy.  This is a no-win situation. This isn't a plane you can add nose weight to easily.   If the nose is too heavy then you'll be auditioning lighter batteries to make it fly.   You may pick up bad flight characteristics like going into a spin when it stalls.   Thus, to be safe, keep the weight as clsoe to 70g as possible. 


KV:  


The D3530 comes in three different KVs.  1100, 1400, and 1700 KV.  It can accept 2 through 4 S batteries.  If you're not opposed to doing a shaft reversal this may be a neat little option.


The higher the KV the more speed performance you'll get from the plane which should make it fun if you're looking for speed. Of course your flights will be shorter.  If you plane of gliding you'll want a slower motor, such as 1000KV.


Searching for a new  spinner


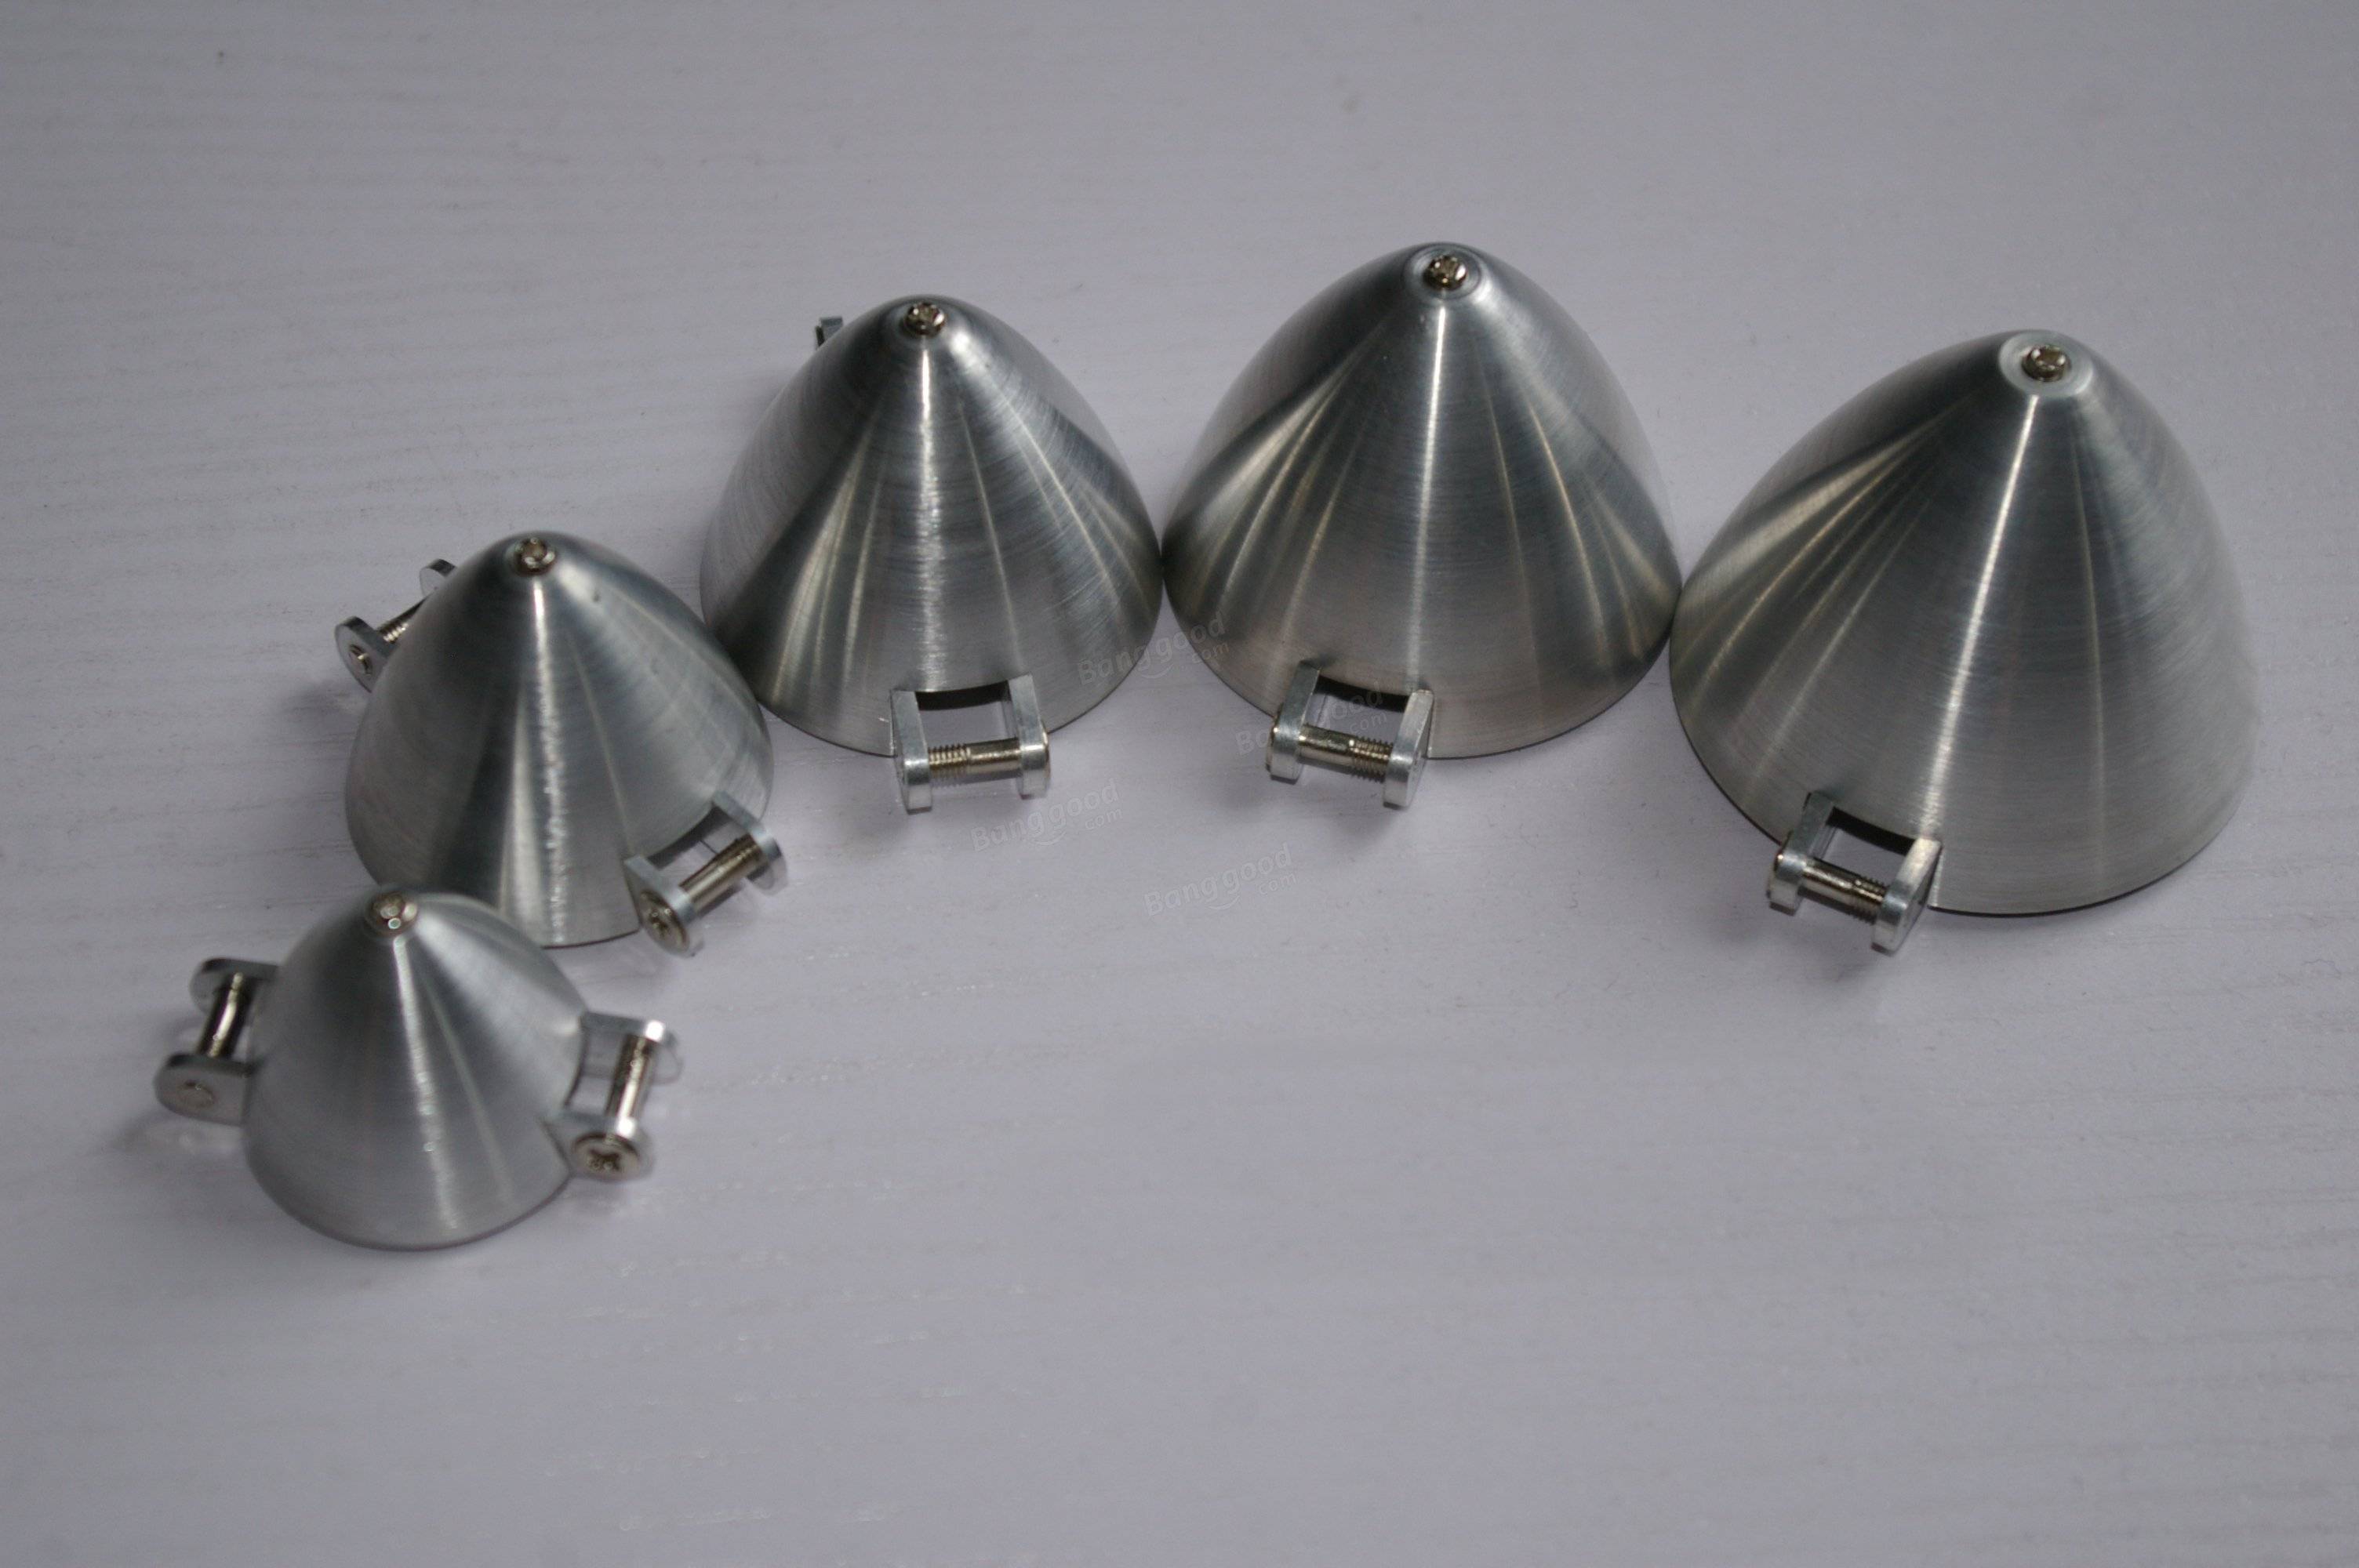
Another avenue you'll find yourself running down is that the spinner that came with the plane may not fit on the shaft of your motor.  You'll be searching for a new one.  I believe 45mm is the diameter size of the spinner.  You'll need it to match your shaft size as well.  I use Gemfan spinners and propellers from Banggood.

Image result for gemfan aluminum spinner

Before you go down this road you can get by with a standard propeller.  Put one on that is the correct size for your motor and see how you like the setup.  The folding propellers simply add to the ability for this plane to glide a bit longer.    When you have the motor and proper propeller size you like you can then buy the spinner setup.  It's not hard to install.   The proper size for a 1000kv motor is 9x6.


Summing it all up


The Phoenix 1600 is a beloved plane.  For what you get, it's dirt cheap. You can leave the motor off and make it a slope glider.   You can 4-6 channels with so many features that you can fire up with most of the computerized radios such as crow and camber. 


This is an amazing plane, but it's not a beginner's plane.  They try to sell it like it is, but it's not.  So, take your time building it.  Chances are likely you have other planes.  Perhaps you live somewhere that winter keeps you indoors and you like working on a project that you put a few hours into each week.    Get the parts you want and get it set up right.  If you do your homework and take your time this will be a plane you'll enjoy for many years.


The fun of buying used planes

  If you like to buy and sell used planes.  Occasionally you can find really good deals. I mean, mind blowing deals.  Most of the time you d...