Wednesday, March 28, 2018

Propeller and motor combinations-What's not in the fine print.

You’ve found the home of broken foam.

Sooner or later you’ll want to go off script. You’ll want a faster motor, or a lighter motor so that you can lighten the planeload. You’ll want a larger prop, a folding prop, or a 3 bladed prop. You’ll stray from what you know and start going to the wrong side of town to talk to those people your mom warned you about for truth and wisdom. Near all the trash and rats and junkyard dogs chasing the rats out of the trash you find my office. Don’t judge me, this is all I can afford after buying so many RC planes. Welcome to the home of broken foam!
Image result for broken foam plane

This is  your disorientation


Thank you for entrusting me to be your personal Yoda in the search for truth when it comes to matching up motors to props.  It’s a search for the truth and you’re going to use it to make your own decisions.  It’s time to forget all you know.  You are going off script.
Image result for i can't drive 55

Truth number 1


Your car can go faster than the speed limit. The point is that when you get to the maximum speed of the car it starts shaking and you’re consuming fuel like crazy while the engine is working very hard. It’s also getting hot. Top speed of a car is far greater than the maximum legal speed limit in most countries. Your car is designed to work efficiently at speeds it’s likely to achieve. This is what to strive for when selecting a motor for your plane. If you’re at full throttle to constantly keep the plane afloat you’re underpowered. You want to make sure you have more than enough power


Truth number 2


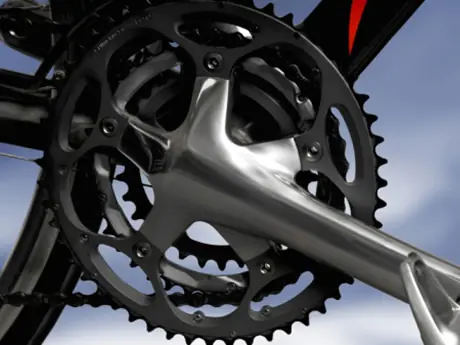
When riding a bicycle the front derailleur controls three gear rings on most modern bikes. These are the three rings next to your pedals. The smallest one is best for hills. Since it’s smaller its easier to make each revolution when you pedal your bike. When you’re going uphill this is the one you select because the other two cog rings are too hard to pedal. But, when you’re on flatland the small ring is too easy to pedal. You are spinning like crazy and not going anywhere. You move up to the middle cog ring and start moving at a pace you feel comfortable with. You find that the middle ring is more efficient for flatland riding. Then, lucky you, you come up to a slight downhill and you have the wind at your back. You switch to the largest cog ring and really start to move. You’ve found even more efficiency.

Keep this in mind when it’s time to talk about prop size. Larger props can be more efficient in the right conditions. They can also work your motor too hard in the wrong conditions. But, just like gear rings larger props take more work to spin each revolution. Typically, higher KV motors (more on this later) spin smaller props and lower KV motors are better suited for larger props. Image result for triple front chainring

Truth #3


The documentation about motors quite often leaves you with more questions than answers. Just because it lists a 4S motor doesn’t mean that the highest thrust listed was made at 14.8 volts. Another thing that screws up things is that propellers from one manufacturer to another can deviate in statistically significant terms when measuring thrust. One will likely produce significantly more thrust than the other. The specs are given to help give you an idea of what the motor can do under normal conditions.


Now it’s time for plane design.
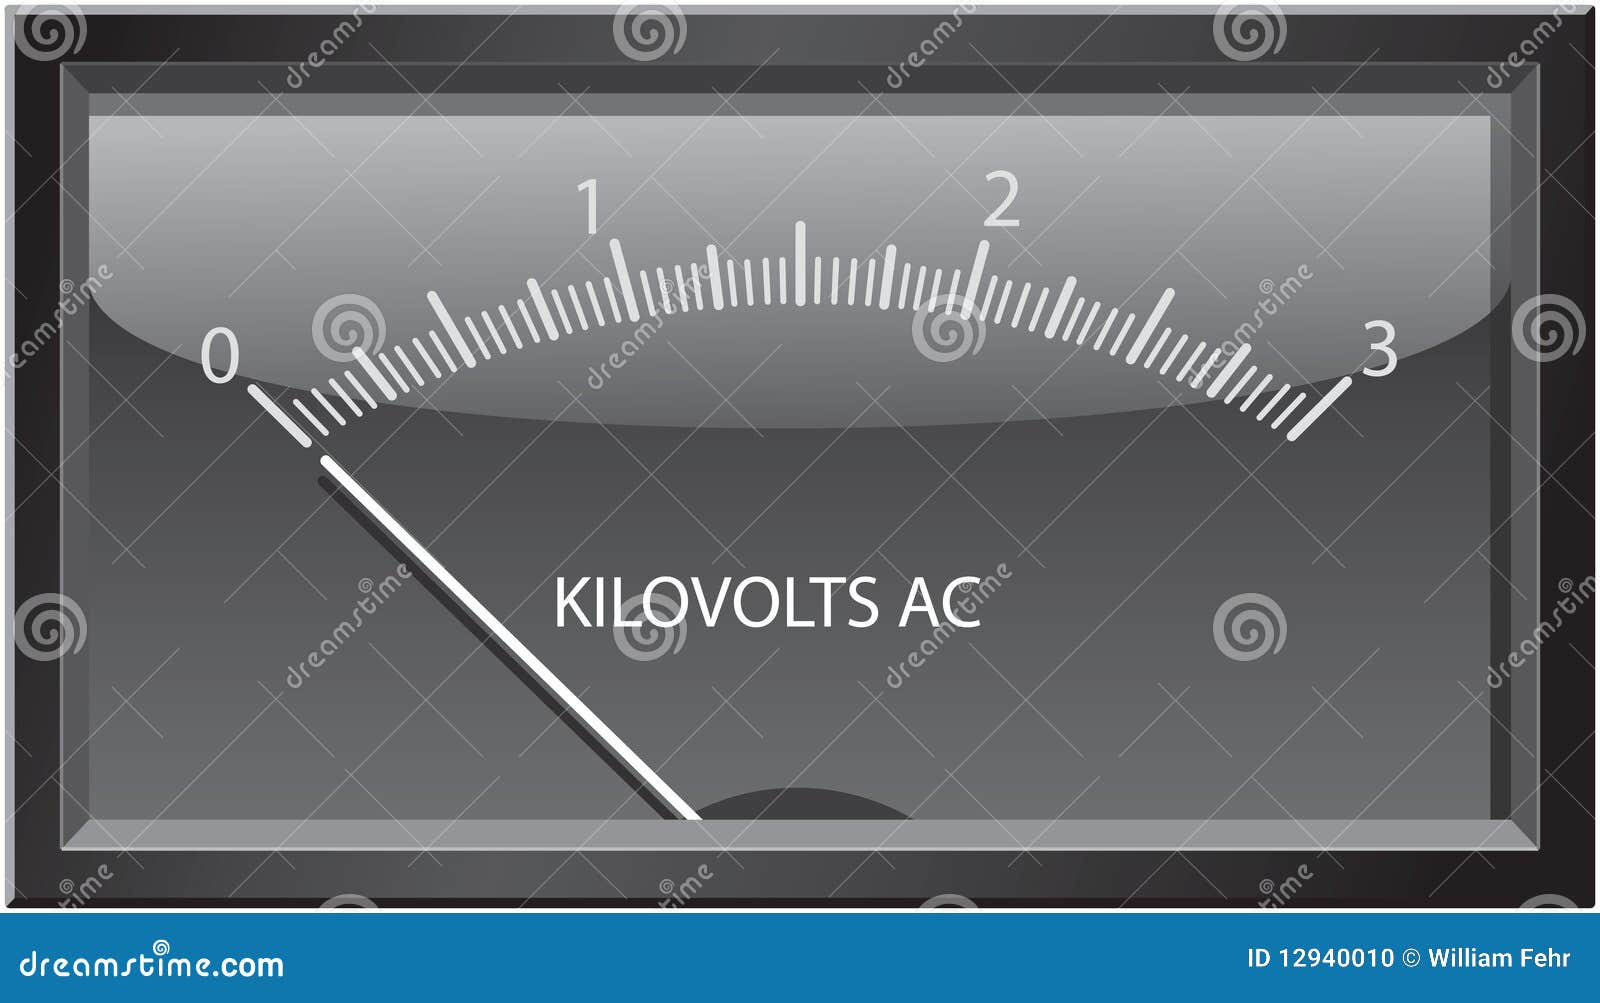


Image result for kilovolts

KV isn’t kilovolts


The “KV” after each motor name keeps people guessing. I’ve seen a few people on Youtube refer to it as “Kilovolts” or 10,000 volts. Most of the motors I work with take less than 15 volts and thus putting 10,000 volts through the motor will turn it to, well, spontaneous combustion. The V in “KV” stands for volts. The K is the constant. KV is not an abbreviation but a mathematical formula. K is the number of RPM’s your motor is capable of doing without a propeller. This is ideal world condition, there is some resistance in the motor wiring for example that keeps it from achieving perfection. That being said, the number is usually very close to accurate. Thus, you simply multiply the number of volts times the K and get the ideal RPM of your motor at various power levels.


The propeller is a resistor

Image result for propeller
Once you put a propeller on the motor KV goes out the window. The propeller acts as a resistor. Typically, the larger the propeller the more resistance it puts on the motor. That’s why we go back to truth number #2 about chainrings on bikes. The larger they are, the more work to make them spin each revolution. The only thing that confuses this issue is the pitch of the propeller. It’s possible to have a larger propeller draw fewer amps (less work) than a smaller propeller if it has a significantly reduced pitch.
The thing to keep in mind is that your propeller is putting resistance on your motor.
Grams of thrust is what we’re concerned about.
Image result for turnigy thrust stand
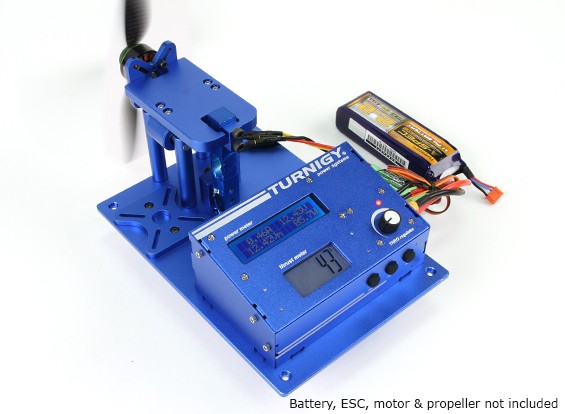
Turnigy Thrust Stands are cleaner ways to test thrust.

There are many videos on Youtube with crazy people hooking up motors and propeller combinations to scales on yelling out numbers like 820 grams. The first time you see this it's kinda strange. They are talking about grams of thrust. If your plane was 800 grams for example (28.22 ounces) when ready to fly this means this motor should be able to make this plane fly. The problem is that it may not be the most efficient flight. Just as your car starts to shake at top speed and consume gas like crazy you may find a plane that can produce 1000 grams of thrust may give a more efficient flight without getting your motor hot. Again, it depends on your plane. If you have a powered glider for example even though you have a heavy plane it may be able to take off and climb with less than full power depending on conditions. Once in the air the plane only needs about a quarter of the power it needs when it takes off to keep afloat.

Not all propellers are created equal.


Image result for rc plane propeller
So, why doesn’t someone just measure every combination of motors and propeller and come out with specs once and for all? Two reasons I can think of. First, not all propellers are equal, even when they have the same specs. An 8040 propeller (8”) can have remarkably different thrust from one manufacturer to the other. Enough to be statistically significant. The other reason is we are living in an era of 3D printers. The cost to design a propeller and have a prototype ready to test is dirt cheap. There are companies like GETFPV.com that design, print and test new props all the time. And, the props can be turned out fairly cheap from China. Thus, there are new propellers on the market all the time. The combinations of motors and propellers are endless.

Those friendly little specs that are listed with a motor.


Motor specs can drive you mad after a while. If a motor is listed as ranging from 2S-4S for example, the top thrust list may be at 4S. But not always. You need to take total watts, divided by amps and see how many volts it was tested with.

And, this is the big problem


If all that mattered was grams of thrust then they would figure out what the peak grams of thrust for each motor would be. If they were testing for maximum wattage they would figure that. If they were testing for efficiency they would figure out a battery, propeller combination that maximizes it. Since they are out to sell motors I imagine that if they posted the true peak specs people would assume that this is how you use it all the time and would burn out motors quickly and leave nasty reviews. Thus, what you are likely to see are some results that are watered down. The suggested prop and motor combination will work fine in most flying conditions. It’s like saying your car can achieve 70mph when it’s top speed is really 100 MPH. If you were to drive at 100MPH all the time it would wear out the motor faster.
.

Here’s what’s important.

Image result for amperage
There are volts, amps and watts, which one is the most important? If you go over the required voltage suggested for your motor then you shouldn’t cry when your motor dies. Watts are good for reference, but amps are what you need to pay attention to. If you run too many amps through your motor for too long it will melt the insulation on your motor wiring and then the motor will short and die. Heat is a sign that your motor is working too hard. If your motor is blistering hot when you land your plane it’s time to think about a new prop and motor combination.

Different flying characteristics


I heard one guy describe his 4-minute flights as the best four minutes of the day. He’s looking for maximum thrust and battery life isn’t important. If you’re flying a glider you’re looking for motor efficiency. You want to find the right combination that keeps you in the air longer. It doesn’t take long to become a motor connoisseur. You can start pairing the right motor to your plane. You will prioritize what’s important when dealing with a motor. Another factor not yet discussed is motor weight. The heavier your motor is the disproportionately more weight you’ll need to put on the other end to counterbalance it. Heavier motors start putting on the weight of your plane rather quickly Heavier planes fly differently than lighter ones.

Useful data to keep in mind.


Gliders are looking for efficiency. You may even be able to get away with an underpowered motor if you’re able to give your glider a good, brisk shove into the air at takeoff and keep off of full throttle in flight. You may be able to get away with a larger prop than is suggested for your motor as long as you’re not drawing above the suggested amperage.

Here are some numbers to keep in mind.


Efficiency-

(Grams of thrust)/(Maximum wattage) This is a comparison number. It’s used to compare two motors. The one with the larger number is more efficient.


Watts per pound


(Maximum wattage)/(Grams of thrust)=Watts per gram of thrust. The result is almost always less than 1. The higher the number the less efficient the motor is. However, it’s best that the ratio is greater than .23 If you multiple .23* 453.592(this is the number of grams in a pound) it equals roughly 100 watts per pound. 100 watts per pound should make anything fly. It’s the general rule of thumb.


Battery life matters

Image result for lipo battery
The reason why your car doesn’t reach top speed at the speed limit is that it would be inefficient. Though your car can do 100 MPH it will do most of it’s driving at under 70 MPH. It’s this overhead you want in a motor and propeller combination. Battery consumption of LIPO batteries drops considerably when you are at 20% from full throttle as opposed to being at full throttle.

Real world tests


Thankfully we live in the world of cheap motors and cheap propellers. All you need is a fairly inexpensive voltmeter and a digital scale and you can set up your own lab to test your own motor and propeller combinations. The thing to do is to take measurements of grams of thrust at full thrust and backed down to 10 amps, 5 amps and 3 amps. Change out propellers and keep records of each thrust measurement. You will want to stay within the manufacturer's suggestion for maximum amperage and make certain that your motor isn’t getting hot. If you’re pulling excessive amperage or your motor is getting too hot you’ll need to back down the propeller size and/or pitch.

Take it up


Instead of one pure winner, you’ll want to take your favorite 2 or three propellers out for a flight. Figure out which ones give the best flight characteristics while keeping you within the zone of flying time. Once you’re in the air your results are no longer scientific because flight characteristics change from the flight. If, for example, one flight lasted 18 minutes and the next one lasted 21 minutes the way you fly and weather conditions may have caused the variation. By this point, all you’re looking at is the flight characteristics.
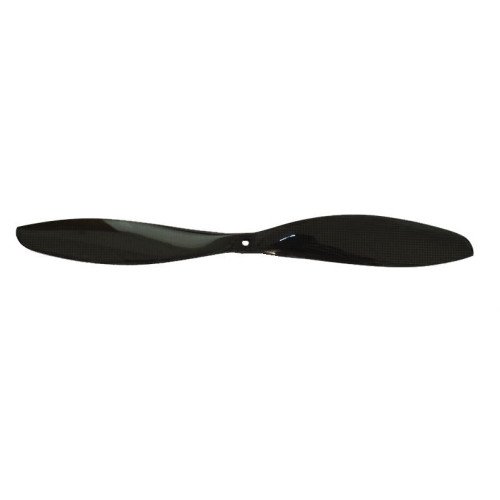
3 bladed propellers

Image result for 3 bladed propeller
A very common problem is that you are landlocked on your plane. You want a 9” propeller for example but can only fit an 8” propeller at the largest. If you simply switch to a 3 bladed propeller you can get the what you’re looking for. The idea is that if you fly with an 8x4 (8040) 3 bladed propeller it’s around the same as a 9x5 (9050) propeller.


The real downside to 3 bladed propellers is that they break on landings more frequently.


Tuesday, March 13, 2018

C1 Chaser Radio Controlled (RC) Airplane


Oversized Wing-Wing?


The Wing Wing is one of those planes that people just love. All EPO foam, a simple design, easy to build, easy to fly, durable, and a ton of fun to fly, The main directive of the Wing Wing is to make it a little speed demon. It’s loud and tears up the sky like nothing else. When the C1 was announced Matt Osborn put out a video saying that we’re all going to get divorced because we’re all going to buy one. He was crazy about it, and then another video came out where he said he hasn’t flown the plane in six months, why? The short answer may be that it’s not a Wing Wing. Yet, this is a plane that stands on its own merits.


The C1 Chaser-Overview


The C1 is a 1200mm EPO foam plane with a similar build to the Wing Wing. It looks like something that you may expect to see flying at Tomorrowland at Disneyland in the 1970s. It’s a Delta Wing with a serious spar going through the middle of it. The main bay is HUGE and can hold a lot of FPV gear if that’s the route you want to go. This plane is an excellent platform for FPV. It also demands larger batteries. Your 3S 2200mAh battery is probably too light for this plane and will need extra weight just to get it to fly. So, the downside to this plane is that you may need to buy some new batteries.


My FPV plane gripe


The radio controlled plane hobby is evolving. It started out from the need to simply fly planes line-of-sight. That means, as far as you could see it was as far as the plane could go. So, the planes were built for fun over short distances. But the newer FPV planes are designed with gear-loading in mind. They are designed to hold a lot of gear and travel much further distances than 2000 feet, so the fun factor for line-of-sight flying is forgotten in models designed for medium to long range flights. These flights are usually minimal on turns, going in fairly straight lines is the objective. Instead of being sports cars they are more like cargo trucks. If you try and fly them line of sight they do work but they may not be as fun and responsive as you would imagine them to be. The large Skywalker planes are not on my radar because I don’t plan on doing this type of flying. So, when I see planes like the C1 Chaser my first impulse is to think that it won’t perform. But, to my surprise, it does perform.


C1 Chaser - Normal Build.


What was suggested on the Banggood website.
11.1V 3S 3300mAh 20C Lipo Battey,


2212 2200KV Brushless Motor


6030 2-blade propeller


30A ESC


Hmm, the high KV motor and small blades means fast and loud. I put on an 8 inch prop with a triple bladed propeller instead. That provides lots of thrust and requires low amounts of power. It flies well even on 2S though hand-launching is more difficult with 2S. What I had to do was go through trial and error with batteries to figure out which one would work the best. I managed to make it fly with a 2700mA 2Sh battery with a little extra nose weight. The glide characteristics were off the charts! It caught thermals and increased in altitude with the motor off. I still didn’t have the right amount of weight in the nose which made it a bit hard to control. But it floated like a cloud. The lightweight characteristics meant that it didn’t have to move that fast in order to maintain flight. This is important if you plan on catching thermals.


The FPV Build


11.1V 3S 5200mAh 20C Lipo Battery


2217 1400KV Brushless Motor


8060 2-blade propeller


30-40A


This motor is heavier by around an ounce. That is counterbalanced by more than an ounce in the front The propeller is 8”, along with the motor it can definitely provide thrust. That battery is very heavy so it’s going to weigh the plane down. Yes, it will work with your FPV gear but it’s going to be a much heavier plane. It will require more energy to keep it moving and will need faster speeds to prevent it from stalling.
What do you want?


When you weigh this plane down it’s no longer a lazy glider. The extra gear is expensive, so perhaps you may want to work up to the heavier build of this plane. With more weight it won’t fly the same. It’s going to be harder to launch and is a lot less care-free in flight. My suggestion is to start off with the lighter batteries, figure out how to fly it then add your gear. When it’s built light, and you get the CG right it is very, very manageable in the air.


3 Thing I do and don’t like about this plane


#1. It’s a lot of great plane for the price!


Like the Wing-Wing, you get a lot for your money. For under $50 (USA) you get a plane that is actually very well built. The servos mount on the top which help prevent them from ripping off when you land on the grass. The lid snaps on and actually stays in place during fliight. The motor mount is not weak like the Wing Wing’s motor mount. It has different noses for FPV or non-FPV flying.


#2. It’s resilient


I’ve unfortunately given mine a good crash. Other than a broken propeller it was fine. I think I was more lucky than anything, but still. . . it can take a bit of abuse and hang in there


#3. It’s versatile


A lot of planes are one trick ponies. They are great for one setup only. What i like about this plane is that it can go many different directions. Do you want go full FPV? Sure, it can do it. Do you want a plane that you can fly with iNav? Yes, this is perfect. Do you want to make a glider? Why, sure, give it a try. Since it’s cheap it may be the model you use for more than one build.


What I don’t like


#1. It’s pure white with ugly decals.


White affects me more on some planes that others. This one just looks cheesy in white. It looks lIke a large flying styrofoam cooler. If you haven’t read my review of Krylon Foam Primer, this is a good time. This plane is begging for a good paint job and lamination. Since it’s in many pieces that are easy to paint separately it can make a very nice two tone paint scheme or even 3 tones.


#2. Cameras may be difficult to mount.


This ain’’t a Bixler. There are not many different mounting options for your FPV cameras. There is a hole in the nose that fits a camera lens. Which one, I don’t know, perhaps a Runcam? Other than that, it’s self-contained which makes it hard to mount cameras. Perhaps you can leave the lid off and make a base out of plywood? I’ve seen people mount cameras on the wing with Velcro.


#3. No spare parts


I don’t know what will happen if you break a motor mount. Supposedly, Smallpartscnc.com is making and aluminum motor mount for this plane. The owner tells me it’s on his wish list. If you break an elevon perhaps you can make new one out of foam or balsa wood. If you break a winglet and can’t glue it back together you may have to get creative with cardboard or foam. But, if worse comes to worse you simply buy a new plane and use the broken one for spare parts.


Overall


I fly this plane with a smile on my face. It’s a lot of fun. When properly trimmed this plane is very maneuverable. It can do flips and spins and various stunts though planes this size tend to not be as sporty as smaller planes. I am impressed how well it moves around a fairly small park, it’s very controllable. This is a plane you really need two versions of:


Version 1


This is the heavy build. It’s fun to fly this plane on 4S. For me a 2200mAh 4S LiPo worked perfectly. I had a 8x6 triple blade propeller. Yes, it tears up the sky. And yet it’s still fairly floaty. I’ve had larger batteries in it with longer run times. The extra weight helps the plane penetrate better on windy days. But, it flies like heavy planes do. This seems like a great plane for iNav or FPV. It also seems like it could do some good intermediate iNav flights. Perhaps out and back 4 or 5 miles. Play with different batteries, make it go for speed or distance, or perhaps tone it down a bit and have it float a bit more. Strange to say, but even with this build the plane is versatile. Just by changing batteries it can be a completely different plane. That’s what makes this plane so appealing in my book. It’s different flight characteristics on one build give it range.


Version 2


The goal of this is to make this plane as light as possible. I am going to power the plane with a D2208 1400KV motor and fly it with an 8” folding prop on a 2S battery. The idea will be for it to catch thermals. You can think of it as a low powered power assisted glider. The key will be a good launch. It may be underpowered for takeoff so the difference between success and failure may be a good shove into orbit. It may be a glider that you can take to the glider spots on windy days.


A word about launching


Matt Osborne talks about “The duck” of this plane, You launch it and the first thing it wants to do is fall back to earth on its belly. This can be reduced by tilting the nose up and giving the plane a good firm toss. Learn how to do it with your left hand. It needs to nearly fully power to take off but once airborne you should cut back on the throttle if the angle of attack is too steep.


Ideas for your first C1 Chaser


I’ve learned quite a bit about building planes and have learned a lot from my mistakes and less than stellar ideas. The motor mount can take huge motors and I know you may be tempted to start off with a D3536 as your first motor. I don’t know if this plane will balance with that heavy of a motor. Thus, to be safe, stick to 50g and 60g weight ranges of motors. There are a lot of great motors in this range.


Painting the plane


If you stick with white and land it on the grass over time the bottom will look very dirty as it rubs along the wet grass, time after time. This is a plane ripe for painting. If you don’t primer it first with Krylon Primer the EPO foam will melt a bit. It will give an alligator skin texture. It doesn’t look bad, but you may not like it. You can paint the wings one color and the fuselage another color. I painted mine red and black in honor of my college (San Diego State University). It looks so freaking sweet low to the ground. But at high altitudes the black is a bit difficult to see. My second C1 I painted the fuselage blue, the wings white with blue tips and red winglets. It’s a patriotic American red, white and blue. I am waiting on parts before I assemble that one. EPO foam is smooth and thus doesn’t need a lot of paint. Paint does add weight so try to get your painting done in as few coats as possible.


Lamination


Lamination reduces drag. It adds strength and rigidity. I go for a strong 5 mil lamination.


Battery- Start out with what you’ve got. Add weight onto the battery to get the plane to balance. For example, start out with a 3S 2200mAh battery if that’s what you’ve got. Go to hardware store, buy some lag bolts. They are long and heavy. Figure out which ones make your plane balance the way you like. Weigh your lagbots and battery combination. This weight combination is what you should look for in your next battery. It can be 3S or 4S if your motor supports 4S.


Wednesday, February 7, 2018

Teksumo/Popwing Review


Teksumo/Popwing -The “Frampton Comes Alive” of RC Airplanes- Everybody has a copy.


Image result for teksumo
The Original Teksumo sold by HobbyKing.

The original Teksumo from Turnigy (HobbyKing) is the stuff legends are made of.  It doesn’t matter if you’re watching a Brit, Aussie or Yank go on and on about some plane they are building on Youtube, you’re bound to see that familiar orange plane in the background.   Here in the States, you’re likely to have people refer to your delta wing, regardless of brand as a “Popwing.”  The Popwing 900mm is the same plane as the Teksumo.  So, this review is for both planes because there really isn’t much difference

.
As far as foam planes are concerned these planes are ubiquitous.  They are beloved, modified, crashed, destroyed rebuilt and beloved even more. I have one Teksumo that has faced sure death more times than any cat can handle.  The one great thing I can say about them is that they are resilient.

Nice graphics, not over the top.  Got from NtiroPlanes.com.

The graphics: I know it seems silly to start off a review talking about the graphics of this plane because how it looks is usually among the last things we care to think about.   But, when you’ve got more than one of these planes you want them to look different so you can easily tell them apart.  So many of the graphics of planes I’ve seen tend to look like they were designed with 14-year-old boys in mind.  But, in the hundreds and hundreds of videos I’ve seen most people flying planes are over age 30.  What I’ve liked about the Popwing, in particular, is the graphics.

There are too many different versions of graphics to discuss each one in detail.  They are very colorful and at least one of the graphic patterns should appeal to you.  I like smart graphics in the sky because i can’t tell you how many times I’ve lost a plane in the sky and had to do some rapid scans to find it.  I like planes that stand out.  Planes with vibrant colors and lots of pattern and contrast work the best.

The Teksumo is another story.  For years it came as one style, orange with a lovely fish design. It was a beautiful plane.  I mean, it's interesting to look at.  Women seem to really appreciate the beauty of it.  But once you get it in the sky that orange really stands out.  It doesn’t matter what kind of day it is.  On a sunny day with a blue sky, this plane looks extra beautiful.  .  .  Anyway, Hobbyking has discontinued that classic orange design.  What they offer is the same simple graphics with four different colors, at a higher price.  Sorry, I am underwhelmed by the newer graphics.  It looks like something a first-year art student would make in about 20 minutes.


The Build


3 Things I like


#1 Nice, thick foam cores-  I like a plane with some meat on its bones.  Yes, this plane has a lot of very nice foam, unlike the Rainbow 2 1000mm by Dancing Wings.  A healthy amount of foam helps prevent severe damage in serious crashes.   It also makes you think you’re getting something for your money.

#2. Great instructions-  It comes with a full-color booklet. The instructions are written in English, decent English, not perfect English.  You’ll get the point by reading the booklet.  The cover page has virtually all the information you’ll ever need to know about the plane including the CG, required prop, speed controllers, etc.  I mean, this is fantastic.  This is exactly how every RC Plane assembly booklet should be made.  The only thing I would change is to have a link to a website where any information is updated and can ask help from the community.

#3 Stand-up servos-There are holes that go through the middle of the plane for servo placement. This means two things that I like.  First, you’ve got the choice of mounting the servos on top or bottom.  The instructions show the servo’s control arms on the bottom, as to keep all the electronics on the bottom and to keep the top of the plane clean of wires and servos.  My rule of thumb is servos should be on top, whenever possible.  It prevents damage.   Thus, my servos are top mounted.  The second thing this does that I love is it makes getting to the screw on the servo very easy, in case you need to remove the control arm for any reason such as fine tuning after a good trim is established.

#3.5 (Honorable mention)  There is a spot to mount your receiver and speed controller under the plane, in a precut drive bay.  The plane comes with zip ties and holes for the zip ties making the installation very easy.  For extra protection, I also use velcro on the bay and ESC/Receiver.  I have to say, this is really nice. I appreciate it.

3 Things I don’t like about the build.


#1  Precut battery bay- The plane needs lots of weight in the nose and thus the battery is placed on the nose. Cutting out a large piece of foam so close to the nose is a very bad idea. I’ve broken the nose off in bad crashes.  It glues back on fine, but still. . .  

#2. Weak motor mount area- Others have complained about this as well. The plane’s motor will rip right off the plane taking a good sized chunk of foam with it in a good crash. It’s best to throw a CF rod on this area and hit it with some extra Goop.

#3. Elevons rip off- Another design flaw is that elevons rip right off in a bad crash.  Carefully apply contact cement, and re-attach.  Perhaps apply a light coating of Goop on the hinge ling (very light) when you see the elevons starting to separate from the trailing edge.

Flight Characteristics


The obvious give-away that this is an outstanding plane is that so many people own at least one version of this plane.   Yes, it’s a wonderful flying experience.   Cut the power and it has a legendary “glides on rails” feel about it.   The only bad thing I have to say about the plane is that it’s prone to be tail heavy.   That’s why the battery compartment is on its nose.  Be careful in setting the uptick on your elevons (reflex)  because you can easily aggravate this problem.

I find that the sweet spot on this plane is a 1800mAh 3S lipo battery that’s small enough to fit in the battery bay.   It’s still light enough to give this plane a floaty flying experience.  The 2200mAh 3S batteries will also work, but the extra weight makes for a very different flying experience.

Interesting graphics, also from NitroPlanes.com

Going off script.


Though this plane is a beautiful park flyer  with a 7” and 1400 KV motor,  feel free to stick on higher KV motors and smaller propellers to get this plane to scream around for the park for ten minutes. A favorite seems to be the D2826 2200KV with a 3S  2200mAh  battery.   If you’re going to go batshit crazy with the plane doing high dives you may want to use digital metal servos for this build.   You can add a little extra carbon fiber rods and perhaps reinforce your elevons with Goop, tape or plastic hinges. To further get the “Oh my gosh, I hope this thing doesn’t crash!” feeling be sure to throw on some lamination onto your wing to cut down on drag. For a little more fun, throw a triple-bladed propeller on and watch it own the sky.

This all depends on your flying style.  As a stock plane, it’s wonderful and explores the sky in a nice, tranquil flight. You can slowly bring it up to your ceiling height, turn-off the throttle and watch it slowly glide back to earth.  There is something majestic about how this plane glides. You won’t get bored of it.  You can do this for 40 minutes at a time depending on your flying style.  Or, set it up so that it gives you 8 minutes of hell-raising excitement.  This is the reason why so many people own more than one copy.


A platform plane


Image result for popwing
The Mach-5 of Popwings

The most obvious suggestion for taking the capabilities of this plane further is for FPV flight.  There are many videos on YouTube that show you how.  But as drone brethren are falling in love with smaller drones like the DJI Spark the FPV gear has to get lighter.  So, many of the how-to videos feature out of date gear.   A lighter FPV load means longer flight times.
Another exciting use for this plane is flying missions with GPS and computer controlled flight controllers.   Again, borrowing heavily from our drone brethren (Can I just take a moment to thank you guys for the billions of dollars you’ve spent on this hobby, helping to give us great gear at dirt cheap prices?) flying missions on pre-planned routes is within reach. The only downside to all this is a lot of soldering.  You don’t have easily installed electrical components.  Thus, making planes to do these tasks are a bit of a project.  But, at least with the Teksumo/Popwing, you have a nice platform.

Overall evaluation


I own quite a few of these planes, and yes I do like them a lot.  But when I can get out for 30 minutes to grab one flight, I hate to say it, but it probably won’t be this plane. I still prefer the flight characteristics of a Hacker Hotwings Evo 1000, or the Hotwings 1200.  

Still, there is plenty to love about the Teksumo/Popwing.  The lovely EPP foam is forgiving and easy to fix when things go wrong.  There are a fair number of zombie Teksumos out there. Planes that suffered catastrophic crashes that get pieced back to life out of spare foams and unconventional means.  Overall, this is a plane you need to own at least one of.  Chances are you’ll really like it.   The new pricing of just under $50 at HobbyKing for the newest model is a bit over the top.  Watch for it to go on sale.  You can always pick up a Popwing at NitroPlanes but, they are always out of stock.
Due to its pricing structure, it’s out of the realm for my “Cheap Thrills” series of articles because these planes cost more than $30.  However, it did get an honorable mention.  This plane isn’t  under $30 but it’s not $500.  If you’re likely to only own a few RC foam planes, the Teksumo/Popwing should be in your mix.

H-King Teksumo EPP Wing 900mm (35") (Cerulean Blue) (Kit)
The new Teksumo-Eh, not digging it.

Image result for popwing
A club in San Diego races Popwings once a month near Sea World. Silent Electtric Flyers of San Diego


Updates:  February 2018.  The new TekSumo by Hobbyking seems to be shipping without instructions.   You now have to download the instruction from HobbyKing's website.


NitroPlanes carries a wide selection of Popwing planes for sale-with one thing in common. They are all out of stock. Five years ago, people complained about the same thing.


Grayson Hobby has their version of the TechOne PopWing in stock. It's the same price as the TekSumo from HobbyKing.  Grayson is a small, Veteran-owned hobby supplies shop located in Georgia. .The owner also is an RC enthusiast.    Let's support small business by buying from this guy!    You can buy it now and enjoy it all summer long.

Techone EPP
Grayson's custom graphics

Monday, February 5, 2018

Hacker Hotwing 1200

Exceptional airplane if you don’t follow the instructions.


Image result for hacker hotwing 1200


My first experience with the Evo 1200 was when a buddy who is an experienced RC builder helped me put the finishing touches on it.  We got it up in the about 80 feet  during the first five seconds of flight and it split in half.  It did a slow death spiral to the ground.  This is like being set up on a blind date and watching them have an acute heart attack during dinner.   I mean, where do you go from here?


I should be writing the most negative review about the plane right about now.  But I won’t. Instead I took it home, fixed it, and about a week later it split in half again about 700 feet up.   Then I fixed it yet again and it was dreamy.  I think the term “fixed” is a bit of misstatement.  I mean to say I hacked together the plane with enough glue and spars to make it stick together better.  Well enough to not fall-apart in flight, but  it wasn’t reaching its potential.  It wasn’t until recently that I was able to clean up the plane and bring it to an acceptable standard.

This plane is really fantastic!  I am not just saying that, I mean it.  Set up right it’s perhaps the most compelling $50 you’ll spend on foam this year.  The key is to set it up right.  And that’s where the problem lies.  You really have to go off script with the instructions.  If you follow the instructions you’ll have a limp, light plane that isn’t anywhere near it’s potential and may fall apart after a good crash.

This plane needs reinforcement


Image result for hacker hotwing 1200


The reason my plane ripped apart in mid air was that I had too much wing load on it.  I was using a 2200mAh 3S battery.  The problem is that build requires a much lighter battery.  The lightest they suggest is a 1300mAh 3S Lipo battery.   That’s a fairly light battery for this airframe and the risk is a tail heavy plane or one that is very light and easily blown around in the wind.

However, it will stay up for very long periods of time because of how light it is.

Okay, let’s deviate for a moment.  When you go to Germany to get your new Porche you need to baby it for the first 100 miles or so.  Then you put on Du Hast by Rammstein and crank the music as you take it to the limit on the Autobahn.   If that doesn’t register with you, then just build this plane per the instructions and good luck to you!

Now for the rest of the us.

The Mods


Retro-Zagi


I’ve seen quite a few different mod ideas.  One is to essentially turn this plane into a Zagi by cutting off the elevons and replacing them with balsa wood. Then covering this plane with packaging tape.   What is required is to find the Zagi 400X pdf (found here https://zagi.com/wp-content/uploads/2016/07/Zagi-400X.pdf)   and follow the instructions.


Packaging tape for plane covering does work. There was a lot of interest in making planes from Dollar Tree foam about five years ago and covering them with tape.  So, yes, it worked.  But today we’re more likely to use Econokote if you’re going to want a colored covering or lamination if you want a clear covering. If you do this you don’t need as much filament tape. I am also more in favor of more spars than what is suggested on this build.   

If you’re building a retro-Zagi you’re probably going to want some amazing 14g metal gear servos.  You’ll also will want to really get the plane reinforced with carbon fiber spars everywhere.  This is going to be a very stiff, rigid plane made for high speed action and stunts.  The choice of motors is up to you.   You’ll want something that can push a 5” or 6” prop.  A D2826/6 is a good suggestion.  It’s 2200KV which is plenty fast.    You can put on a 6x4 triple blade propeller and tear up the sky!  You will tear through your batteries fairly quickly so be prepared for flights around 10 minutes.


High n Dry build


One of my friends has a heavy 48” plane and has loaded it up with a 3000kv motor and 5” propeller.  When he flew it on the beach everybody within half a mile around could hear and see it.  I don’t have that kind of luxury where I live.  I get to fly my planes at my local park until residents decide that they don’t like me flying my planes at the local park.  Too much noise would certainly rub people the wrong way.  Therefore, I prefer quiet planes.   The High n Dry build is just perfect for my needs.


The idea is simple, larger propeller, quieter motors, light builds and long, long flight times.  The key is to put in a decent about of carbon fiber to secure the plane. I use the elevons that came with the plane  and I don’t go for high end servos.  But, all in all, it’s a very good build that stays of for sometimes an hour, and best of all, it’s very quiet.


My build is simple. It’s a BR2212 1400kv with a Master Airscrew triple bladed propeller.  There are extra CF rods on the edge of the wings. I use 2mm CF rods.  For the large cross piece in the middle I would suggest 4mm or 5mm cf rods if you’ve got em.  I didn’t laminate this wing, but you can if you want to cut down on drag.

Flight characteristics


I am not into FPV, yet. So, what I’ve done is put heavier batteries on this plane along with video cameras.  Just a couple of extra ounces changes the flight dynamics.  It tracks better but the flights aren’t as long.   So, how you build it and how you fly it is really up to you.   If you get aggressive with a Retro-Zagi this plane will feel completely different than a High n Dry build.  I’ve flown a similar plane to a Retro Zagi before and yes, it tears up the sky.  But it comes in hot  when you land it.    My High N Dry builds gracefully glide back to earth.

When I fly the High N Dry builds I want a super floating experience.   I can put it at around 30% throttle and get a nice angle of attack that will gradually get me up to maximum altitude. If I am in  hurry and can put the throttle to full and push the nose down a bit to find the right angle of attack.  It will find maximum altitude in a matter of seconds.   Once I am at maximum altitude I cut the throttle and let it glide back to earth over  a 3 minute glide back down.  When it’s near the ground I turn it back to 30% power and climb back up.   Perhaps this is too boring for most folks, but I enjoy watching a plane glide. People watch and get mesmerized.  Depending on the day these flights can last an hour if not longer.

Three things (Good and bad)


Image result for hacker hotwing 1200
Nice color scheme graphics

The Good!

#1.  This is a hell of an airplane!


This is a plane I look forward to flying.  It never gets old, it never gets tiring.   Everybody has different flying habits.  I am into light planes that float well.   You can build this plane to float for extended periods of time.  In my latest build I put on a 1000KV motor being spun with a triple bladed 9x6 propeller.  It has great authority in the air, even better when my camera is mounted to it.  

#2.  Build it your way.


Though I do like planes that have the carbon spars installed in them suck as the Teksumo I do also like having the freedom for adding as much or as little carbon fiber as I care to add, in combinations of thicknesses and laid into the foam in a manner that pleases me.  You can fit the carbon fiber to the use.  If you want a light, floating plane then use 2mm carbon fiber rods fairly sparingly.  If you’re going to fly it hard and fast then more rigid Carbon Fiber will be required.  

This plane will accept anything that can mount a 16x19 crossbar.  That’s a lot of motors.  The real question becomes the weight.  So far, I’ve been very pleased with motor around 52g.  There are a lot of motors such as the BR2212 and D2826 that fall into this weight category.  I have not built this plane with a high speed motor.  I like larger props that spin slower.

#3    It’s a lot of plane for under $50.


I think this plane is an outstanding value.  It’s a compelling EPP foamie that has a wonderful glide.   When you look to see what else is available in this price range in a kit it’s usually EPO foam. EPP is more forgiving in modest crashes.  The Hotwing  also very easy to repair.   Now that the newest Teksumo is actually more expensive than this plane, yes, it’s an even better deal!

3 not so wonderful things about the plane


#1. Here’s what may break -


The main cores if you don’t reinforce them with your own carbon fiber rods.  I have firsthand experience with this.    I’ve had my plane break in half not once, but twice.  After I fixed it and reinforced it, it was a wonderful plane.  


The elevons are somewhat thin for this plane. So you have to be careful not to rip them off doing stunts.  They are also prone for flaking off in landings on the grass. Small bits and pieces come off, and usually can be glued back on without a problem.  

The winglets are too weak for this build.  The thin EPP foam  breaks easily  My next build I will forgo using them and put ones on the end in a more traditional triangle design. It’s not that the plane will fly any better, it’s just that  I won’t have to spend as much time fixing the winglets..

#2.  Crappy accessories-  I usually only use a couple of things that come in the kit.  This has been my gripe with many kits on the market. With $3 worth of better parts you can have a remarkably better plane.  Just make certain you have better control horns and connectors to the servo arm.


#3.  So-So instructions-  This plane comes from Eastern Europe. Some things were lost in translation when writing the instructions. If this isn’t your first kit you shouldn’t have a problem with it.  If it is, you may need to ask for some help.  I wouldn’t trust the thin spars they tell you to install in the instructions.

Image result for hacker hotwing 1200
This all American design isn't available in the United States, yet.

Overall


I freaking love this plane!  It’s very stable in the air, and can take a bit of weight in case you want to add on some FTP gear.   I’ve been known to pick up extra planes when it goes on sale.   

I have other planes such as the C1 Chaser which is essentially the same size.   When that plane goes up in the air, it’s a different experience.  The C1 Chaser is much heavier and it does get my heart beating when I fly it, especially when it’s low to the ground.   The Hacker  is so light that  it’s not the same type of flying experience.    It’s carefree flying, without the fear of it falling from the sky if you happen to sneeze.  Without a doubt it’s the most compelling $50 you’ll spend on foam this year. Here's a video I shot from this plane.

The fun of buying used planes

  If you like to buy and sell used planes.  Occasionally you can find really good deals. I mean, mind blowing deals.  Most of the time you d...